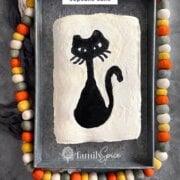

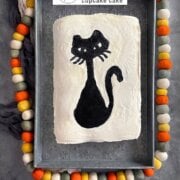
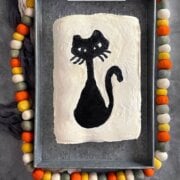


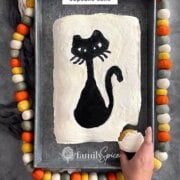
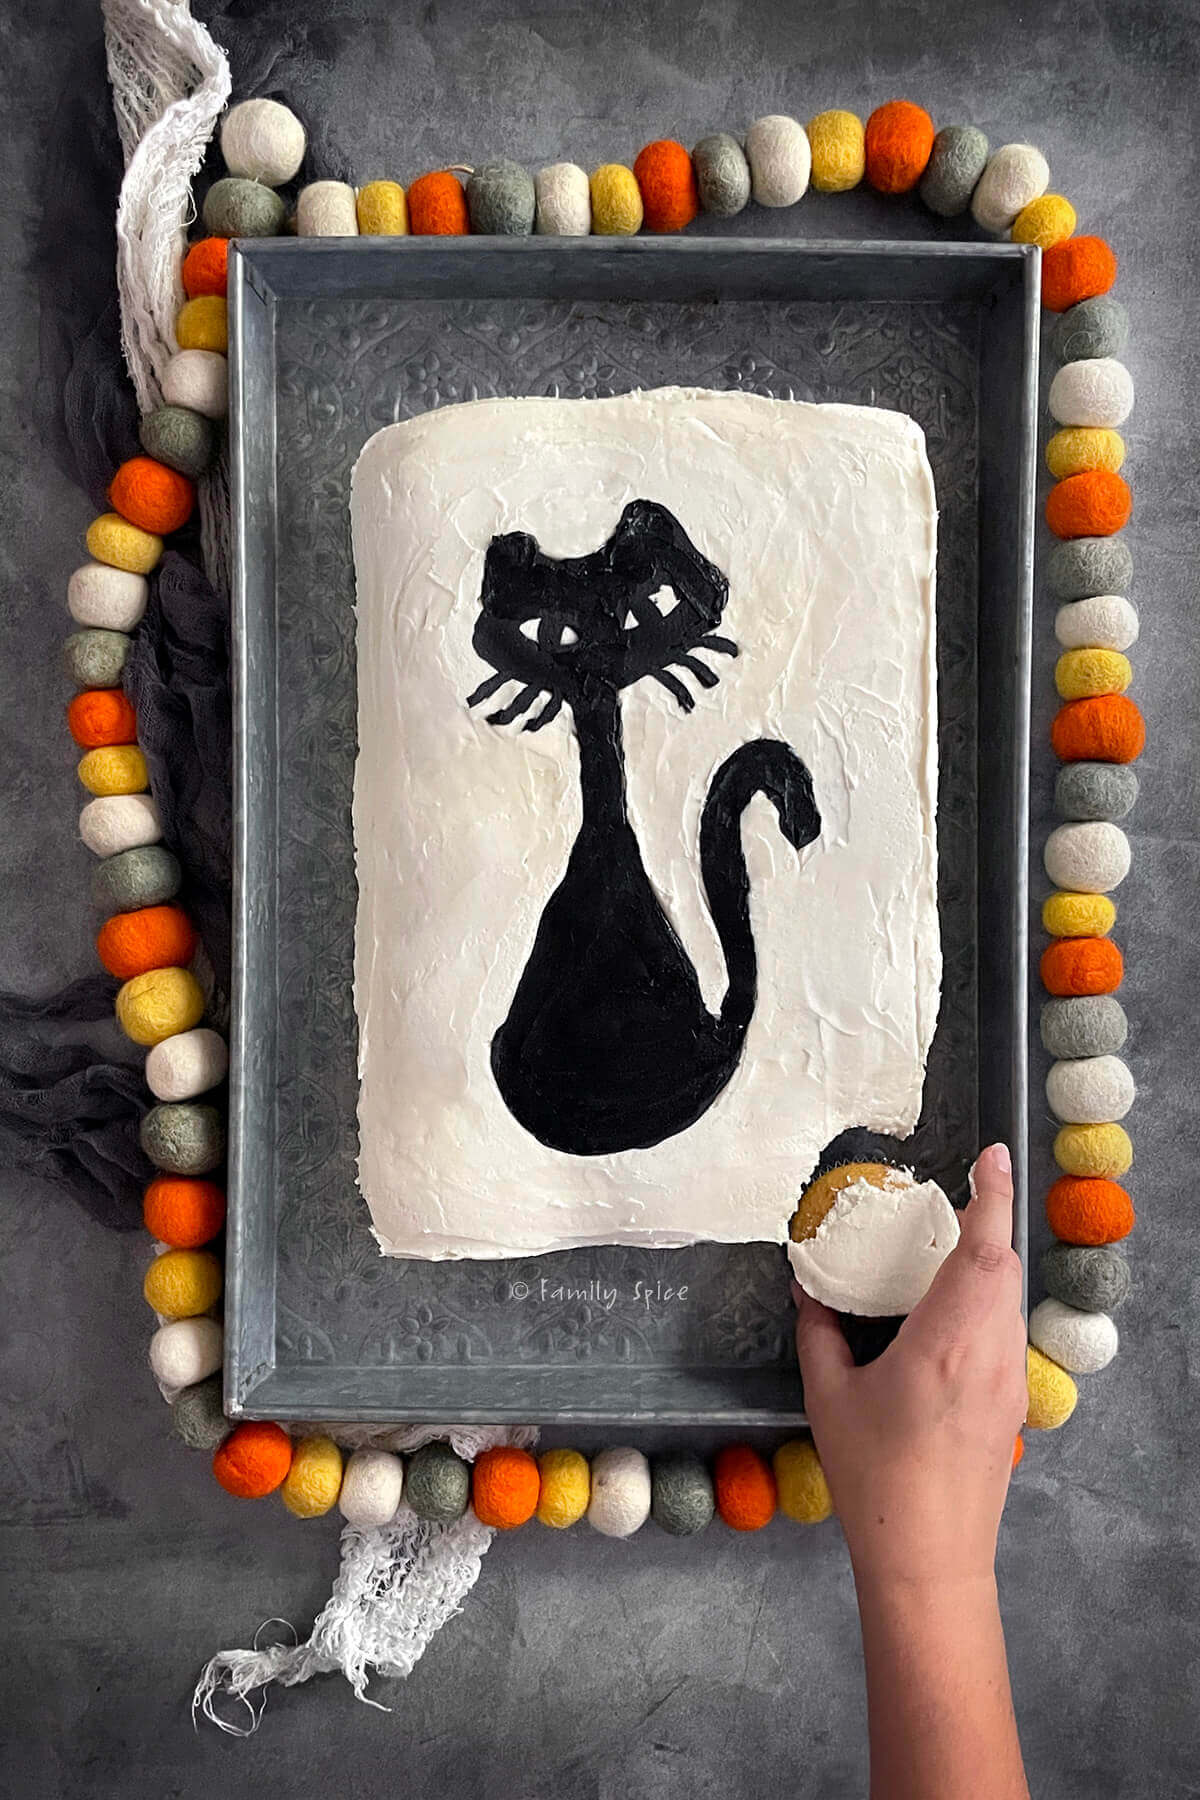
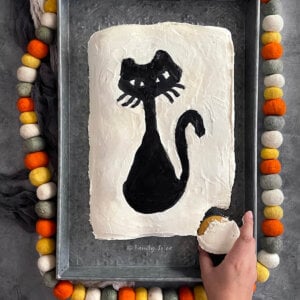
Looking for a spooky-cute Halloween dessert that wows without the fuss? This Halloween Pull Apart Cupcake Cake is made with simple cupcakes frosted together into one big cake and decorated with a retro-inspired black cat design. No carving, no fancy skills — just grab a cupcake and go!
I bake a lot of cakes. I bake cakes for family birthdays – hello barbie cake. I bake cakes for every holiday – hello, Christmas unicorn cake. I bake fancy cakes and simple ones. I frost using a piping bag and tips. I frost using a simple icing drizzle.
From 3-layer cakes to bundt cakes and even simple cupcakes, I’ve done them all! I especially love trying new cake recipes and using different techniques. This pull apart cupcake cake is one of these new-ish techniques.
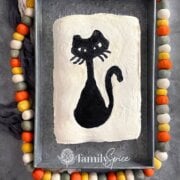
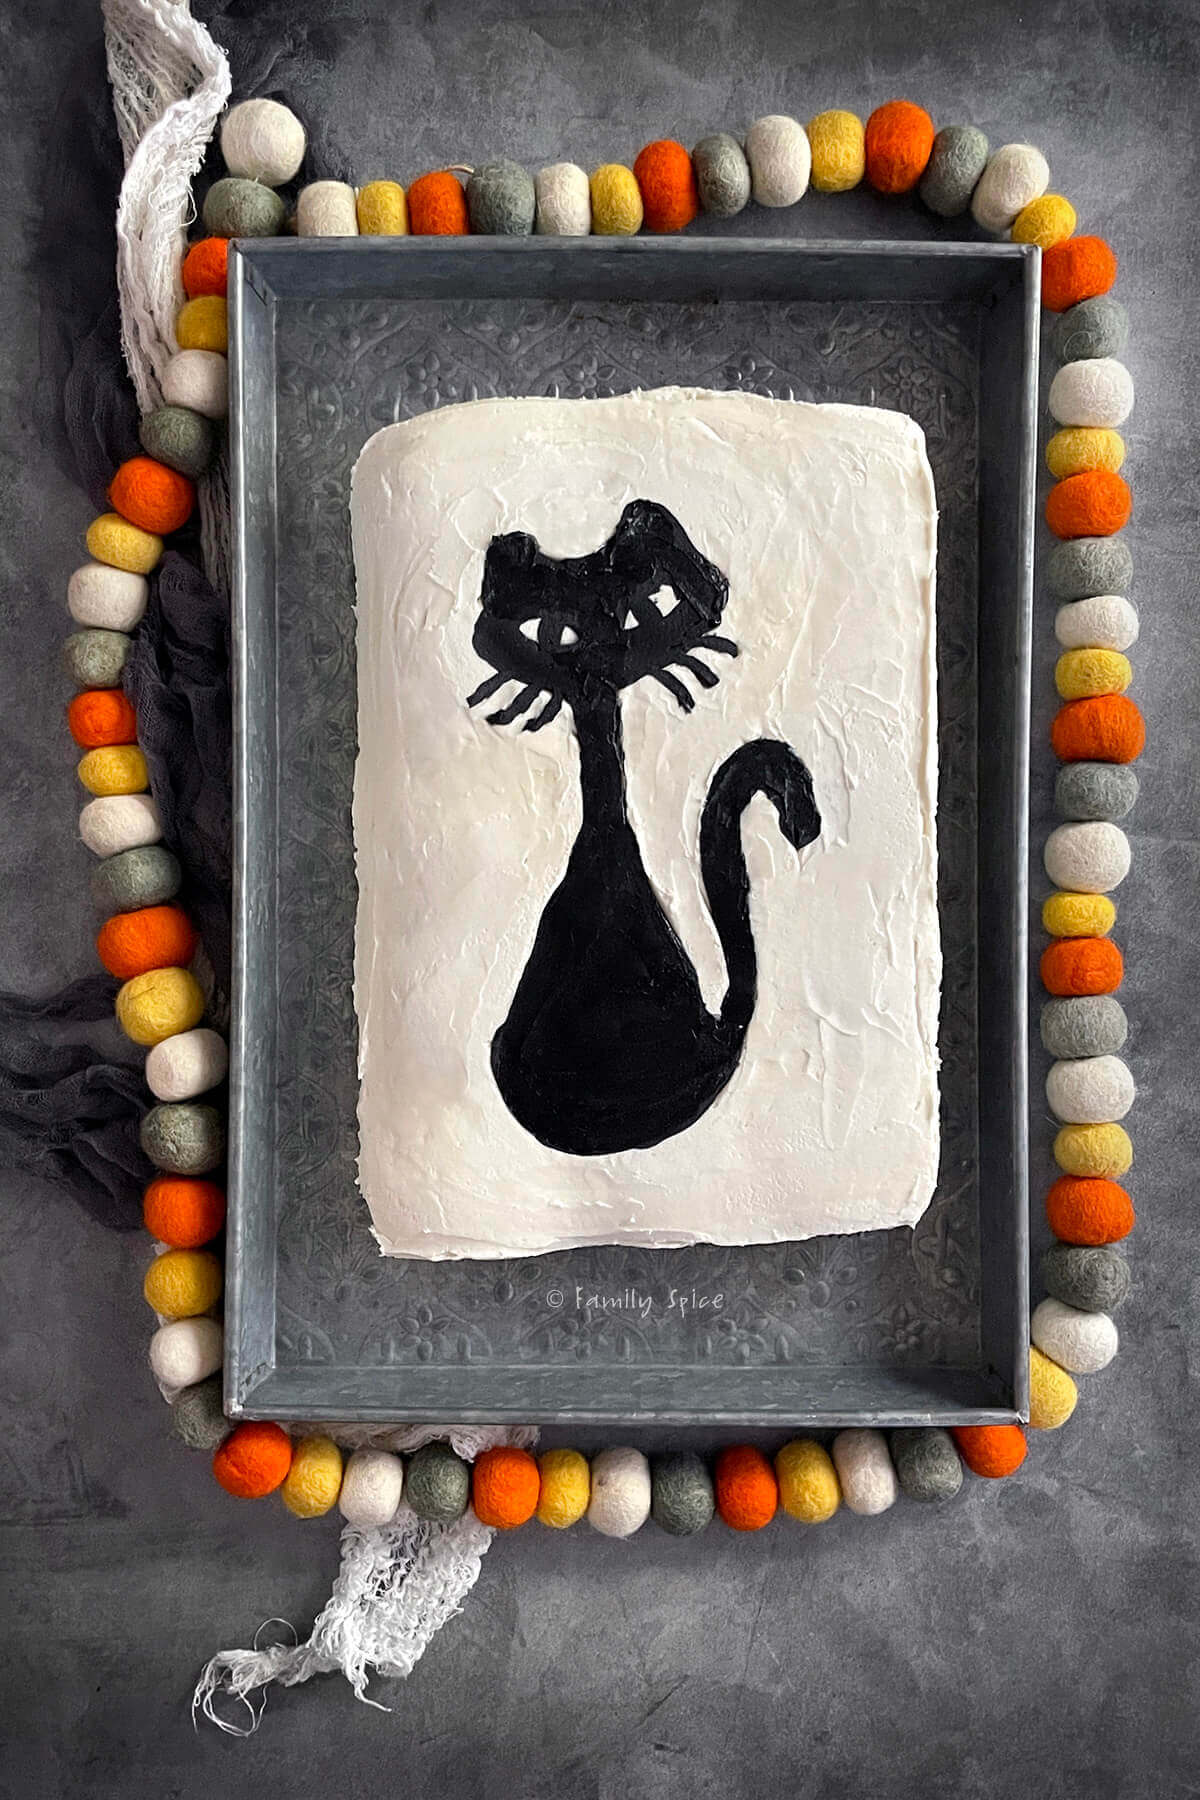
A cupcake cake is basically a bunch of cupcakes arranged in any shape you want and frosted to look like one big cake. This post creates a flat frosting top where you end up with a cute mod black cat cake created by using a buttercream transfer technique.
Jump to:
Laura says :
Why this recipe works
- No fancy skills required: With my easy tracing trick, you can recreate any cute cake design without needing artistic talent.
- No special tools needed: Forget pricey equipment. All you need are piping bags (or even sturdy freezer bags) to decorate like a pro.
- Budget friendly fun: Start with a simple box mix, store-bought cupcakes, or my homemade vanilla olive oil cake recipe to keep costs low.
- Party perfect: Whether it’s Halloween, a birthday bash, or any holiday, this pull apart cupcake cake is a guaranteed crowd-pleaser.
- Kid-approved: No cutting, no mess! Little ghouls and goblins can grab their own cupcake and dig right in!

Ingredients Needed

This post contains some affiliate links for your convenience (which means if you make a purchase after clicking a link I will earn a small commission but it won’t cost you a penny more)! Read my full disclosure policy
- Box cake mix: Depending on how many people you are feeding, you will need to make as many cupcakes as you want. A box mix will give you 18-24 cupcakes, depending on how much you fill the cupcake wells. Each box mix has it’s own necessary additional ingredients. For the one I used, I needed oil, water and eggs.
- Butter: I love the flavor of homemade buttercream frosting. Some people use shortening for frosting base or mix 50/50 with butter.
- Heavy whipping cream: I add a little heavy cream to smooth out my frosting. For a vegan option, you can use almond or coconut milk.
- Vanilla extract: To give the frosting a little flavor I add some vanilla extract. You can skip it or add another flavor extract.
- Food coloring: For this example, I used black and white frosting. Black requires a lot of food coloring, so I use gels for bright vibrant colors. To decorate your cupcake cake, you can also add sprinkles or other edible embellishments.
Step by Step Directions
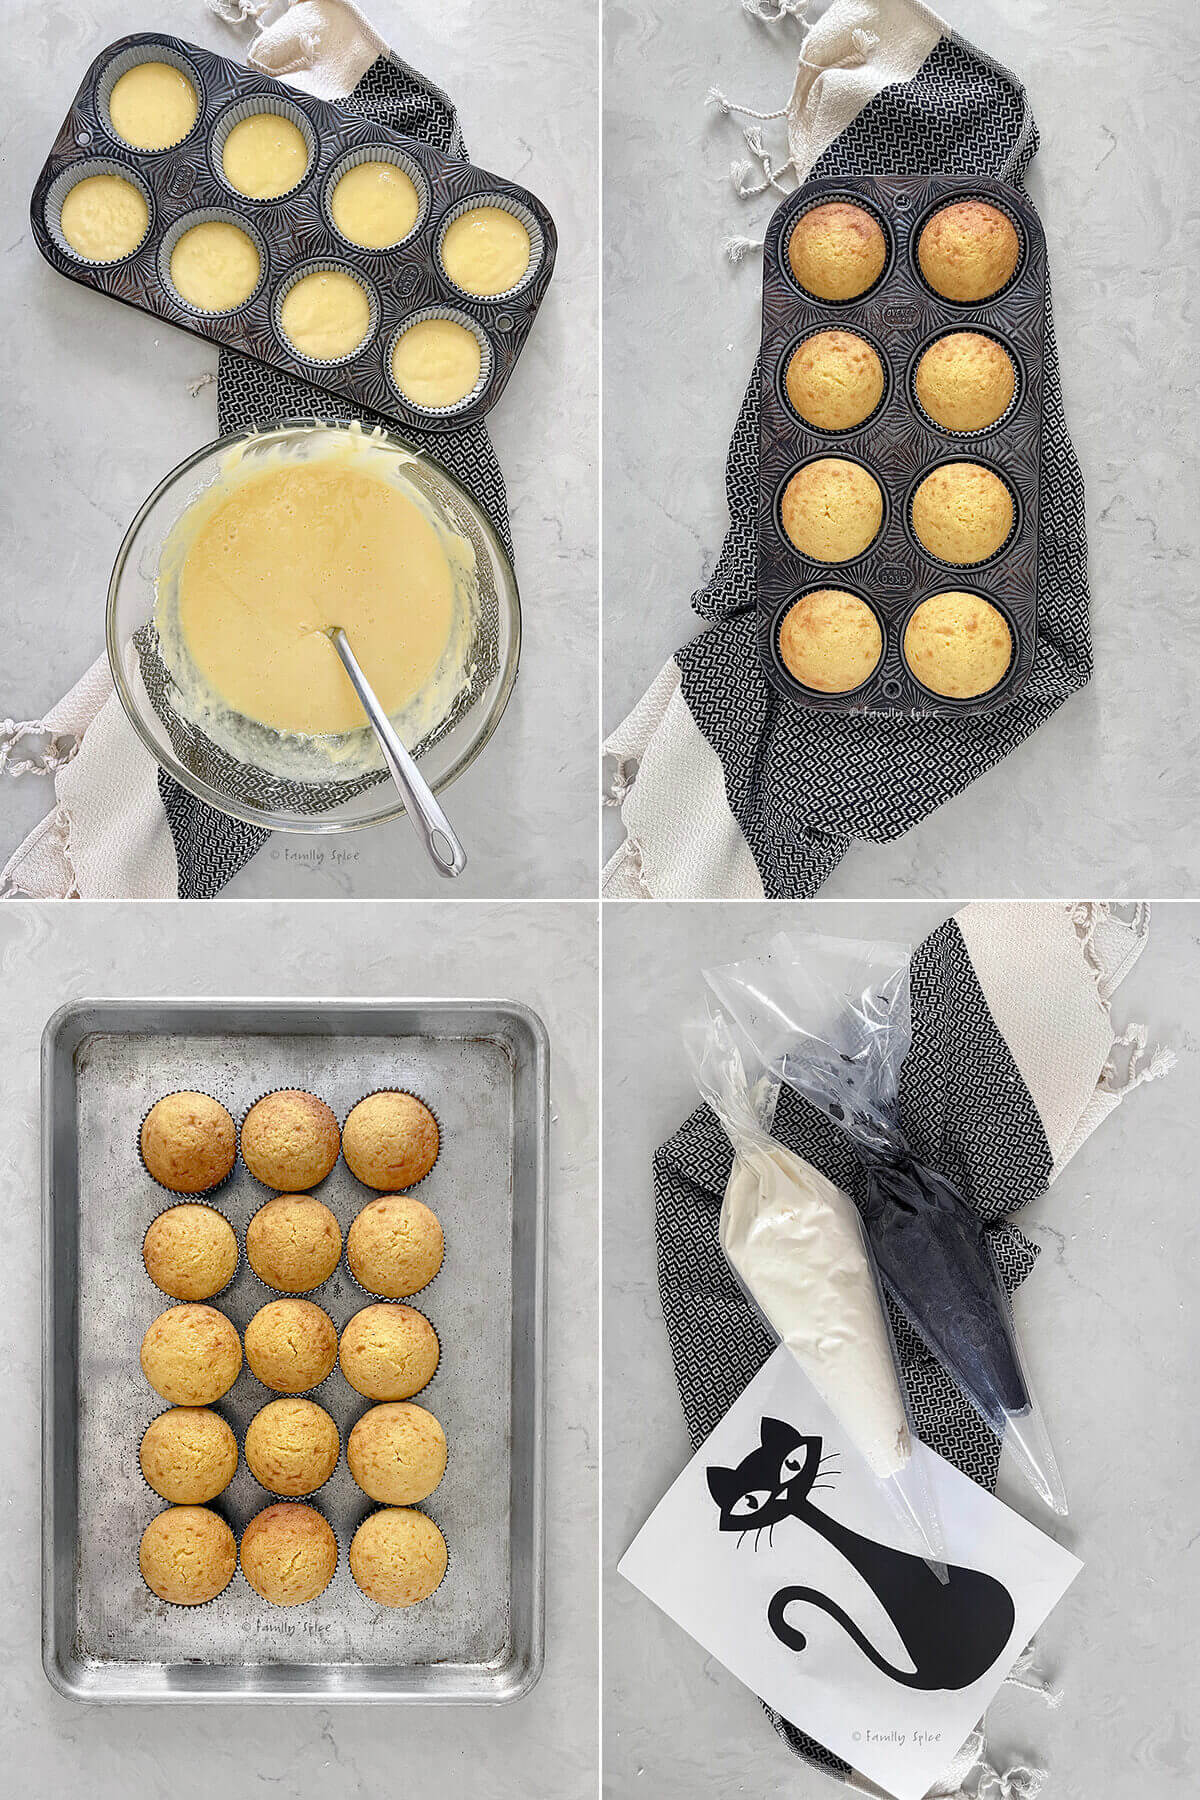
- Make the batter. Follow your box mix instructions or cake recipe and whip up your cupcake batter.
- Bake the cupcakes. Add liners to your cupcake pan and divide batter accordingly. Bake the cupcakes until done and let them cool completely.
- Arrange your cupcakes. Figure out the shape of your cake and arrange your cupcakes accordingly. For me, I made a simple rectangle shape using a 3×5 cupcake configuration. This will be the area you need to frost.
- Make the frosting. Make your buttercream frosting then divide into bowls. Using the dyes you need, mix up your colored frosting and transfer into piping bags. I don’t use piping tips for this project, instead I cut small holes in the bags for details and then widen the holes to fill in the frosting.
- Get your design. I’m sure I could have tried to frost this freehand, but I chose to follow this cat design I found online and frost it using the buttercream transfer technique. Blow up the image to the size you want and print it out. Place your design on your work surface, add a sheet of white parchment paper over it and tape the edges down.
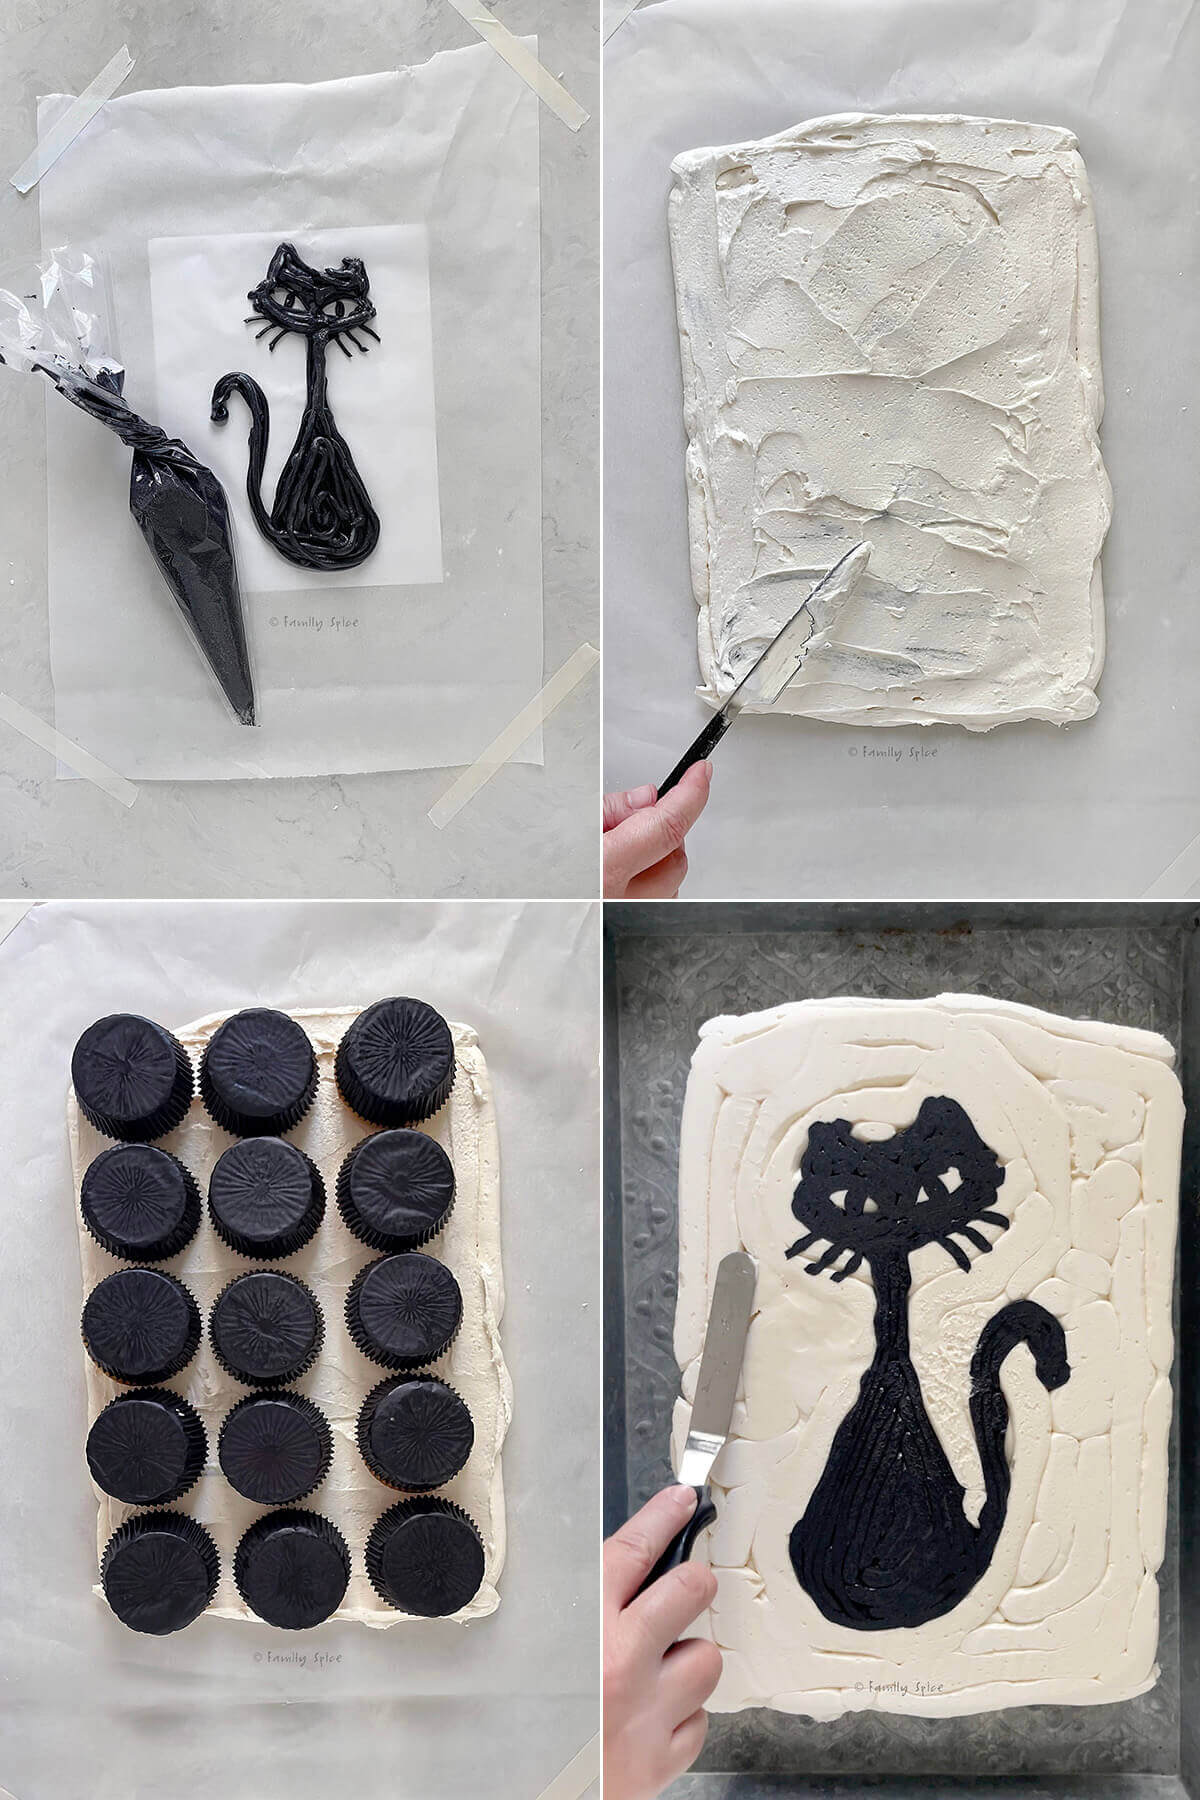
- Pipe the details. For the black cat cake, I piped the eyes and whiskers first. Then, I outlined the cat and filled in rest. I had chilled the frosting so it was a little hard to squeeze out, hence my wobbly lines. So make sure the frosting is at room temperature when piping. Smooth the frosting carefully with a thin knife or icing spatula.
- Pipe the background. Keeping this cake simple, I frosted a white background around the cat. I filled in the eyes and the tight spaces between the whiskers and tail first (with a smallish piping hole). After that, I cut a larger hole to frost the rest of the cake. Smooth it out with an icing spatula, making sure all the holes are covered.
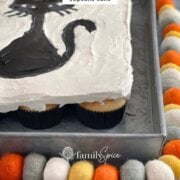
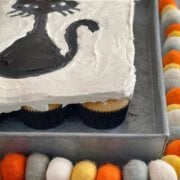
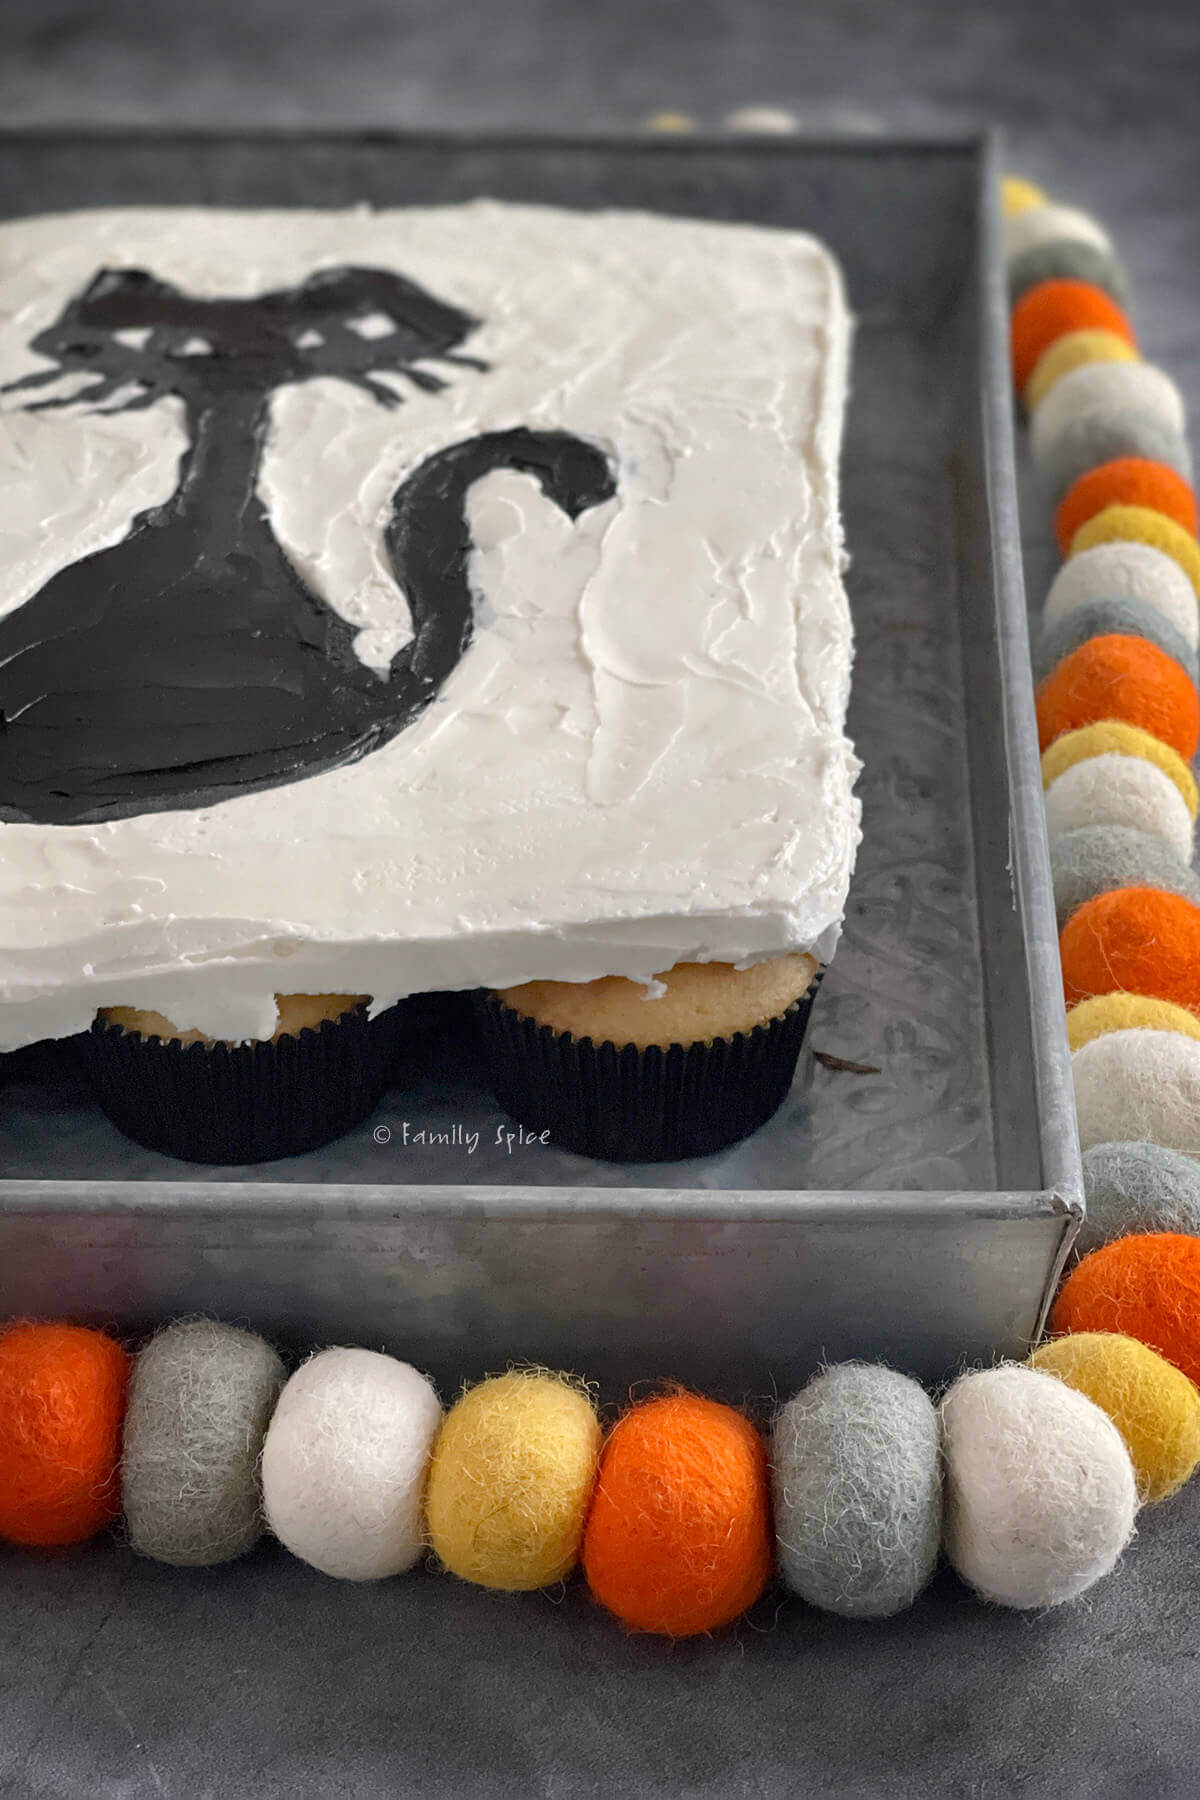
- Place cupcakes. To create the flat frosting look, press the cupcakes upside down into the frosting. Place them more snug than I show in the picture, otherwise you will have a lot of frosting in between.
- Chill. If you don’t have everything on a baking sheet already, carefully slide the parchment paper holding the cupcakes onto one. You can also use a tray or a piece of wood. Chill the cupcakes UPSIDE DOWN at least an hour for the frosting to set.
- Smooth it out. Place a tray or board over the cupcakes (the bottom of the cupcakes) and carefully flip it over. Remove the top tray and slowly peel off the parchment paper.
- Even though I smoothed out parts of the frosting before chilling, I could see all the piping lines after I flipped it over. This was easily cleaned up using a small butter knife or icing spatula and a glass of warm water. Dip the knife in the warm water, shake off the excess then blend and smooth the frosting out.
Want to save this recipe?
Expert Tips and Recipe FAQs
As I mentioned before, make sure your buttercream is at room temperature when you are decorating so it will frost more smoothly and blend better. Chilling the cupcakes afterwards creates a nice flat frosted cake.
By piping your frosting on parchment paper, you can trace most any design you want without having any artistic talent. You could assemble your cupcakes and frost directly on top of them, but this means piping your design free hand.
Again, don’t let the frosting hang over the cupcakes too much or the buttercream will sag and melt as it sits and softens. Your guests will also end up with frost covered hands – speaking from experience here!
I have lots of other great halloween desserts like this one. You should try my kitty litter cake, my halloween kit kat cake, a very cute halloween themed pull apart cupcake cake or my red vine monster cake.
Storing/Freezing Instructions
TO STORE: If your cupcakes are frosted, I suggest storing any leftovers in an airtight container and refrigerate for up to 5 days. If unfrosted, you can keep it covered on the counter for up to 3 days or refrigerate for longer.
TO FREEZE: You can also freeze leftovers. Wrap in foil, parchment paper or plastic wrap and freeze for up to 4 months.
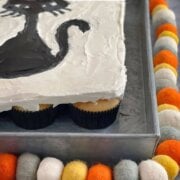
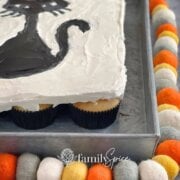
A pull apart cupcake cake is a group of cupcakes arranged in a shape or design, then frosted together to look like one large cake. Guests simply grab a cupcake, no slicing needed!
You can make virtually any shape, from pumpkins and ghosts for Halloween to balloons, hearts, or holiday trees. Just trace the outline on parchment paper and arrange your cupcakes to match.
Absolutely! You can bake the cupcakes a day in advance and store them in an airtight container. Frost and decorate the cake the day of serving for the freshest look and taste. Cupcake cakes do need to chill a bit for the frosting to set.

If you are enjoying my recipes, please sign up for my newsletter and get my free 28-day meal plan! You can also follow me on Instagram or Facebook.
Halloween Pull Apart Cupcake Cake
Ingredients
- 20 plain cupcakes
- 1 lb salted butter
- 2 lb powdered sugar
- ¼ cup heavy whipping cream
- 2 tablespoon vanilla extract
- food coloring
Instructions
- Whip up the softened butter in a stand mixer or using a hand mixer for 5-8 minutes until fluffy and smooth.
- Add powdered sugar, vanilla extract and heavy whipping cream and mix until smooth and velvety.
- Divide frosting into bowls and color them using food dyes you need. For the black cat cake, I used white (plain) and black frosting.
- Transfer each colored frosting into a piping bag. You don't need piping tips. Instead cut small holes from the tip of the bag to pipe details and then widen the holes to fill in the rest of the frosting.
- For the black cat cake, pipe the eyes and whiskers first. Then outline the cat and fill in the rest of the black frosting. Make sure the frosting is at room temperature when piping. Smooth the frosting carefully with a thin knife or icing spatula.
- To create the flat frosting look, press the cupcakes snugly together upside down into the frosting.
- Carefully transfer slide the parchment paper with the cupcakes onto a baking sheet and chill them UPSIDE DOWN at least an hour for the frosting to set.
- Place a tray or board over the cupcakes (the bottom of the cupcakes) and carefully flip it over. Remove the top tray and slowly peel off the parchment paper.
- Dip a butter knife or icing spatula in the warm water, shake off the excess then blend and smooth the frosting out.
Notes
Nutrition
Nutrition Disclaimer
Nutritional information is an estimate provided to you as a courtesy. You should calculate the actual nutritional information with the products and brands you are using with your preferred nutritional calculator.
PS If you try this recipe, why not leave a star rating in the recipe card right below and/or a review in the comment section further down the page? I always appreciate your feedback.
You can also follow me on Pinterest, Facebook or Instagram. Sign up for my eMail list, too!
Written by Laura Bashar
Hi, I’m Laura, a certified professional cook and cookbook author living in San Diego. I have been sharing my family’s favorite recipes inspired from all over the world since 2008. Let’s cook up something fun!