

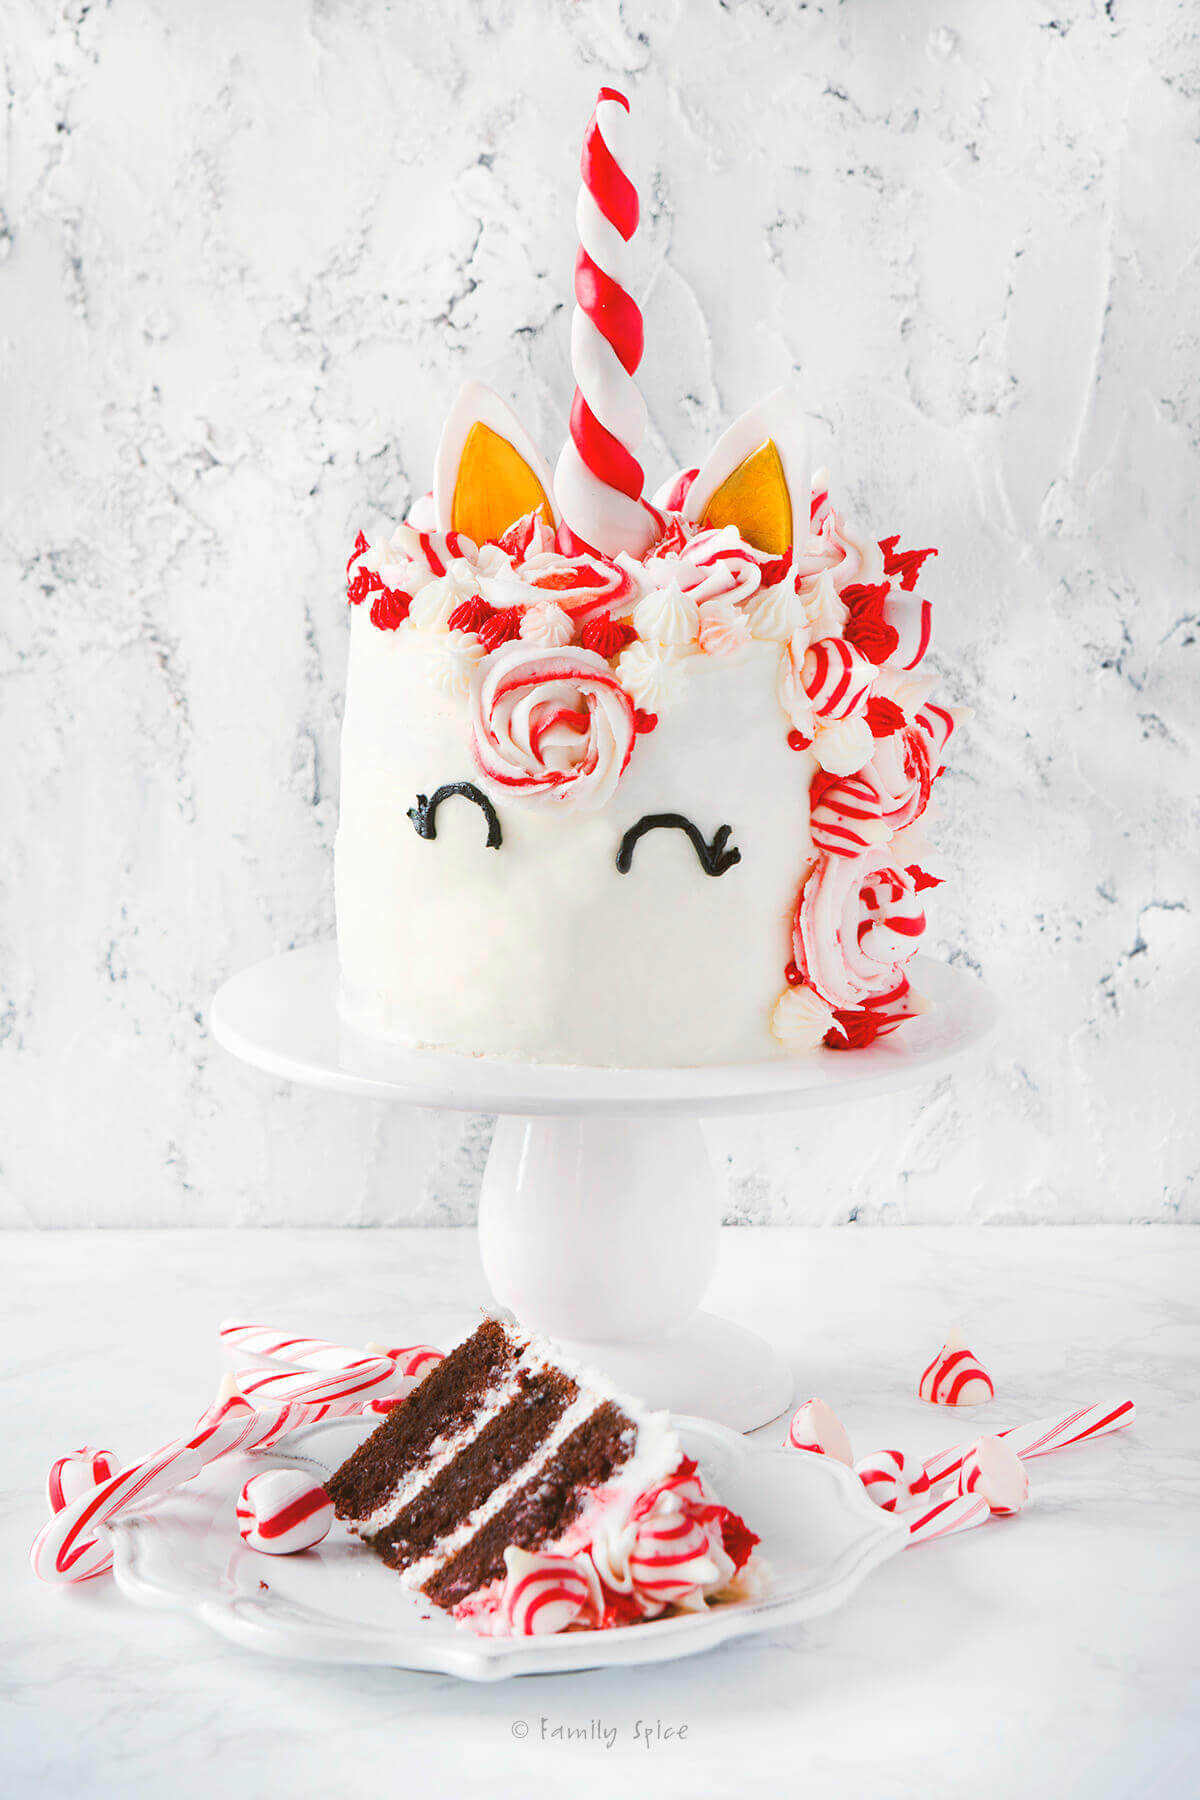
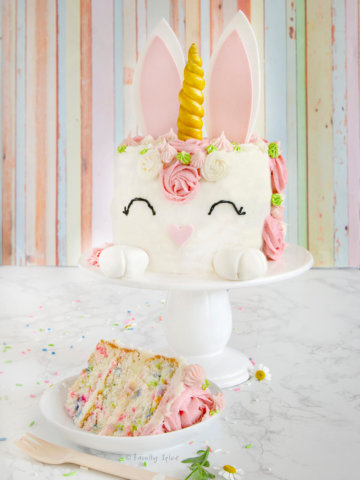
‘Tis the season for chocolate peppermint cake! Keep the magic of the holidays alive with all the glitter and sparkle of this fun and festive Christmas unicorn cake.
I know what you’re thinking. Oh no, she did it again. Well, yes I did. My sweet girl might be 14, but she is so fun and carefree at heart. And she’s still holding on to the excitement of trick-or-treating, the joy from watching every golden retriever Buds movie and of course, the magic of unicorns.
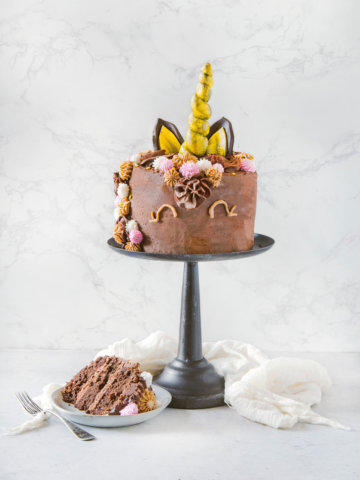
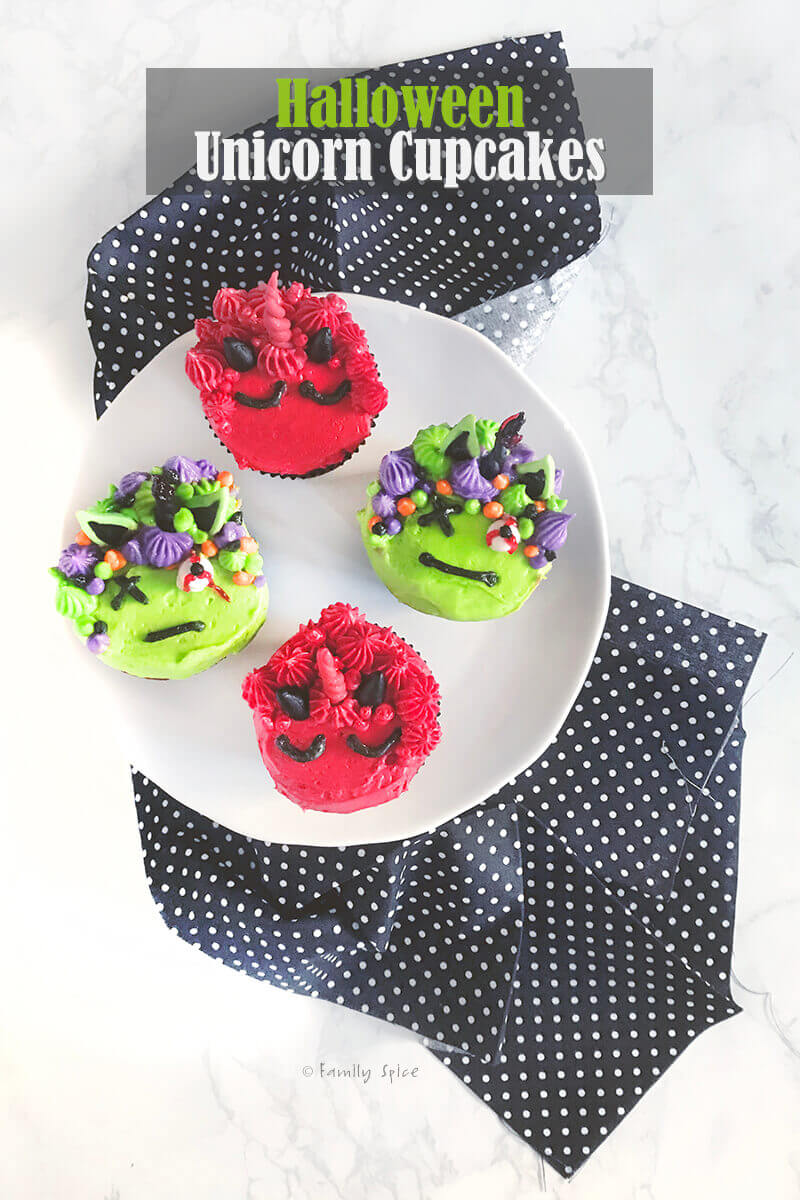
Ever since I made her a unicorn cake for her birthday last year, we got bit by the unicorn baking bug and have continued to come up with fun new unicorn themed ideas. Some have become reality, like our halloween unicorn cupcakes and Easter bunny unicorn cake, while others remained pure fantasy.
With Christmas and the holidays around the corner, my daughter and I knew it was time for another unicorn cake. Yup, we had to make a Christmas unicorn cake!
Jump to:
- Recipe highlights
- Reader’s Reviews
- Ingredients you need
- Step 1: Bake the cake
- Step 2: Make the unicorn horn
- Step 3: Make the unicorn ears
- Step 4: Paint your fondant gold
- Step 5: Make the frosting
- Step 6: Frost the cake
- Step 7: Finish the cake
- Expert tips and recipe FAQs
- Storing/Freezing Instructions
- Christmas Unicorn Cake
- Written by Laura Bashar
Recipe highlights
- Detailed Steps: Making your own unicorn cake can be a daunting task. But since I have made several, I share every step with precise details and measurements to make your life easier! I have fine tuned every step so you won’t have to look anywhere else for help or answers.
- Customize: You can adjust the color scheme to however you like. I kept mine red and white. And of course, you can use any flavored cake you like, too!
- Budget Friendly: Making your own unicorn cake is way cheaper than buying one from a bakery. And if you use box mix cakes and pre-made fondant, it helps keep the costs manageable.
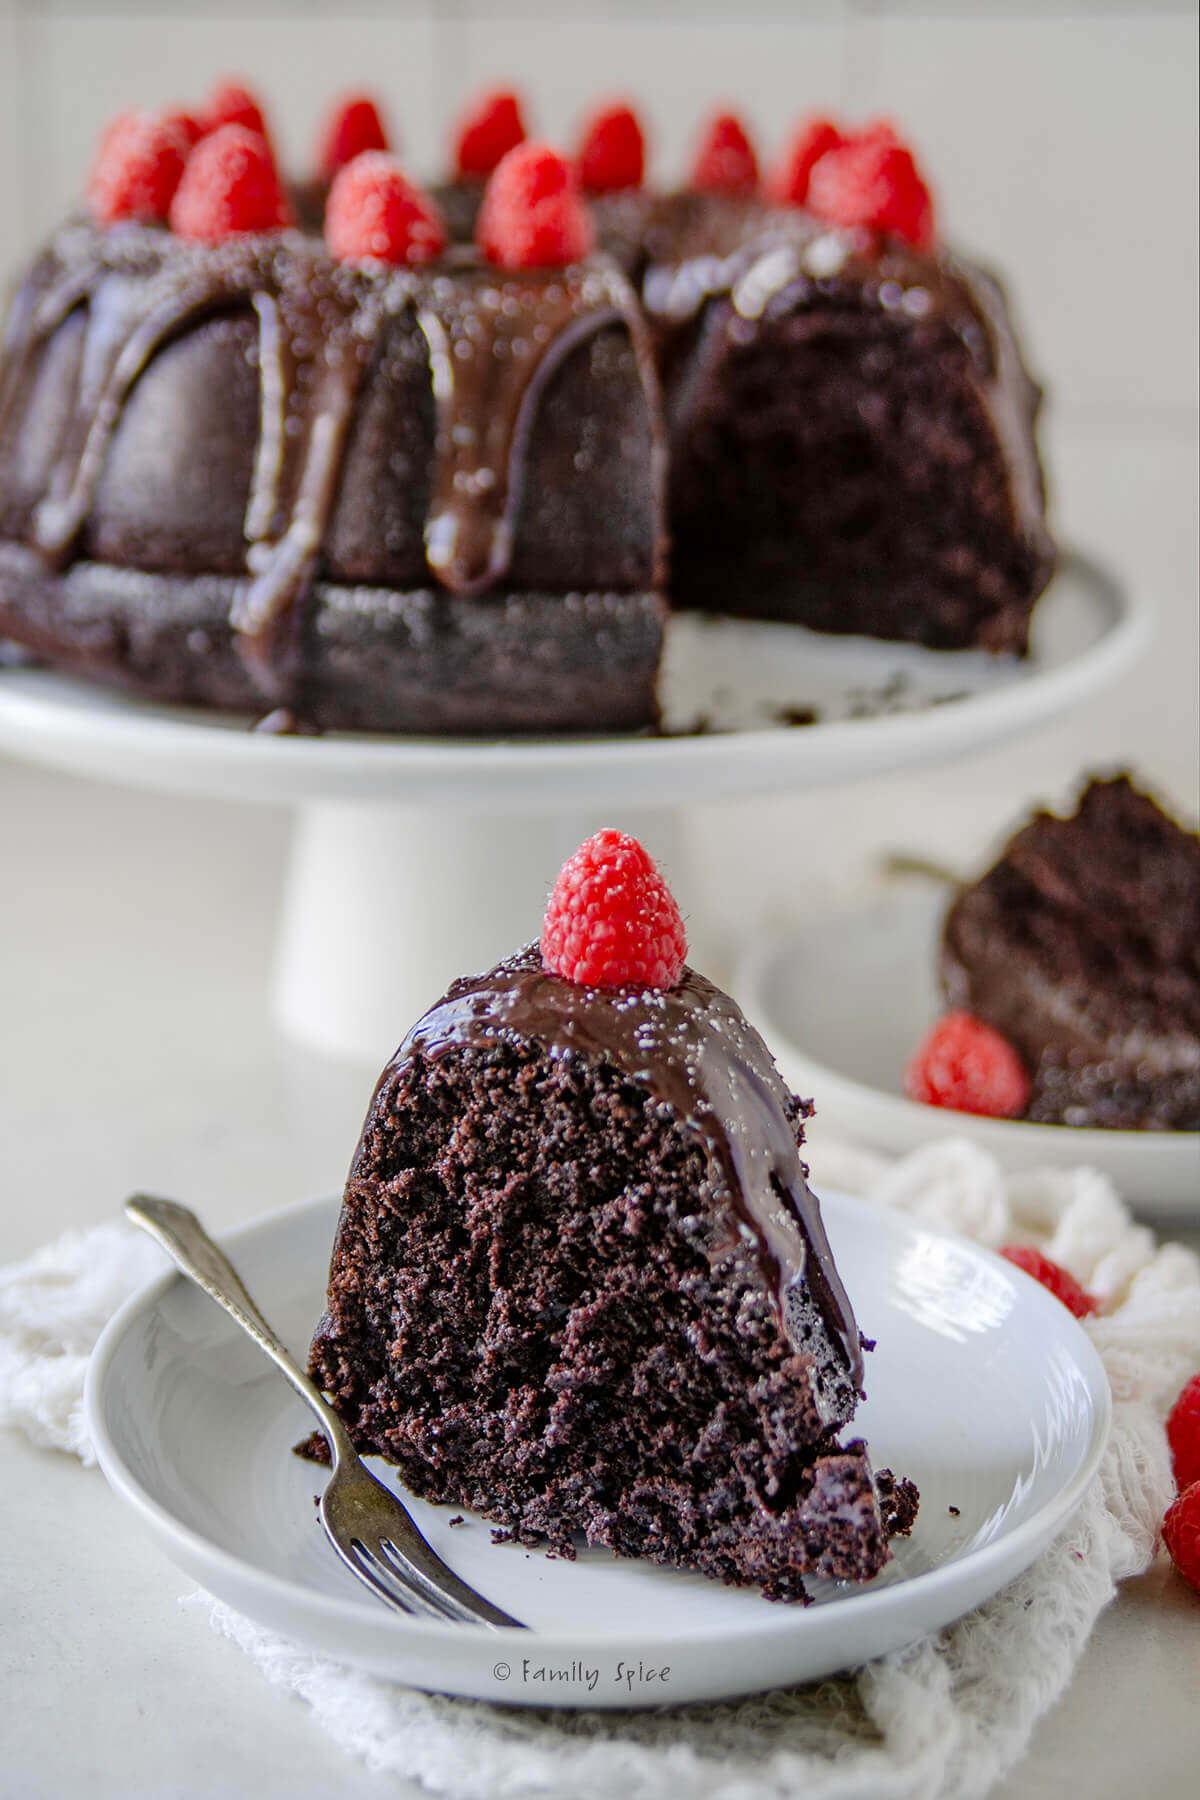
- Holiday Cake: Chocolate and peppermint is a favorite combination over the holidays. So why not celebrate with a whimsical Christmas cake?!
Reader’s Reviews
“Thank you again for the lovely recipe, detailed instructions, and template! My daughter adored her candy cane unicorn Christmas birthday cake” — Karen

Ingredients you need
This post contains some affiliate links for your convenience (which means if you make a purchase after clicking a link I will earn a small commission but it won’t cost you a penny more)! Read my full disclosure policy
Unicorn cakes are usually tall, so aim for at least three layers. I used three 6-inch layers from one box of cake mix. For a 9-inch, 3-layer cake, you’ll need two boxes. A two-layer cake will work, but the unicorn’s face will look shorter and wider—so three layers are ideal.
No matter the cake base, add 1 teaspoon of peppermint extract to the batter. For extra chocolatey flavor, mix in 1 cup of your favorite chocolate chips.
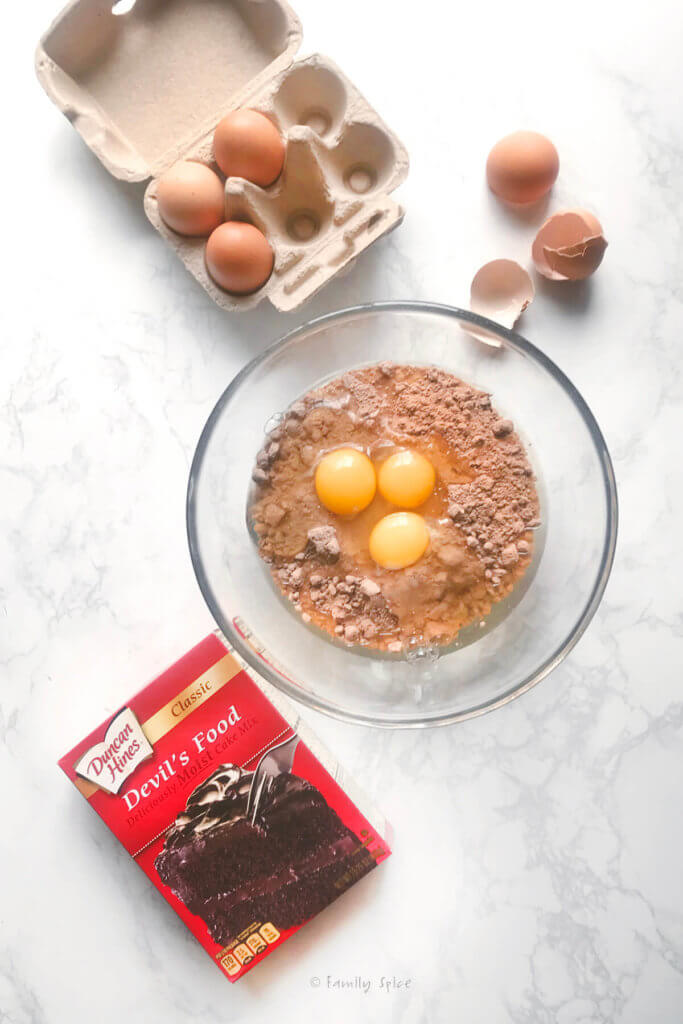
- Box Devil’s Food Chocolate Cake plus eggs, water and oil to make it
- Peppermint extract: A must for extra peppermint flavor!
- Vegetable shortening and unsalted butter: I used a combination of shortening and butter for the frosting.
- Confectioners’ sugar: This is for the frosting and for working with fondant.
- Heavy cream: I like to add a bit of heavy cream to my homemade frosting. You can also use whole milk.
- Peppermint candies or candy canes: Some candies will be crushed and mixed to the frosting. Other peppermint candies are added to the cate for decorations. I also added white chocolate peppermint striped Hershey Kisses.
- Fondant: The unicorn horn is made with red and white fondant. You can use homemade or store bought.
- Edible gold powder: I use the gold for the inside of the unicorn’s ears.
- Food coloring: I used red food coloring for the frosting and black food coloring to pipe the eyes and lashes. I use Wiltons gel colors.
Step 1: Bake the cake

Bake your cake batter in 3 cake pans. For this post, I used one box mix for a 3-layer 6-inch cake. Let them cool completely before frosting. I usually bake the cakes a day before frosting and serving. You can also freeze them.
Step 2: Make the unicorn horn

When making a unicorn cake, no matter if it’s plain or holiday themed, you do need to reserve a couple of days to make and assemble the cake. The fondant unicorn horn and ears have to dry and harden overnight.
- Roll out the fondant. For the unicorn horn, you will need about 1-ounce of red fondant and 1-once of white fondant. Roll the fondant out on a silicone mat or flat work surface dusted with powdered sugar.
- started with. I shaped them into a log, where one end was thicker than the other. They were about 6-inches long.
- Form a log. Roll each fondant into a tapered rope about 16-inches long. Start by rubbing your ball of fondant between your two hands until you have a nice log forming. Then you roll it on your work surface using both hands, stretching it outwards as you roll to make it longer.
- Taper the end. Add more pressure on one end of the rope as you roll it back and forth to form a tapered end. Again, this takes some practice to get it right. If you don’t like how smooth your tapered rope is turning out, roll it back into a ball and start again.
- Wrap the horn. Wrapped both fondants onto and down the bamboo skewer, starting with the thinner part of the fondant on top and ending with the fatter part of the fondant on the bottom. Use a little water to get the two pieces of fondant to stick together.
- Trim the ends. The length of your fondant unicorn horn is up to you. Mine was about 9-10 inches long. Snip off the extra fondant when you get the horn to the length you like and tuck it into the fondant.
- Let it dry overnight. Stick your unicorn horn somewhere safe to dry out. It can be in a glass, a vase or in a big piece of styrofoam.
Step 3: Make the unicorn ears

- Print out template. You can use tear drop cookie cutters for the unicorn ears or print out the unicorn ear template I have provided. If using the template, be sure to cut out the ears so you have it ready.
For this 6-inch cake, I printed the unicorn ear template at 70%. If you are making an 8-inch or 9-inch cake, then print the ear template at full size, or 100%. The ears will be too big for a 6-inch cake if you print these ears at 100%.
Want to save this recipe?
- Roll fondant flat. Starting with a tennis ball size amount of fondant press it down flat on your work surface. Use a small fondant rolling pin to roll the fondant smoothly until it is about ⅛-inch thick. Again, use powdered sugar to keep things from sticking.
- Cut ears out. Place the large ear template over the flat fondant and use the tip of a sharp knife to cut two out. Repeat with the smaller inner ears, too. You will have four pieces in total.
- Assemble the ears. Lightly moisten the back of one of the smaller ears with water and position it on top of one of the larger ears. The bottom of the ears should line up together on the straight end edge. Do not press the fondant too much as every indentation shows up. Repeat with the other two ear pieces until both ears are ready and assembled.
- Dry the ears. The unicorn ears aren’t simply flat pieces of fondant sticking straight out of the cake. Instead, they are rounded. This is simple to recreate. Place each assembled ear over a small rolling pin or whisk handle, with the little ear facing down. Gently smooth the ear over the curve so the ears are curved together facing down. Let it dry overnight.
Step 4: Paint your fondant gold
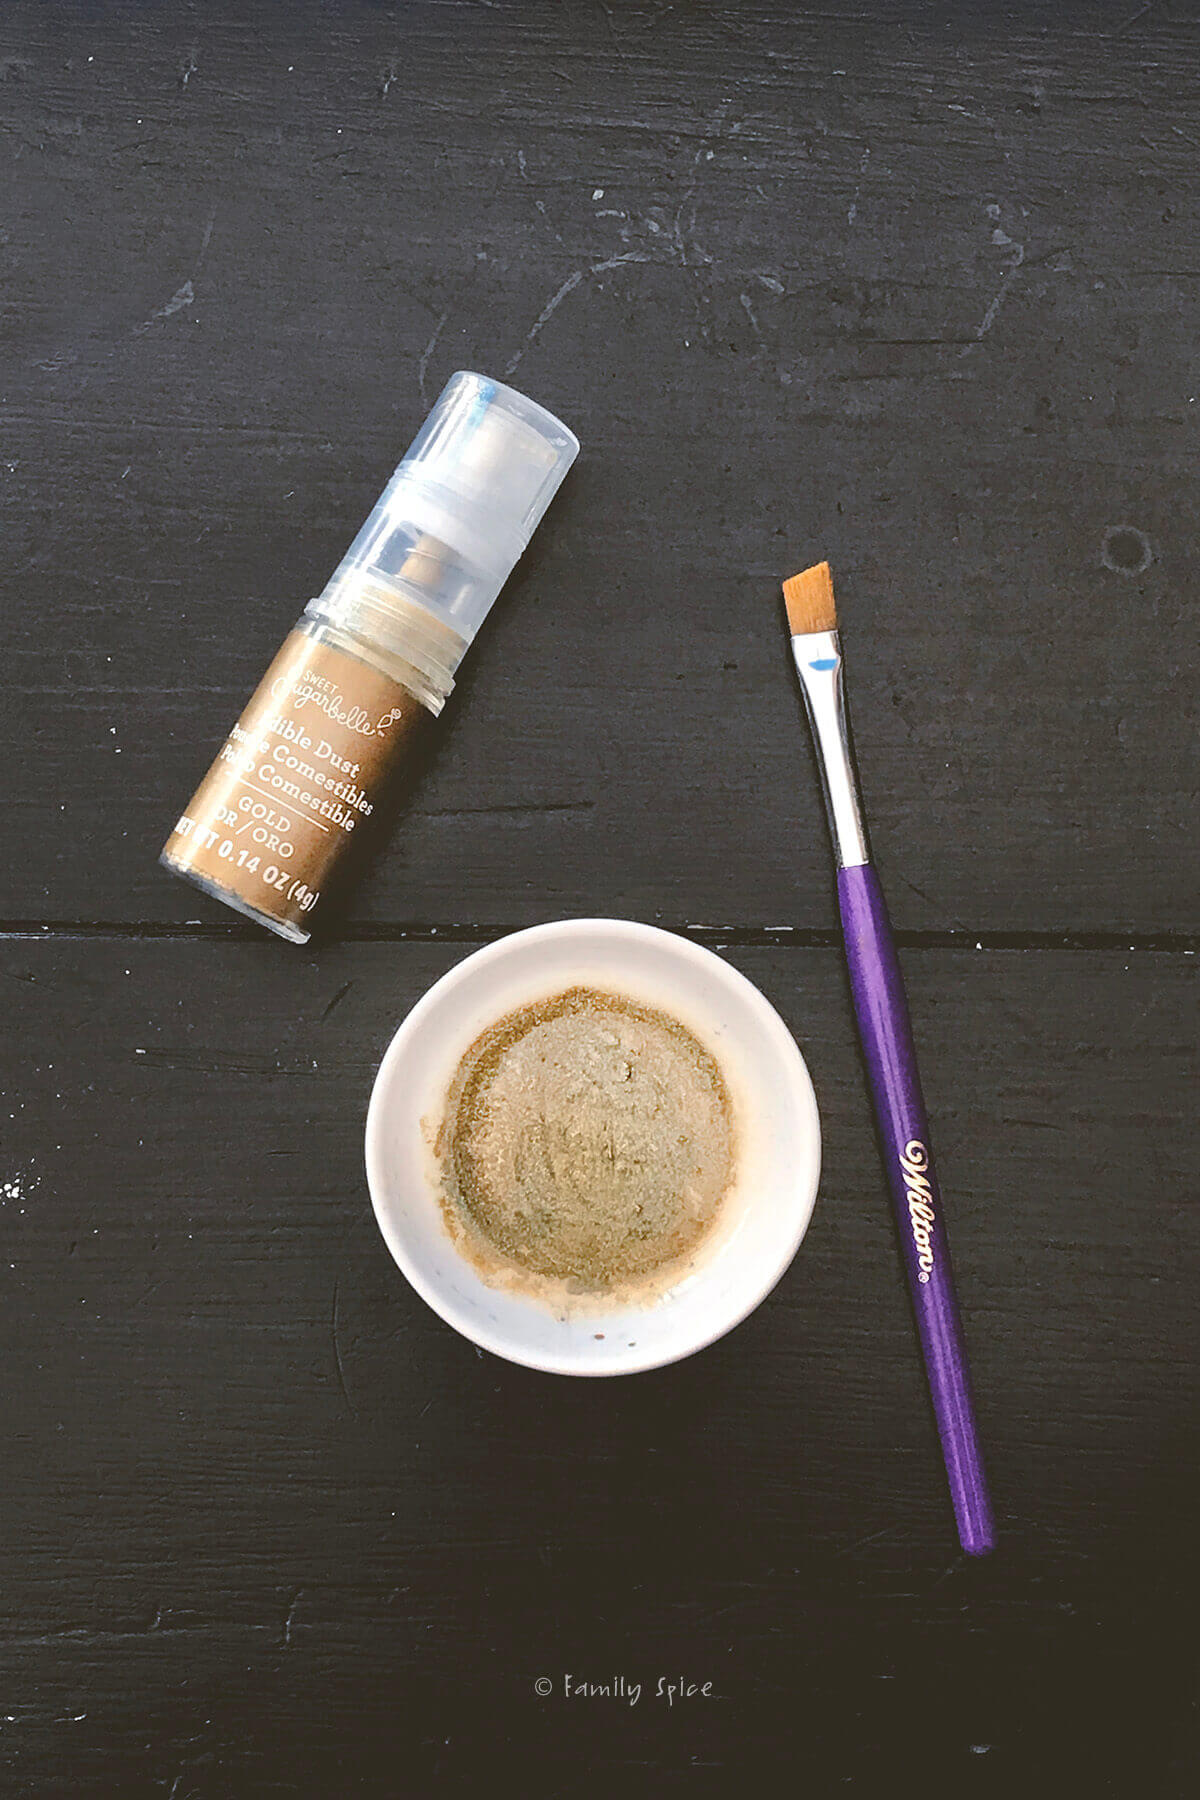
When your fondant ears have hardened, you can paint them. I chose to paint the inner ear gold.
- Make the gold paint. Add a teaspoon of edible gold powder into a small bowl with a few drops of vodka, peppermint or almond extract. The alcohol evaporates as the gold paint dries, keeping the gold adhered to the fondant.
- Paint your fondant. Use a brand new paint brush or one that is exclusively used for food. Simply paint your fondant unicorn ears with the edible gold paint and let it sit for a couple hours (or up to overnight) to dry completely.
Step 5: Make the frosting

The quantities listed below is to frost a 3-tiered 6-inch cake. If you are making a 9-inch cake, I suggest making 1.5-2xs the amount of frosting. The base of the frosting is made with both butter and vegetable shortening. You can also use all butter or all shortening. The preference is based on flavor and how easy the frosting is to pipe.
- Whip the butter. In a stand mixer, combine butter and shortening until fluffy and smooth, about 5-8 minutes.
- Add sugar. Mix in powdered sugar, one cup at a time. Add heavy cream and peppermint extract and blend until smooth.
- Divide frosting. Add crushed peppermint candies to approximately 2 ½ cups of frosting.
- Dye frosting. Dye approximately 1-cup of frosting red. Dye remaining ¼-cup of frosting black.
Step 6: Frost the cake

- Flatten the layers. Using a serrated knife, cut the domed tops from each of your cake layers to flatten them.
- Assemble the bottom layers. Add a dab of the white peppermint frosting on you cake stand and lay your bottom layer down. I typically flip the cake over so the bottom of the cake (the flattest surface) is facing up. Cover with white frosting.
- Assemble the layers. Add the next layer of cake and top with frosting, continuing until all the layers are on top of each other.
- Frost the sides. Either with a piping bag or offset spatula, add frosting to the sides of the cake. Smooth out the sides and top of the cake. I find that using a rotating cake stand and acrylic scraper helps create a smooth professional looking frosted cake.
- Chill the cake. When the cake is crumb coated, place it in the refrigerator to chill for at least an hour or two.
- Final coat: Add the final and clean coating of white frosting.
Step 7: Finish the cake

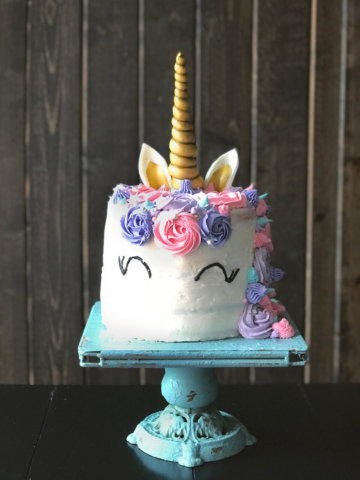
- Make swirl frosting. Spread half of the red frosting down one side of a large pastry bag. Spread in approximately 2 cups of white frosting into the same bag. Add a large coupler and tip #1M.
- Start at the top. Use this to pipe four large rosettes along the top of the cake edge, equidistant from each other. Pipe a large rosette on the side for the center of the forehead.
- Pipe the eyes. Pipe the black frosting using tip #3. If you aren’t super confident with the piping bag, then practice on a baking tray or sheet of parchment paper before piping directly on the cake.
- Finish piping. I used tips #18 and #32 to pipe stars using the plain red and plain white frostings. You can use any variations of the star tips to do this. Continue to pipe rosettes and stars along the top and down the side for the peppermint unicorn mane. Add finishing touches to the forehead mane.
- Add the horn. Push the stick end of the horn into the top of the cake. I had the horn leaning a slight bit towards the front of the cake, not pointing straight up.
- Add the ears. Gently place the ears on either side of the horn. I placed each ear at a slight angle pointing in opposite directions of each other.
- Final touches. I continued the peppermint theme by adding peppermint swirl Hershey kisses and peppermint candies onto the cake. Feel free to add your own touches or red and white sprinkles to your cake.
Expert tips and recipe FAQs
You don’t have to make a 3-tiered cake to get your chocolate peppermint fix. You should try my buttery chocolate peppermint bark cookies, my easy 4-ingredient Oreo peppermint fudge or my peppermint chocolate mug cake for your single serving pleasure!
Got unicorn fever? Try my other unicorn cakes: unicorn bunny cake, chocolate unicorn cake and the one that started it all, unicorn cake with rainbow layers.
Storing/Freezing Instructions
TO STORE: If your cake is frosted, I suggest storing any leftovers in an airtight container and refrigerate for up to 5 days. If unfrosted, you can keep it covered on the counter for up to 3 days or refrigerate for longer.
TO FREEZE: You can also freeze leftovers. Wrap in foil, parchment paper or plastic wrap and freeze for up to 4 months.


If you are enjoying my recipes, please sign up for my newsletter and get my free 28-day meal plan! You can also follow me on Instagram or Facebook.

Christmas Unicorn Cake
Ingredients
Cake Ingredients
- 1 box Devil’s Food Chocolate Cake
- 3 large eggs
- 1 cup water
- ⅓ cup extra virgin olive oil
- 1 teaspoon peppermint extract
Frosting Ingredients
- 1 cup vegetable shortening
- 1 cup unsalted butter softened
- 8 cups confectioners’ sugar approximately 2 lb.
- ¼ cup heavy cream
- 2 teaspoon peppermint extract
- ¼ cup crushed peppermint candies or candy canes
- Red food coloring
- Black food coloring
Decoration Ingredients
- 3 oz white fondant
- 1 oz red fondant
- ¼ teaspoon edible gold powder
- ⅛ teaspoon peppermint extract
- Assorted peppermint candies optional
Instructions
Bake the chocolate cake
- Preheat oven to 350ºF.
- Add 1 teaspoon peppermint extract with remaining ingredients in a mixing bowl. Mix up one devil's food cake batter per package directions.
- Divide batter into 3 6-inch cake pans, coated with oil and lined with parchment paper.
- Bake cakes until toothpick inserted into center of cake comes out clean, about 25-30 minutes. Let cakes cool completely on wire racks.
- Do not begin frosting the cake until the cakes are completely cooled.
Make the fondant horn and ears
- Roll out approximately 2-ounces of white fondant until ¼-inch thick. Use teardrop cutters or template I provide printed at 70% (link in blog post) to cut out 2 ears with 2 inner ear pieces.
- Mix a few drops of peppermint extract into edible gold dust and then brush it onto the inner ear to paint it gold.
- Dampen back of inner ear with water and use s small offset spatula to place on top of larger ear piece. Place ears facing down over a small rolling pin or round form and let it harden overnight (detailed instructions in blog post.
- Roll out 1-ounce of white fondant into a log where one end is thinner than the other and is approximately 6-inches long.
- Roll out 1-ounce of red fondant into a log where one end is thinner than the other and is approximately 6-inches long.
- Using both colors of fondant, begin wrapping them around a bamboo skewer, starting with the thinner parts of the fondant and ending with the fatter ends. By wrapping both colors, you will create a 2-color swirled unicorn horn.
- You will only need about 3-inches of bamboo stick to place in your cake, so cut off any remaining parts of the bamboo stick, past this 3-inch mark.
- Allow the fondant horn and ears to sit overnight to harden and dry.
Make the peppermint frosting
- In a stand mixer, combine butter and shortening until whipped and smooth.
- Mix in powdered sugar, one cup at a time.
- Gently pour in the heavy cream and 2 teaspoon peppermint extract and blend until smooth.
- Remove approximately 2 ½ cups of frosting, place in a small bowl and mix in crushed peppermint candies.
- Stack cakes on a cake stand, layering in the small batch of peppermint frosting between each inside layer.
- Smooth top of cake and surrounding sides with white frosting to make a crumb coat.
- Place in refrigerator to chill.
Assemble the unicorn cake
- Frost and smooth out entire cake in white frosting.
- Place approximately 1-cup of frosting in a small bowl and dye it red.
- Place approximately ¼-cup of frosting in a small bowl and dye it black. Transfer black frosting to a piping bag fitted with tip #3.
- Transfer ½-cup of white frosting to a piping bag fitted with a start tip, like tip #32.
- Add large coupler to a large piping bag and attach tip #1M. Spread half of the red frosting to form a line of red frosting down one side of the bag.
- Fill rest of the large piping bag with remaining white frosting. Squeeze out frosting until both colors start to come out.
- Transfer remaining red frosting to a piping bag fitted with a start tip, like tip #18.
- Pipe rosettes on the top and along one side of the cake using the red and white swirled frosting and tip #1M.
- Add dollops of white and red frostings using the #32 tip and #18 tip.
- Pipe eyes onto the front center of the cake using the black frosting and tip #3.
- Place horn on the top center of the cake and the ears on either side of the horn.
- Add peppermint candies around the cake, if desired.
- Refrigerate until ready to serve.
Notes
Nutrition
Nutrition Disclaimer
Nutritional information is an estimate provided to you as a courtesy. You should calculate the actual nutritional information with the products and brands you are using with your preferred nutritional calculator.
PS If you try this recipe, why not leave a star rating in the recipe card right below and/or a review in the comment section further down the page? I always appreciate your feedback.
You can also follow me on Pinterest, Facebook or Instagram. Sign up for my eMail list, too!
Written by Laura Bashar
Hi, I’m Laura, a certified professional cook and cookbook author living in San Diego. I have been sharing my family’s favorite recipes inspired from all over the world since 2008. Let’s cook up something fun!

Thank you again for the lovely recipe, detailed instructions, and template! My daughter adored her candy cane unicorn Christmas birthday cake
Hi Karen!
I’m so glad your daughter loved her cake! I hope she had a wonderful birthday!
Laura
I love this cake! Planning to make it for my daughter’s Christmas birthday. Can you please confirm how much peppermint extract goes in the cake batter? I think I read 1tsp in your post but 1tbsp in the recipe. Thank you!
Hi Karen-
If you want to add peppermint extract to the cake batter, use 1 tsp. You will need 2 tsp for the frosting. Together that makes a total of 1 TBS. My recipe plugin didn’t separate these amounts well. You will also use a little for the gold powder to paint the horn.
Can’t wait to see how your unicorn cake turns out!
Laura
Thank you so much, that makes sense! I will be sure to share when it’s all done
This looks delish! And it’s VERY creative. Not to mention fun. 🙂
What a fantastic holiday cake! She is so festive and your instructions are so great with the photos and sizes shown so carefully. Wonderful post Laura!