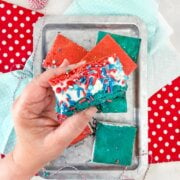


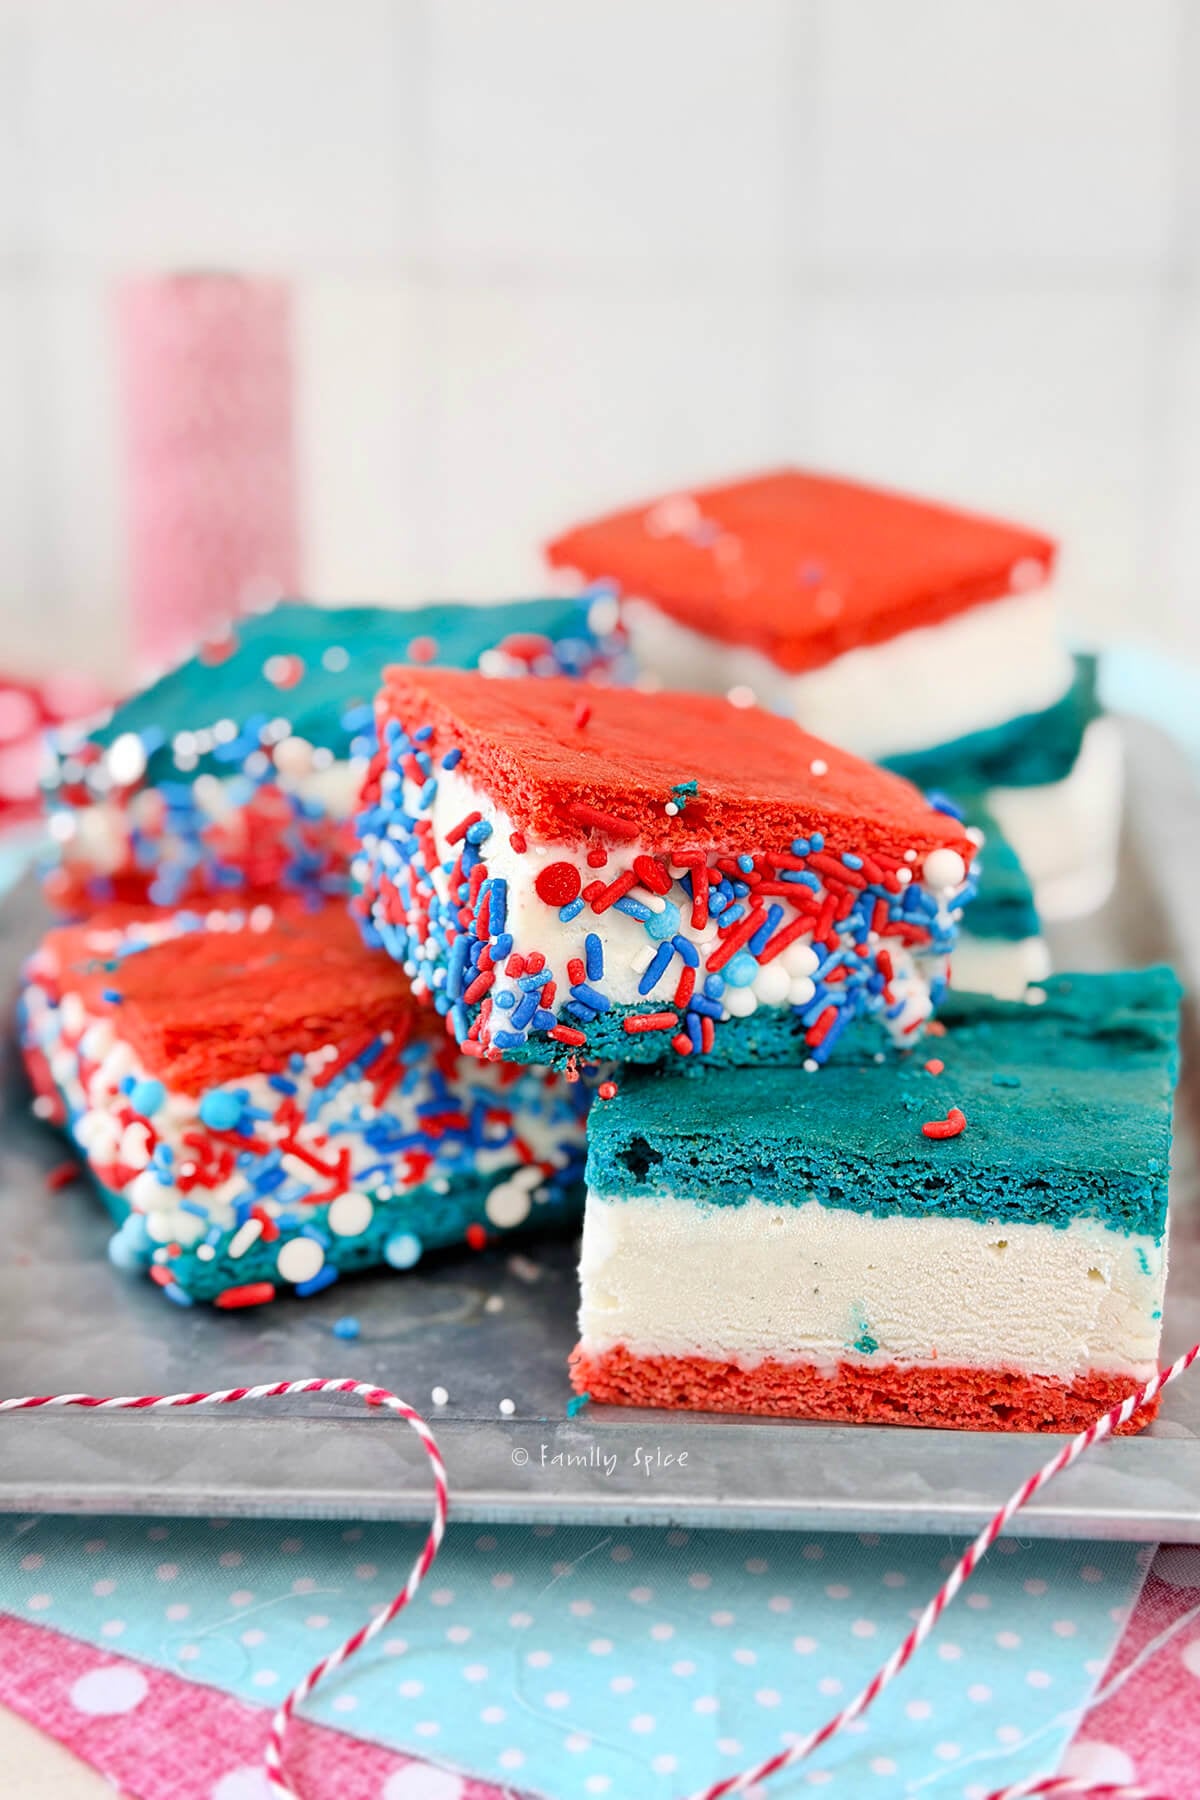
Skip the store-bought treats and make these easy homemade ice cream sandwiches instead! Thanks to a simple cake mix hack, the cookies bake up perfectly soft and chewy, making them the ideal sandwich for the creamy ice cream filling.
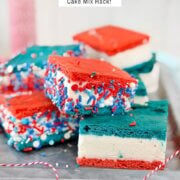
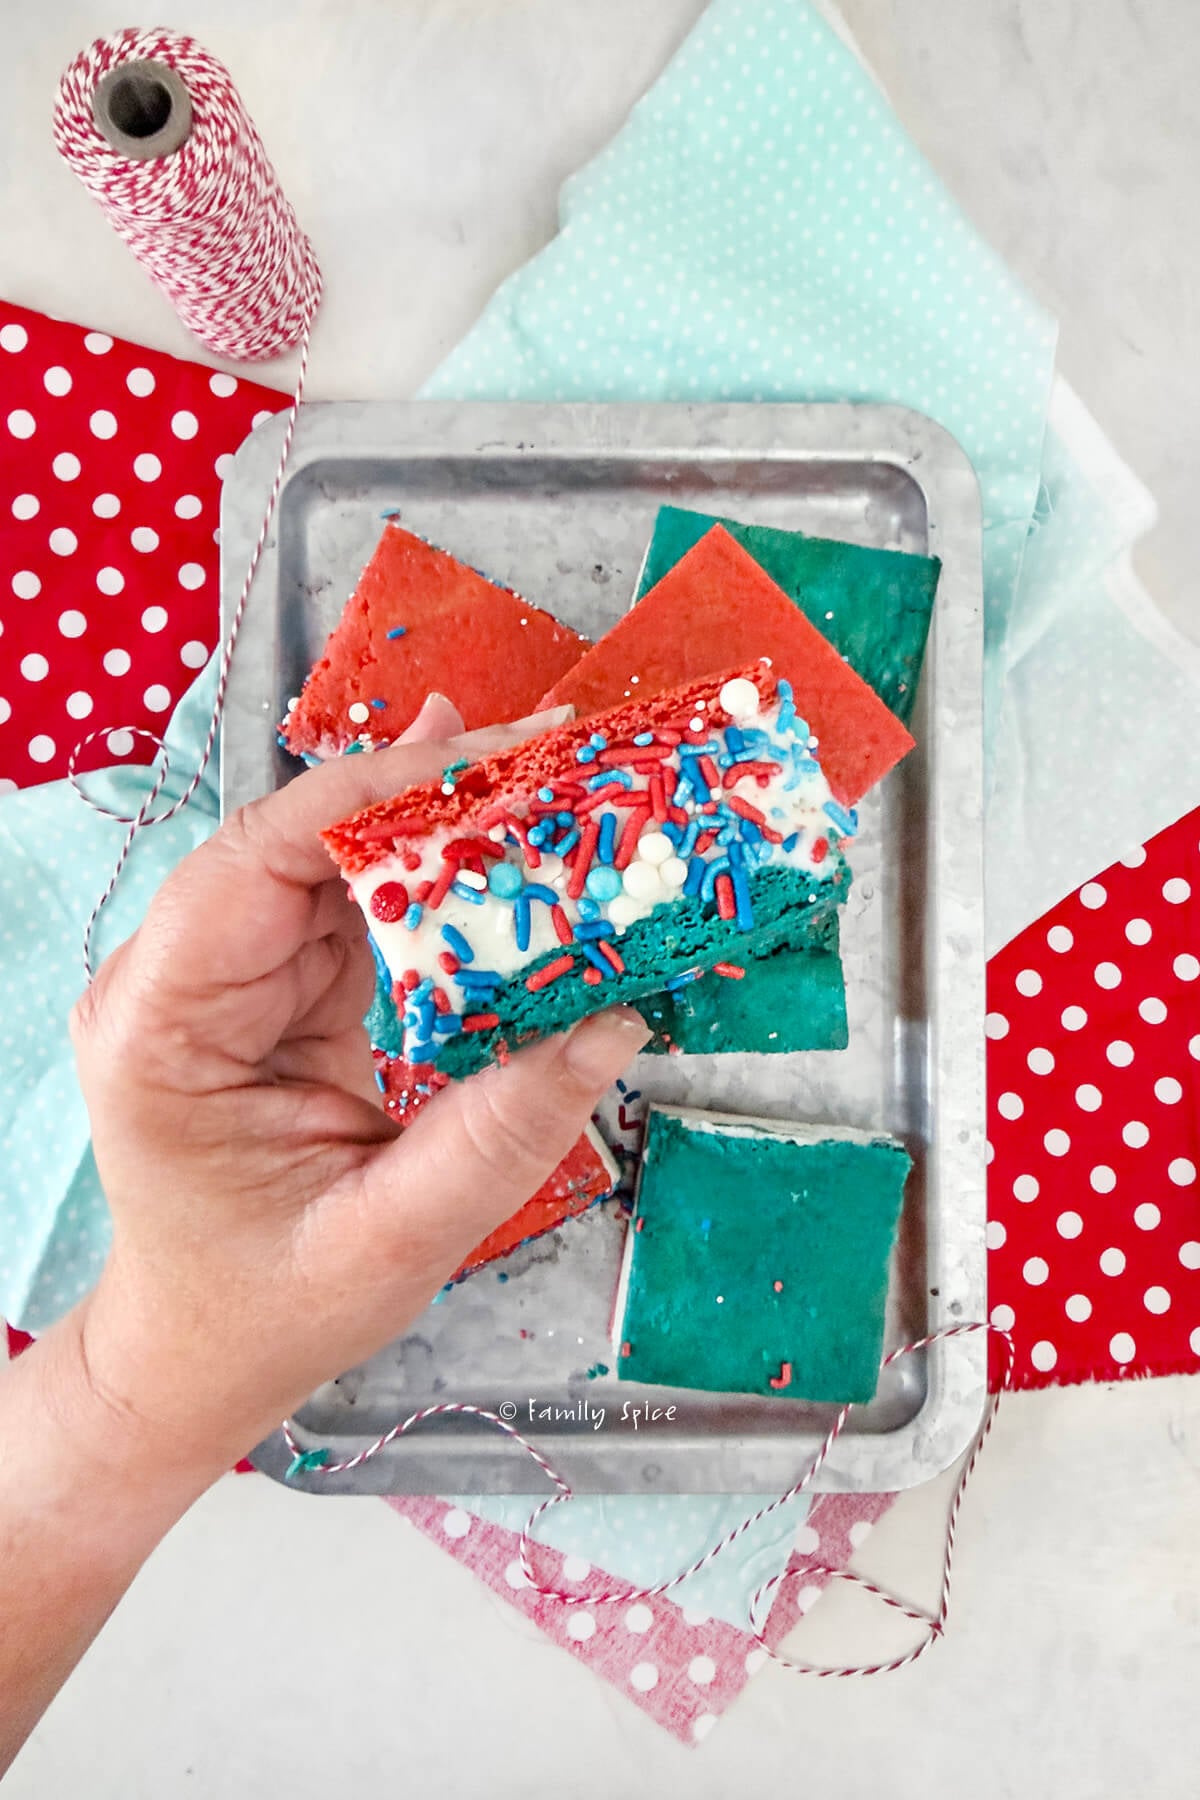
Decorated in festive red, white, and blue, they’re the ultimate make-ahead dessert for the Fourth of July, Memorial Day, and all your summer celebrations.
After years and years of baking for birthday parties, school parties and well, every holiday party, I confess that I sometimes bake with boxed cake mix. They are quick and quite tasty. I especially love a good box mix hack.
I have already shared my hack for making a Chocolate Guinness Cake using box mix. Today I am sharing a fun and easy hack for making these festive red, white and blue ice cream sandwiches.
Jump to:
Laura says :
Why this recipe works
- Cake Mix Hack: Skip the water and use fewer eggs to turn a simple boxed cake mix into soft cookies that are perfect for homemade ice cream sandwiches.
- Perfect Texture: Soft enough to bite through straight from the freezer without squeezing all the ice cream out.
- Festive & Fun: Red, white, and blue cookies with patriotic sprinkles make these a fun and tasty Fourth of July dessert.
- Customize it: You can use chocolate or vanilla cake box mix and color them for any holiday or celebration.
- Make Ahead: Freeze them in advance so dessert is ready whenever your guests arrive.

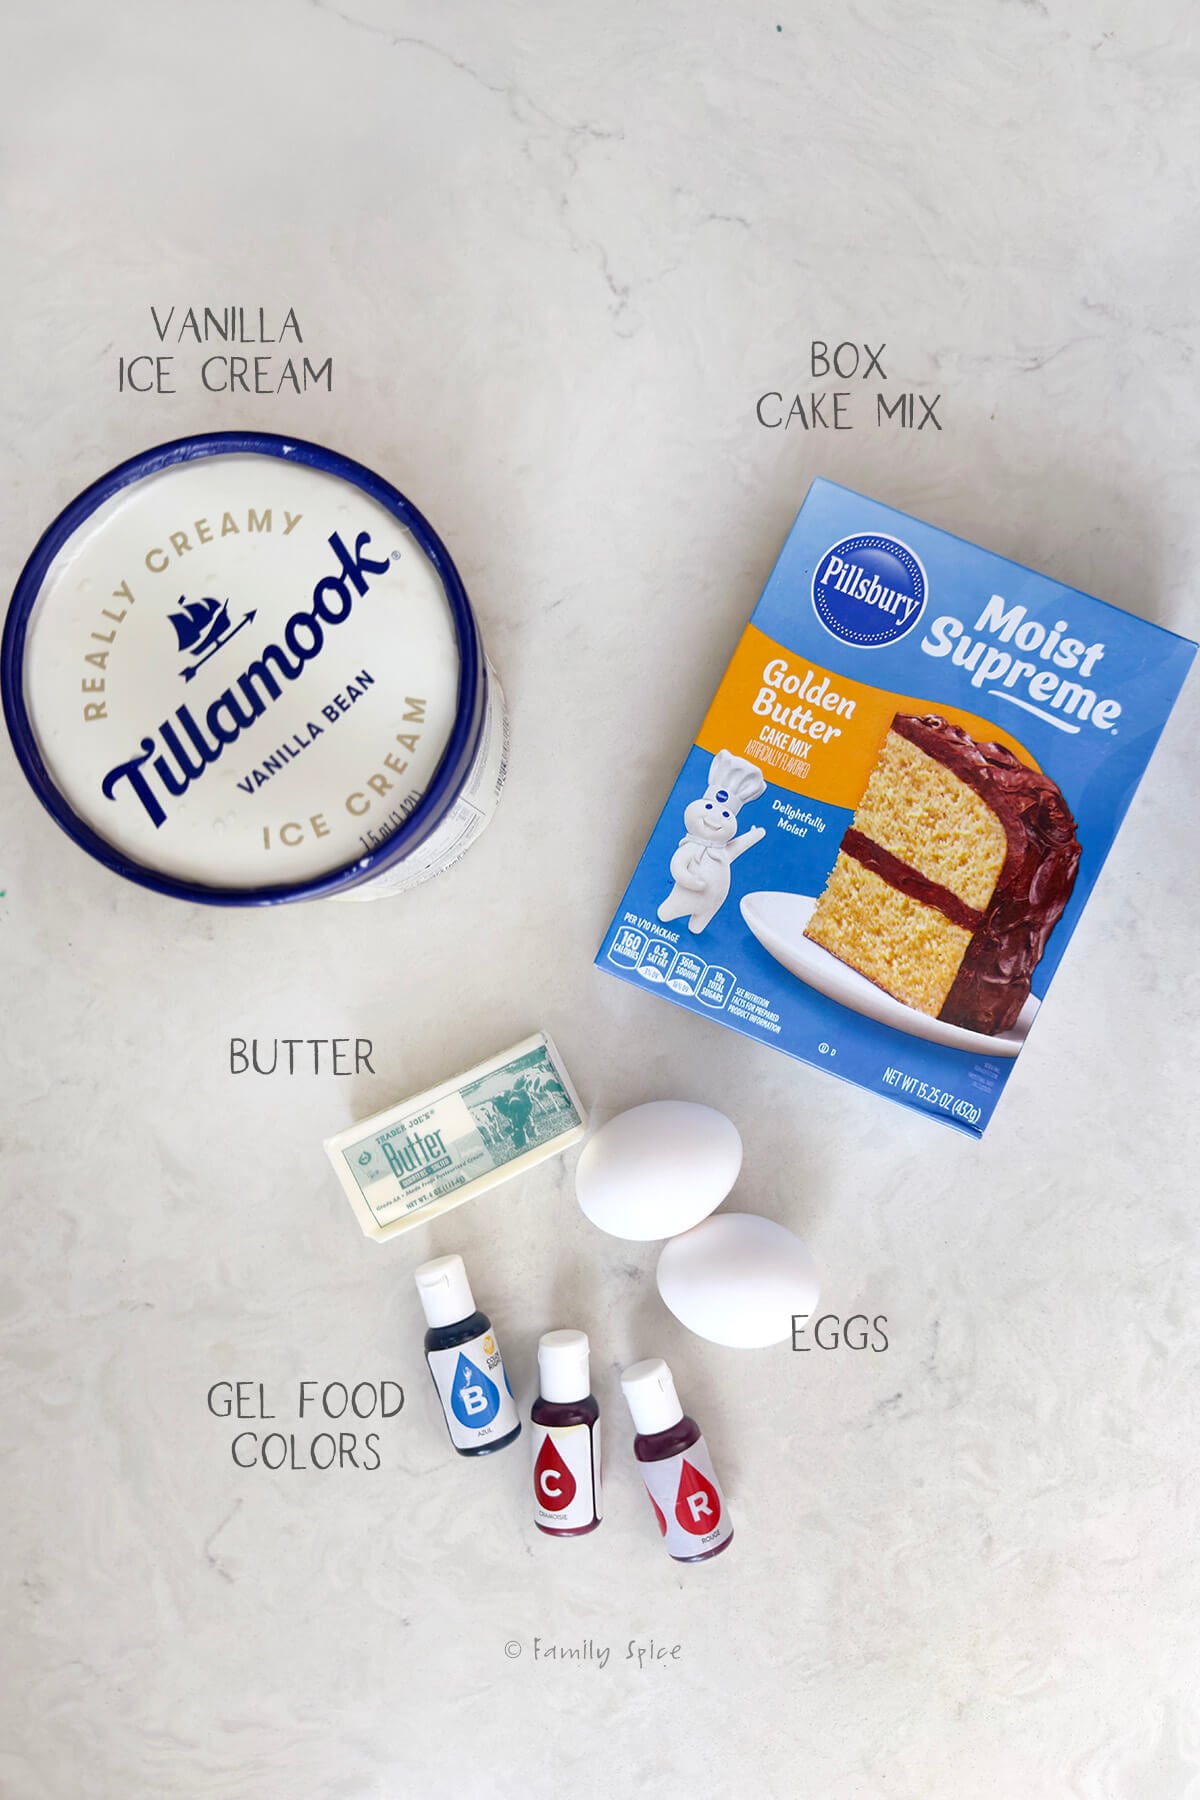
Ingredients needed
This post contains some affiliate links for your convenience (which means if you make a purchase after clicking a link I will earn a small commission but it won’t cost you a penny more)! Read my full disclosure policy
- Box cake mix: You can use vanilla or chocolate box mix cake. I have not tried this strawberry or other flavors — yet!
- Butter: You will swap out the oil for butter. I used a butter specific box mix and just kept the butter quantity the same.
- Eggs: Most box mixes use 3 eggs in the cake recipe. You will reduce this amount and use 2 eggs.
- Water: NOPE! You will omit the water entirely from the cake.
- Ice cream: To keep with the red, white and blue theme, I used vanilla ice cream. Of course, you could use any ice cream flavor you like.
- Food gels: If you are going to dye your cake, I suggest using food gels as a little goes a long way. Also, the cake batter will be yellow, so plan your dye colors accordingly.
- Sprinkles: This is optional. My daughter insisted these ice cream sandies need fun red, white and blue sprinkles.
Step by step directions
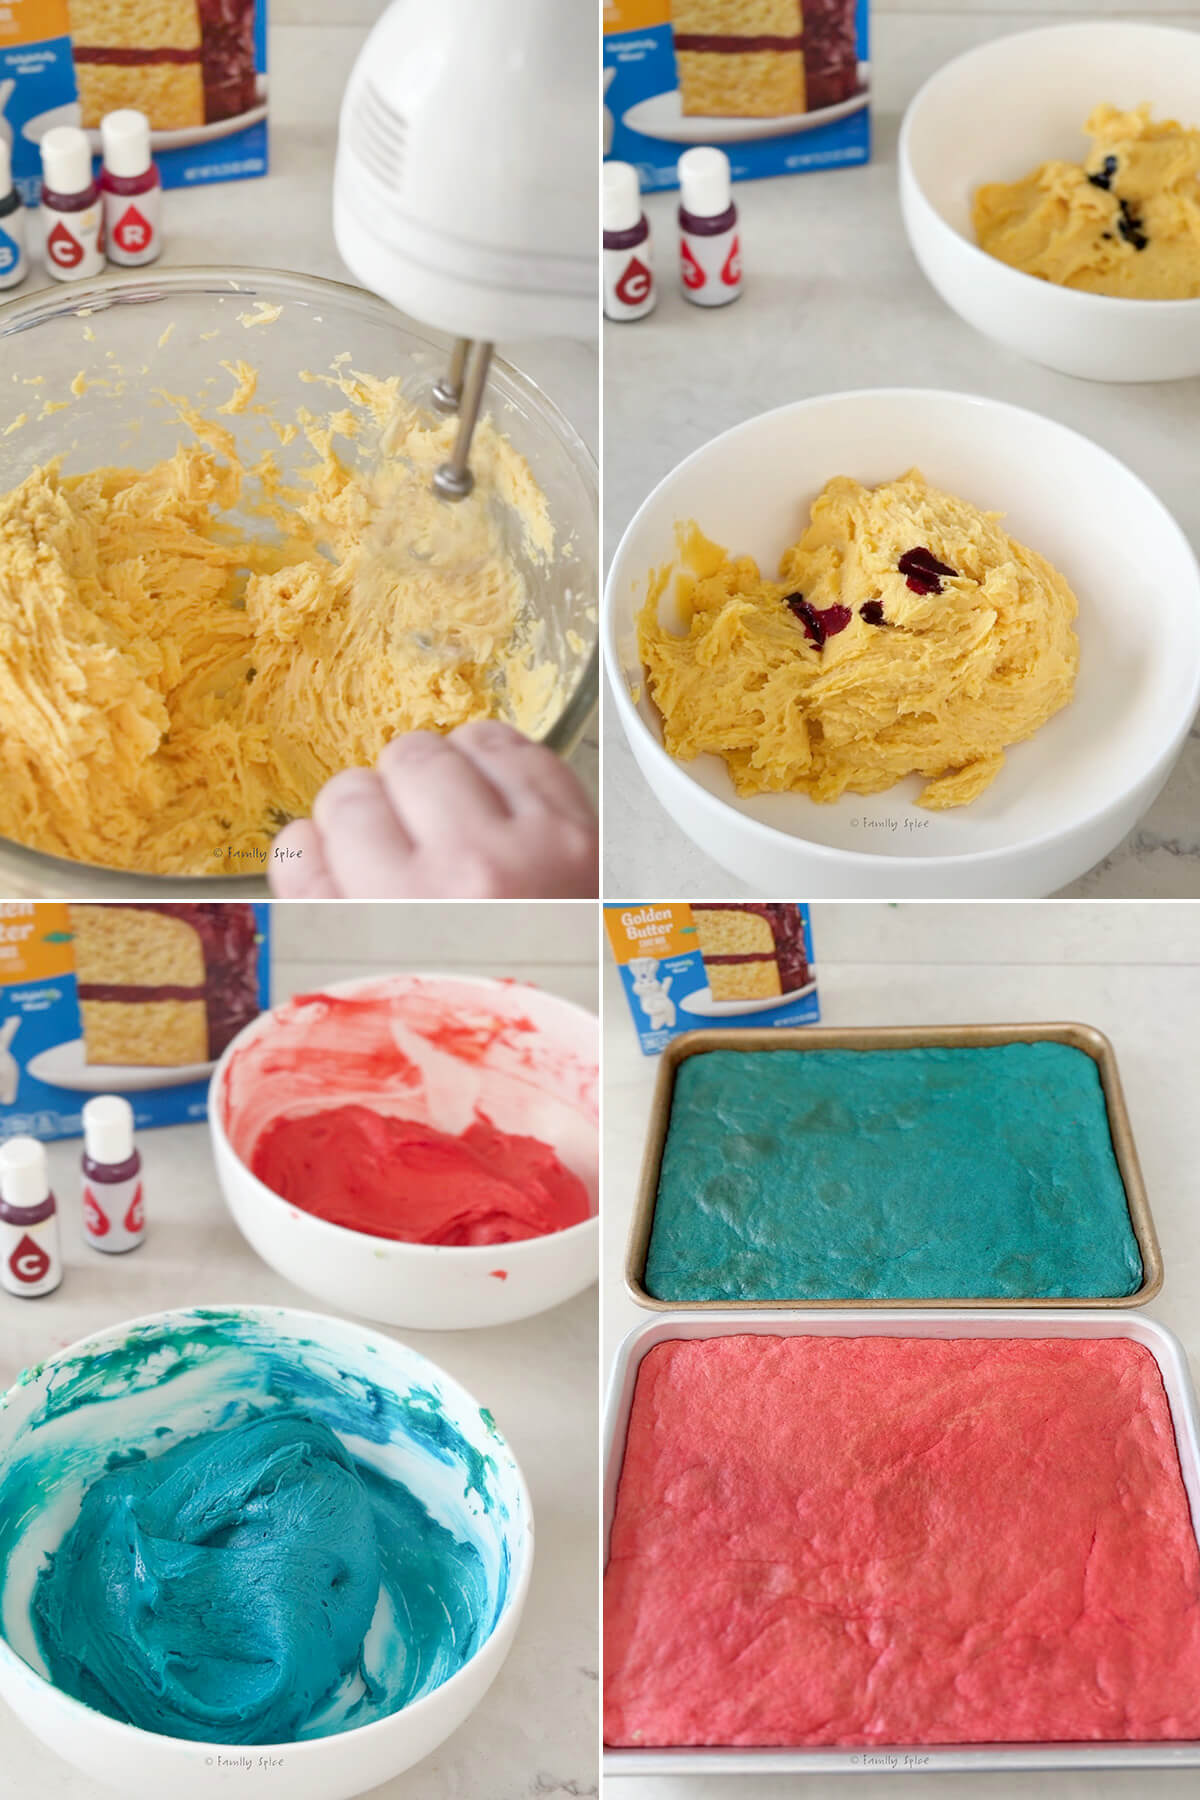
- Mix the batter. Combine cake mix, butter, vanilla and eggs until well blended. The batter will be thick like a cookie dough. (batter will be thick).
- Dye the batter. Divide the batter into two bowls and dye one with blue and the other with red food dye.
- Bake the cake. Spread each dough evenly onto two greased 9×12 quarter sheet pans. Grease your hands to keep it from sticking to you. Bake until set but still soft. Cool completely before assembling.

- Assemble. Line a 9×12-inch baking pan with cooking parchment or waxed paper. Place one cake layer on the bottom, spread softened ice cream evenly over it, then top with second cake layer. Freeze until firm, about 4 hours.
- Cut and serve. Cut into squares or any size you want. Serve immediately, or wrap individually in plastic wrap or foil and store in freezer.
Expert tips and recipe FAQs
Although I didn’t add parchment paper on the bottom of the baking pans when I baked the cookie/cake, it did take a little effort to get them out of the pan without breaking. So to insure they come out easy peasy, add a small sheet of parchment on the bottom of each pan after greasing them.
You might need to trim each cake to make it fit snugly in your pan. All these pans are slightly different sizes, which can be frustrating.
Want to save this recipe?
For clean and even cuts, be sure that the ice cream is nice and soften before spreading and spread it evenly over the cake. Use a ruler and clean the knife after every cut.
Need to feed a crowd? Use two cake mix boxes and bake on full sheet cake pans. You will need 3-quarts of ice cream can cut the baked cake sheets in half to fit into 9×12 pans for assembly and freezing.
Storing/Freezing Instructions
TO FREEZE: Wrap the ice cream sandwiches in foil, plastic wrap or parchment paper and store in the freezer for up to 4 months.

If you are enjoying my recipes, please sign up for my newsletter and get my free 28-day meal plan! You can also follow me on Instagram or Facebook.
Red, White and Blue Ice Cream Sandwiches
Ingredients
- 1 box cake mix vanilla or chocolate
- 2 eggs
- ⅓ butter softened
- food gels
- ¼ cup sprinkles
- 1 ½ quarts vanilla ice cream softened
Instructions
- Preheat oven to 350ºF.
- The amount of butter can vary depending on the type of box mix you use. If the box mix asks for oil, replace with butter, using the same amount. My box mix asked for ⅓ cup of butter, so I just used that.
- Combine cake mix, butter, vanilla and eggs until well blended. The batter will be thick like a cookie dough.
- Divide the batter evenly into two bowls and dye one with blue and the other with red food gel.
- Spread each dough evenly onto two greased 9×12 quarter sheet pans. Grease your hands to keep the dough from sticking to you.
- Bake for 12-15 minutes, or until set but still soft. Cool completely before assembling.
- Line a 9×12-inch baking pan with cooking parchment or waxed paper, making sure there is more sticking out for easy lifting. Place one cake layer on the bottom, spread softened ice cream evenly over it, then top with second cake layer. Freeze until firm, at least 4 hours.
- Run a knife along the edges of the pan and lift the entire cake out using the parchment paper. Cut into squares or any size and shape you want. Serve immediately, or wrap individually in plastic wrap or foil and store in freezer.
Notes
Nutrition
Nutrition Disclaimer
Nutritional information is an estimate provided to you as a courtesy. You should calculate the actual nutritional information with the products and brands you are using with your preferred nutritional calculator.
PS If you try this recipe, why not leave a star rating in the recipe card right below and/or a review in the comment section further down the page? I always appreciate your feedback.
You can also follow me on Pinterest, Facebook or Instagram. Sign up for my eMail list, too!
Written by Laura Bashar
Hi, I’m Laura, a certified professional cook and cookbook author living in San Diego. I have been sharing my family’s favorite recipes inspired from all over the world since 2008. Let’s cook up something fun!