


These zucchini crisps are a fabulous snack or appetizer, and a great way to sneak in veggies in your diet! You can bake them in the oven or even in the air fryer.

Who else is growing a vegetable garden this summer? This was always a fun project I did with my kiddos. We’d look at all the different shapes of seeds and plant them. The hardest part was waiting for the seeds to sprout and fruit to form.
Over the years we have grown all kinds of veggies, from turnips to artichokes. Tomatoes and carrots are always a family favorite. And lately, my kids are starting to appreciate the underwhelming zucchini!
Jump to:
Laura says :
Why this recipe works
- Easy peasy: These zucchini crisps are super easy to whip up. You can bake them in the oven or cook them up faster in the air fryer.
- Low fat: These crisps aren’t heavily battered and you don’t need to deep fry them. A quick coating olive oil is all you need to keep the parmesan and bread crumbs sticking to it.
- Kid friendly: This crunchy treat is a great way to get kiddos to eat their vegetables!
- Party friendly: They make a great appetizer for a crowd or whenever you want a healthy snack!


Ingredients needed

This post contains some affiliate links for your convenience (which means if you make a purchase after clicking a link I will earn a small commission but it won’t cost you a penny more)! Read my full disclosure policy
- Zucchini: You can use green or yellow zucchini. Definitely use fresh zucchini as frozen is too mushy.
- Parmesan cheese: You will need finely grated parmesan for best results. You can also use grated pecorino romano or asiago cheese.
- Breadcrumbs: You can use seasoned or unseasoned bread crumbs. You can also use panko crumbs if you want more crunch! For a low carb option, you can use crush pork rinds.
- Extra virgin olive oil: You can use a mild olive oil or peppery one. You can also use avocado or any other vegetable oil.
- Salt and pepper
Step-by-step directions

- Prep the zucchini. Slice zucchini into ¼-inch rounds and coat with olive oil.
- Make the breading. Combine Parmesan cheese, breadcrumbs, salt and pepper. Press each zucchini round into the Parmesan mixture, coating it evenly on both sides.
- Bake the zucchini. Place the breaded zucchini in the air fryer and bake until toasty, flipping them over halfway.
Want to save this recipe?
Expert tips and recipe FAQs
We dipped this tasty treats in my homemade marinara sauce, and boy were they delicious. You can also use your favorite jarred marinara or even homemade ranch dressing.
Leftovers don’t stay crispy when reheated unless you pop them in the toaster oven.
Want more zucchini recipes? You must try:
- Lemon and Zucchini Quinoa Pilaf
- Zucchini Noodle Pad Thai with Orange Chicken
- Pasta with Zucchini, Garlic and Olive Oil
- Balsamic Roasted Tomato Zucchini Noodles (Zoodles)
Storing/Freezing Instructions
TO STORE: Store any leftovers in an airtight container and refrigerate for up to 4 days. Reheat in the air fryer or toaster oven if you want them crispy again.


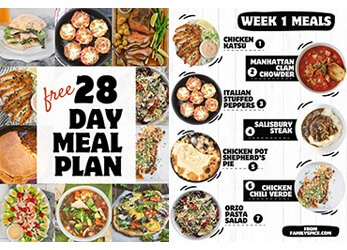
If you are enjoying my recipes, please sign up for my newsletter and get my free 28-day meal plan! You can also follow me on Instagram or Facebook.

Air Fried Zucchini Crisps with Parmesan
Ingredients
- 1 lb zucchini about 2 medium zucchini
- 1 tablespoon extra virgin olive oil
- ¼ cup Parmesan cheese grated
- ¼ cup breadcrumbs seasoned
- ⅛ teaspoon salt
- ⅛ teaspoon black pepper ground
Instructions
- If baking in the oven, coat a baking sheet with cooking spray.
- Slice zucchini into ¼-inch rounds. Place zucchini rounds in a medium-sized bowl and toss with olive oil to coat.
- In a separate bowl, combine Parmesan cheese, breadcrumbs, salt and pepper.
- Press each zucchini round into the Parmesan mixture, coating it evenly on both sides. Place coated zucchini round onto prepared baking sheet.
- For the oven, bake the zucchini rounds at 450ºF until browned and crisp, about 25-30 minutes. To air fry, cook at 400ºF for 15 minutes.
- Serve immediately.
Notes
Nutrition
Nutrition Disclaimer
Nutritional information is an estimate provided to you as a courtesy. You should calculate the actual nutritional information with the products and brands you are using with your preferred nutritional calculator.
PS If you try this recipe, why not leave a star rating in the recipe card right below and/or a review in the comment section further down the page? I always appreciate your feedback.
You can also follow me on Pinterest, Facebook or Instagram. Sign up for my eMail list, too!
Written by Laura Bashar
Hi, I’m Laura, a certified professional cook and cookbook author living in San Diego. I have been sharing my family’s favorite recipes inspired from all over the world since 2008. Let’s cook up something fun!
This recipe and post was originally published May 31, 2010. It has been updated with more content and new photographs.
Wow those look so good! I love how they're not fried. I think i'll try this with panko, thank you.