


Ombre cakes are not only beautiful, but so very simple to make if you want to glam up a cake for a birthday, baby shower or any occasion. And this kool aid ombre cake takes us back to our childhood, reminding us of of giggles, games and carefree times!
I make a lot of cakes for my friends and family. I enjoy baking and getting creative with the cakes, but I am not the most patient cake decorator. My daughter knows this, as she has giggled and snickered while watching me swear and yell at my piping bags while I attempt some magical feat with the cake before me.
I found myself way over my head when I prepared my daughter’s rainbow unicorn cake for her birthday last year. But I survived and I’m mighty proud of how the cake turned out.
But I won’t lie. I prefer less stress and have shared with you many easy birthday cake ideas. And this Kool-Aid ombre cake is another relatively simple way to prepare a glamorous cake.
Jump to:
Laura says :
Why this recipe works
- Customize it: You can use any flavor of Kool-Aid to make this cake, or even make Kool-Aid cupcakes!
- Beginner friendly: An ombre cake is frosted from light to dark color, blending together using any color. what I like most about frosting a cake this way is that you can hide your mistakes really well!
- Flavorful: So what does Kool-Aid cake taste like? Well, it tastes like the Kool-Aid flavor you choose to use. Simple as that!
- Easy peasy: For this ombre cake, I used Kool-Aid and a box of white cake mix.
- Party friendly: Whether you need a kid-friendly birthday cake or a unique cake for a bake sale, this ombre cake is sure to bring smiles!

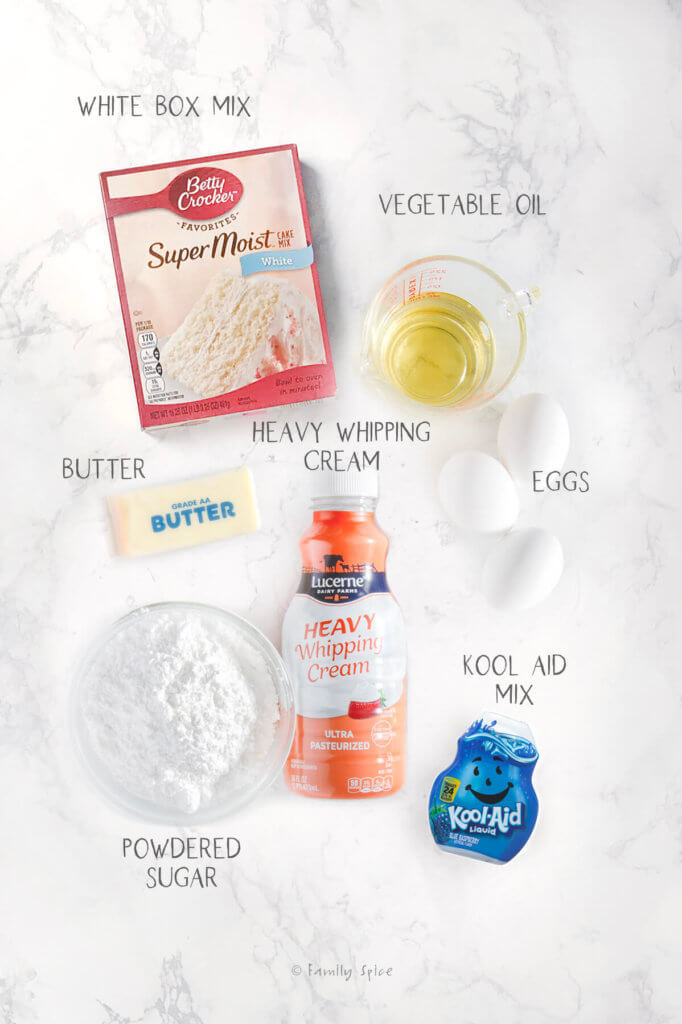
Ingredients you need
This post contains some affiliate links for your convenience (which means if you make a purchase after clicking a link I will earn a small commission but it won’t cost you a penny more)! Read my full disclosure policy
- 1 box of white cake mix: For a 3-layer 6-inch cake, I used one box mix. If you want a 3-layer 8-inch cake, you will need 2 box mixes. You will also need the ingredients listed on the box to make the cake, which is usually egg whites and vegetable oil.
- Butter: You will need room temperature softened butter to make the homemade buttercream frosting.
- Powdered sugar: Also known as confectioner’s sugar, it is need for the buttercream frosting.
- Heavy cream: You can use heavy cream or whole milk to help smooth and thin out the frosting mixture.
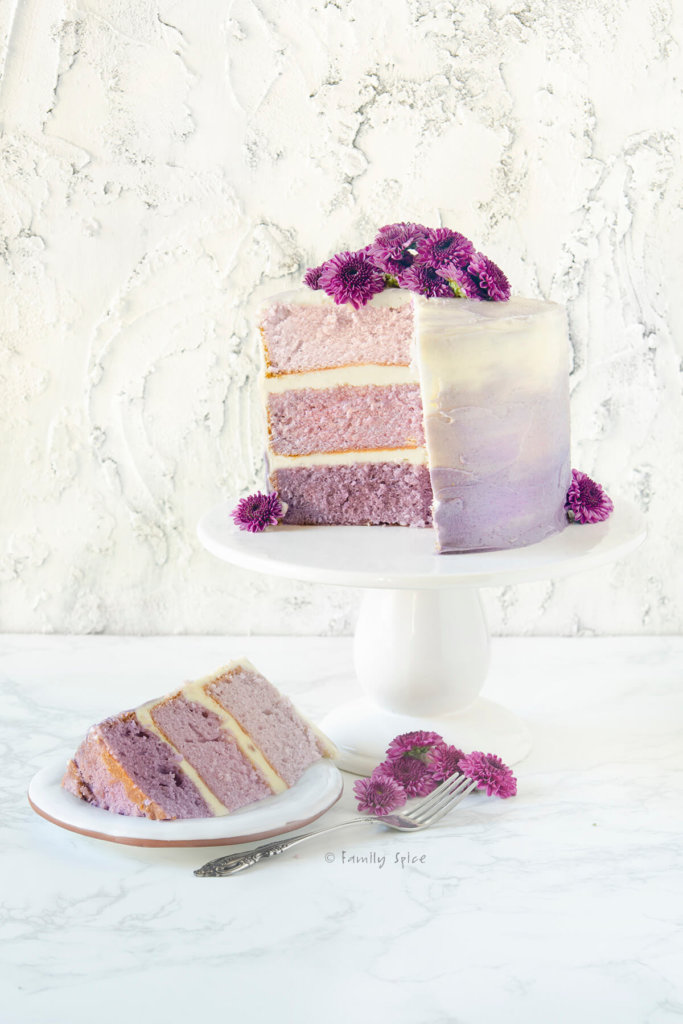
- Kool-aid drink powder: Years ago when I first made this kool aid cake, I used the powder mix. But now they have liquid concentrate, which makes the mixing much easier and less messy. Either is fine. Choose your favorite flavors. In this example, one cake is made with raspberry, another cake was made with grape and the cupcakes were made with grape.
- Food coloring (optional): If you do not want to use too much of the kool aid flavors, you can adjust the colors using food coloring.
Step-by-step directions

- Mix the batter. Follow the directions on box mix and whip up the white cake mix. I like to use my hand mixer for smoother mixing.
- Dye the batter. Using a kitchen scale, divide the batter evenly into three mixing bowls. Add different amounts of Kool-Aid to so you can have a light, medium and dark color.
- Bake the cakes. Transfer to 3 6-inch cake pans that are greased and lined with parchment paper. Bake until a toothpick inserted into the center comes out clean. Let the cakes cool on a cooling rack completely before frosting.

- Assemble the cake. Once the frosting is made, assemble the cake adding the plain basic buttercream in between each layer. Give the entire cake a white crumb coat.
- Dye the frosting. Divide the remaining frosting into 3 bowls, adding different amounts of Kool-Aid to get three shades. Add rings of colored frosting over the white frosting using an icing spatula, starting with the dark frosting on the bottom and the lightest on the top of the side of the cake.
I kept the very top of the cake white. You can pipe the ombre frosting on the sides using piping bags or ziploc bags with a corner cut off, or you can use an offset spatula and smear on the colored frosting.
- Smooth out the frosting. Using your offset spatula or acrylic scraper, smear and smooth out the frosting, blending the layers together.
Can I make kool aid cupcakes?
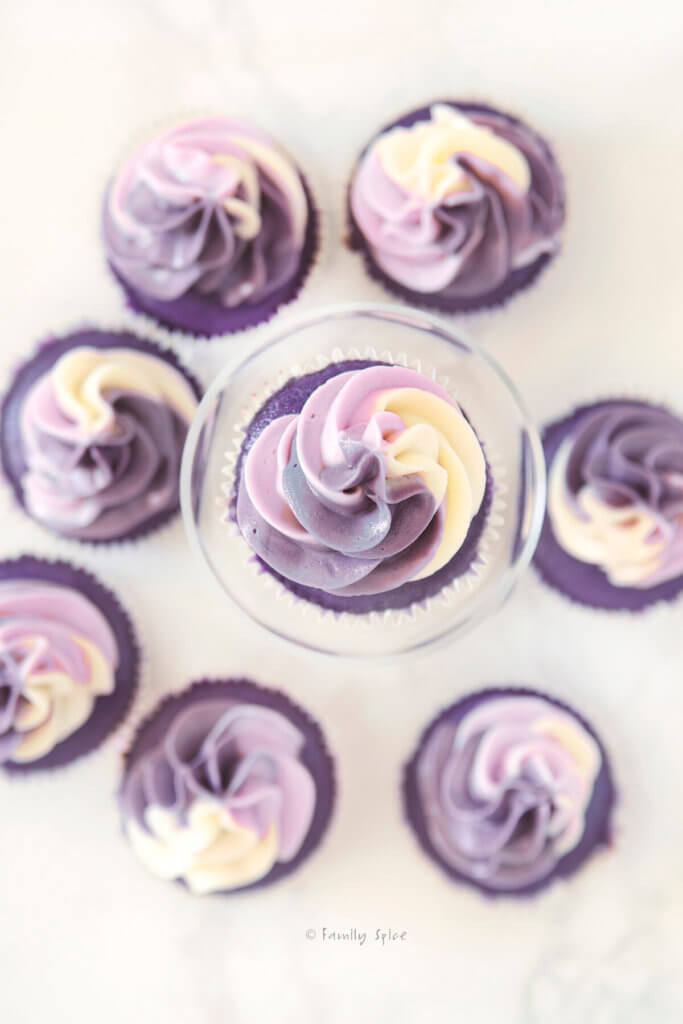
The very first time I added Kool-Aid to cake mix, I was actually making Kool-Aid cupcakes. They were for my kids’ elementary bake sale and they were HUGELY popular with the kiddos.
For these Kool-Aid cupcakes, I used the liquid grape Kool-Aid drops. We added enough Kool-Aid to the batter until we were happy with the flavor, then just added a small amount of red and blue food coloring.
Want to save this recipe?
For the frosting, I still wanted an ombre effect, so I mixed up 3 colors of frosting using Kool-Aid and food coloring: plain buttercream, light purple and dark purple.

I used this spatula technique for the frosting. In one large piping bag I used my long metal spatula to spread out each of the frostings along the side of the pastry bag, creating three stripes of colors. Then I pressed the pastry bag flat, gently smoothing the colors down and start piping the cupcakes.
You can use any cupcake frosting tips to create the effect you like. I personally like frosting tip #1M, which is what I used for the pictured Kool-Aid cupcakes. Remember to use large piping bags, along with the larger tip couplers.
Recipe tips and FAQs
Depending on which flavor and which mix (powdered or concentrate) you use, you will have to adjust how much Kool-Aid you add to the cake batter. Some flavors and mixes might require a touch of food coloring.
For example, powdered grape Kool-Aid turned out more gray than purple when baked into the cake, so it needed the addition food coloring to get a brighter purple color.
You definitely do NOT have to use Kool-Aid to make an ombre cake. Simply use your favorite food colorings to create the same desired effect. The baking and assembly process would be the same with food coloring as it was with Kool-Aid.
Some food colorings do have a nasty after taste, especially when you are using larger quantities. I like to use these Wilton food colors because they are super vibrant and very little goes a long way. Plus, Wilton has a great color formulas for you to follow, so no expensive experimenting needs to be done.
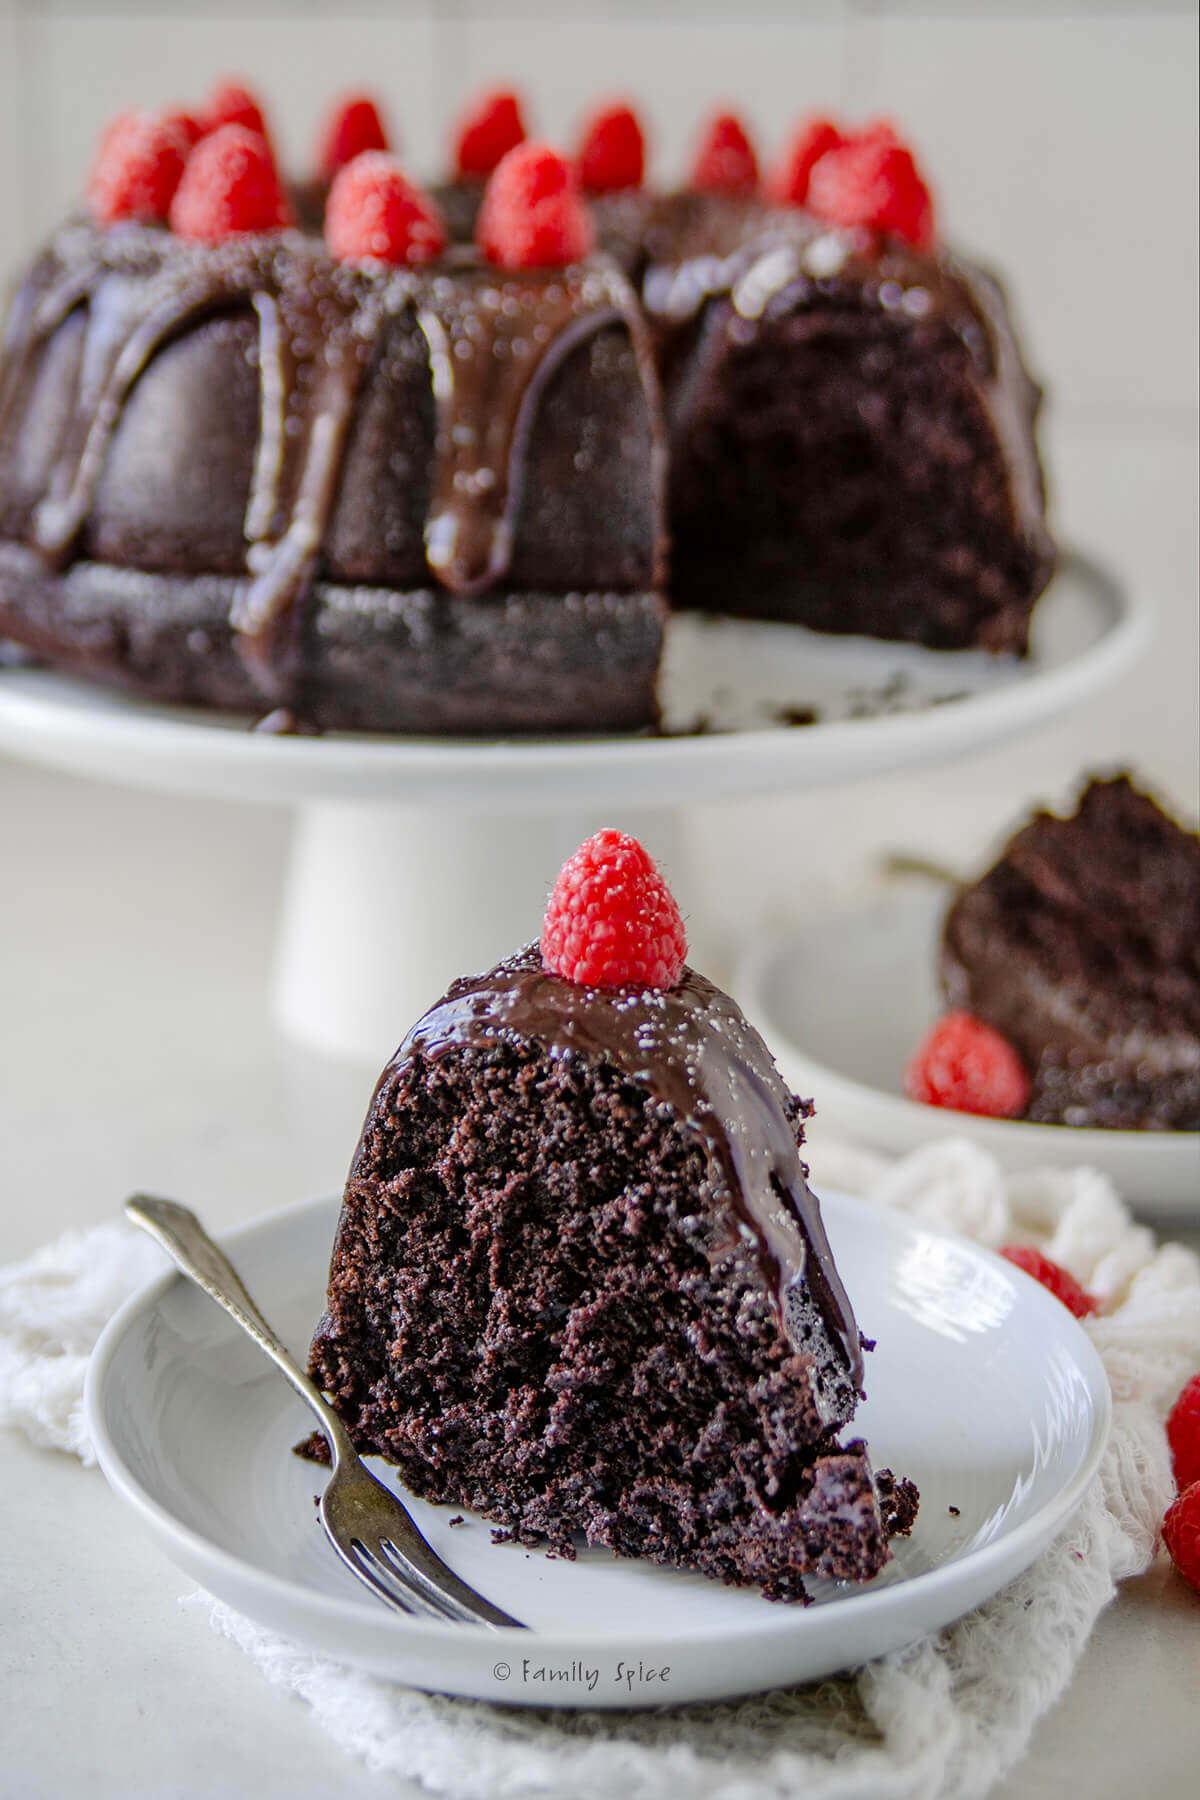
Remember, ombre cakes are great for any occasion, like birthdays, baby showers, bridal showers and even the holidays. My friend Jenni frosted her chocolate Halloween cake with a beautiful orange ombre effect.
Another ombre frosting method is to mix one big bowl of the darkest color then smear it onto the bottom part of the cake. Add more white frosting to lighten the color and then smear the lighter color above the dark. Add some more white frosting to lighten it up again and then smear it on last. Then use the offset spatula to smooth it all together.
Storing/Freezing Instructions
TO STORE: Because of the frosting, I suggest storing any leftovers in an airtight container and refrigerate for up to 5 days.
TO FREEZE: You can also freeze leftovers. Wrap in foil, parchment paper or plastic wrap and freeze for up to 4 months.
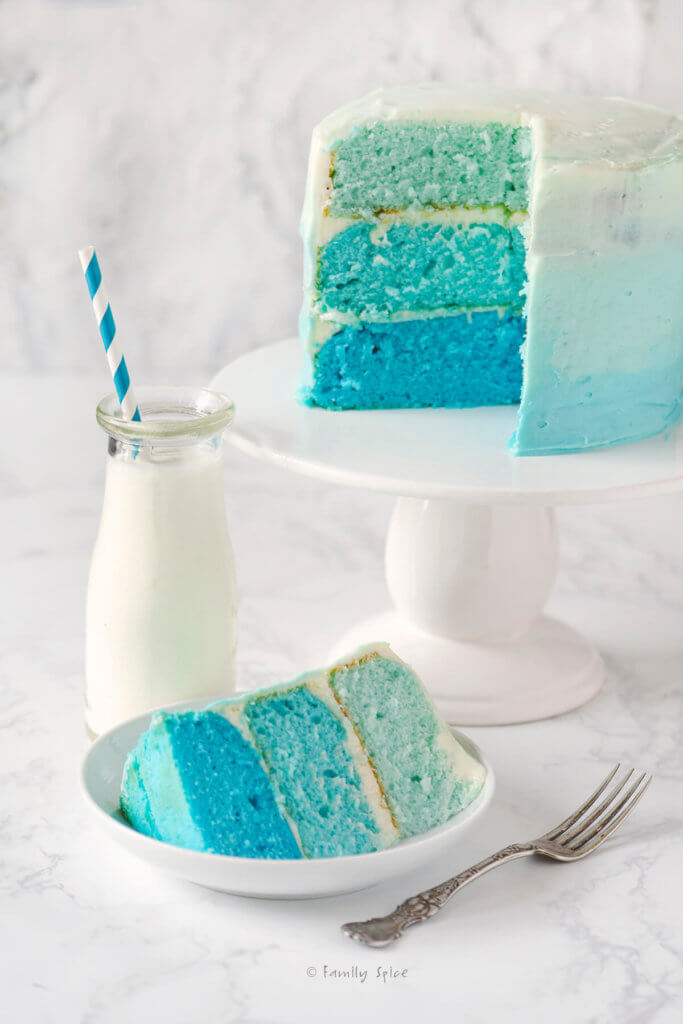
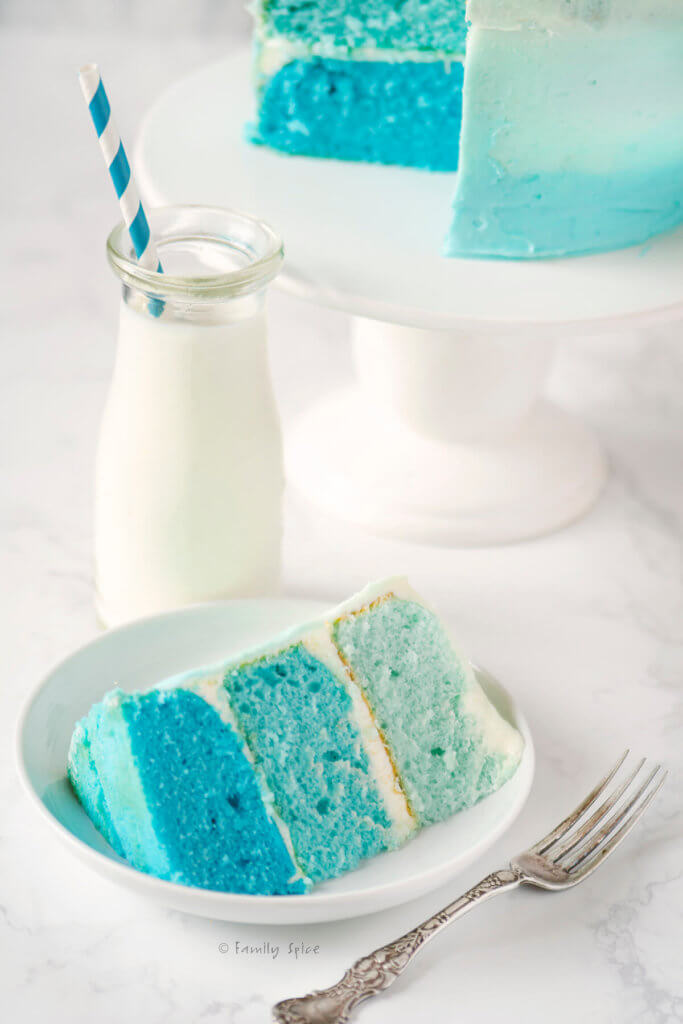
A kool aid cake in this case is white cake mix with Kool-Aid drops mixed into the batter in different amounts to give the cake a beautiful ombre effect. The blue ombre cake featured in this post was made with blue raspberry Kool-Aid drops. I also used the drops in the frosting to create the same 3-tiered ombre effect.
Don’t let this cake leave you thinking you can’t serve it at a party. This 3-layer 6-inch cake feeds 12 very easily.
The term ombré is French meaning shaded. It refers to colors graduating from light to dark or vice versa. An ombre cake is frosted from light to dark color, blending together using any color. The inside of the cake usually has layers showing three different shades of the same color featured as well.


If you are enjoying my recipes, please sign up for my newsletter and get my free 28-day meal plan! You can also follow me on Instagram or Facebook.

Kool Aid Cake
Ingredients
- 1 box of white cake mix*
- 1 ¼ cup water*
- ⅓ cup olive or vegetable oil*
- 3 egg whites*
- 1 cup unsalted butter room temperature
- 3 cup powdered sugar
- 3 tablespoon heavy cream
- Kool-aid drink powder or liquid concentrate
- Food coloring as needed
Instructions
Make the cake
- Preheat oven to 350ºF.
- Coat 3 6-inch cake pans with oil and line the bottom of each pan with with parchment paper.
- In a medium size bowl, combine cake mix with water, oil and egg whites. Mix until batter is smooth. Divide batter evenly into 3 bowls.
- Using your Kool-Aid, add enough drops or powder until you have three distinct shades of colored cake batter. Some Kool-Aid mixes, like grape, need the addition of food coloring to make the colors brighter. Add food coloring, if needed.
- Transfer batter into prepared cake pans and bake cakes until a toothpick inserted into the center of the cake comes out clean, about 25 minutes.
- Once baked, allow cakes to cool completely on a cooling rack. Do not begin frosting the cake until the cakes are completely cooled.
Make the frosting
- To make the frosting, whip together butter, powdered sugar and heavy cream until smooth.
- Stack cakes on a cake stand, starting with the darkest cake layer on the bottom. Add buttercream frosting generously between each layer.
- Frost and smooth out entire cake in buttercream frosting, making sure that the top is generously covered in frosting. The sides of the cake do not have to be completely covered, just a crumb coat.
- Divide frosting evenly into three bowls.
- Using your Kool-Aid, add enough drops or powder until you have three distinct shades of colored frosting. Just like with the cake batter, you might need to add food coloring to make the colors brighter.
Assemble the cake
- You can add the colored frosting onto your cake using a piping bag with large round tip, a Ziploc bag with the corner clipped off, or with an offset spatula. Starting at the bottom of the cake, pipe rings of your darkest frosting completely around the cake about a third of the way up the sides of the cake.
- Pipe rings of your second color above the dark. Do not worry about piping completely straight or even rings.
- Finish off with the lightest color, piping the rings until you get to the top of the cake.
- Once all fo the colors are on the sides of the cake, it is time to smooth it all together, creating the ombre effect.
- Use an off-set spatula held perpendicular to the table start smoothing the layers of color together. Remove any excess frosting. Clean your spatula between use.
- Continue smoothing the layers together until desired effect is reached.
- Each box of white cake mix makes approximately 24 cupcakes. To create the ombre effect for the cupcakes, spread stripes of each frosting into a large piping bag, as described in the blog post. Gently press the bag flat and smooth out frosting. Pipe frosting onto cupcakes using desired frosting tip.
Notes
Nutrition
Nutrition Disclaimer
Nutritional information is an estimate provided to you as a courtesy. You should calculate the actual nutritional information with the products and brands you are using with your preferred nutritional calculator.
PS If you try this recipe, why not leave a star rating in the recipe card right below and/or a review in the comment section further down the page? I always appreciate your feedback.
You can also follow me on Pinterest, Facebook or Instagram. Sign up for my eMail list, too!
Written by Laura Bashar
Hi, I’m Laura, a certified professional cook and cookbook author living in San Diego. I have been sharing my family’s favorite recipes inspired from all over the world since 2008. Let’s cook up something fun!

I’m loving the colors of these! Wow, SO pretty. And it’s a fun cake, too. Kool-Aid? Why not! Very creative — thanks.
That purple version is so stunning with the flowers on top and the shades of lavender and purple!