


Skip the candy aisle and make your own homemade caramel apples! Fresh, crisp apples dipped in buttery homemade caramel make a fun fall treat for Halloween parties, autumn gatherings, or a little sweet indulgence at home.
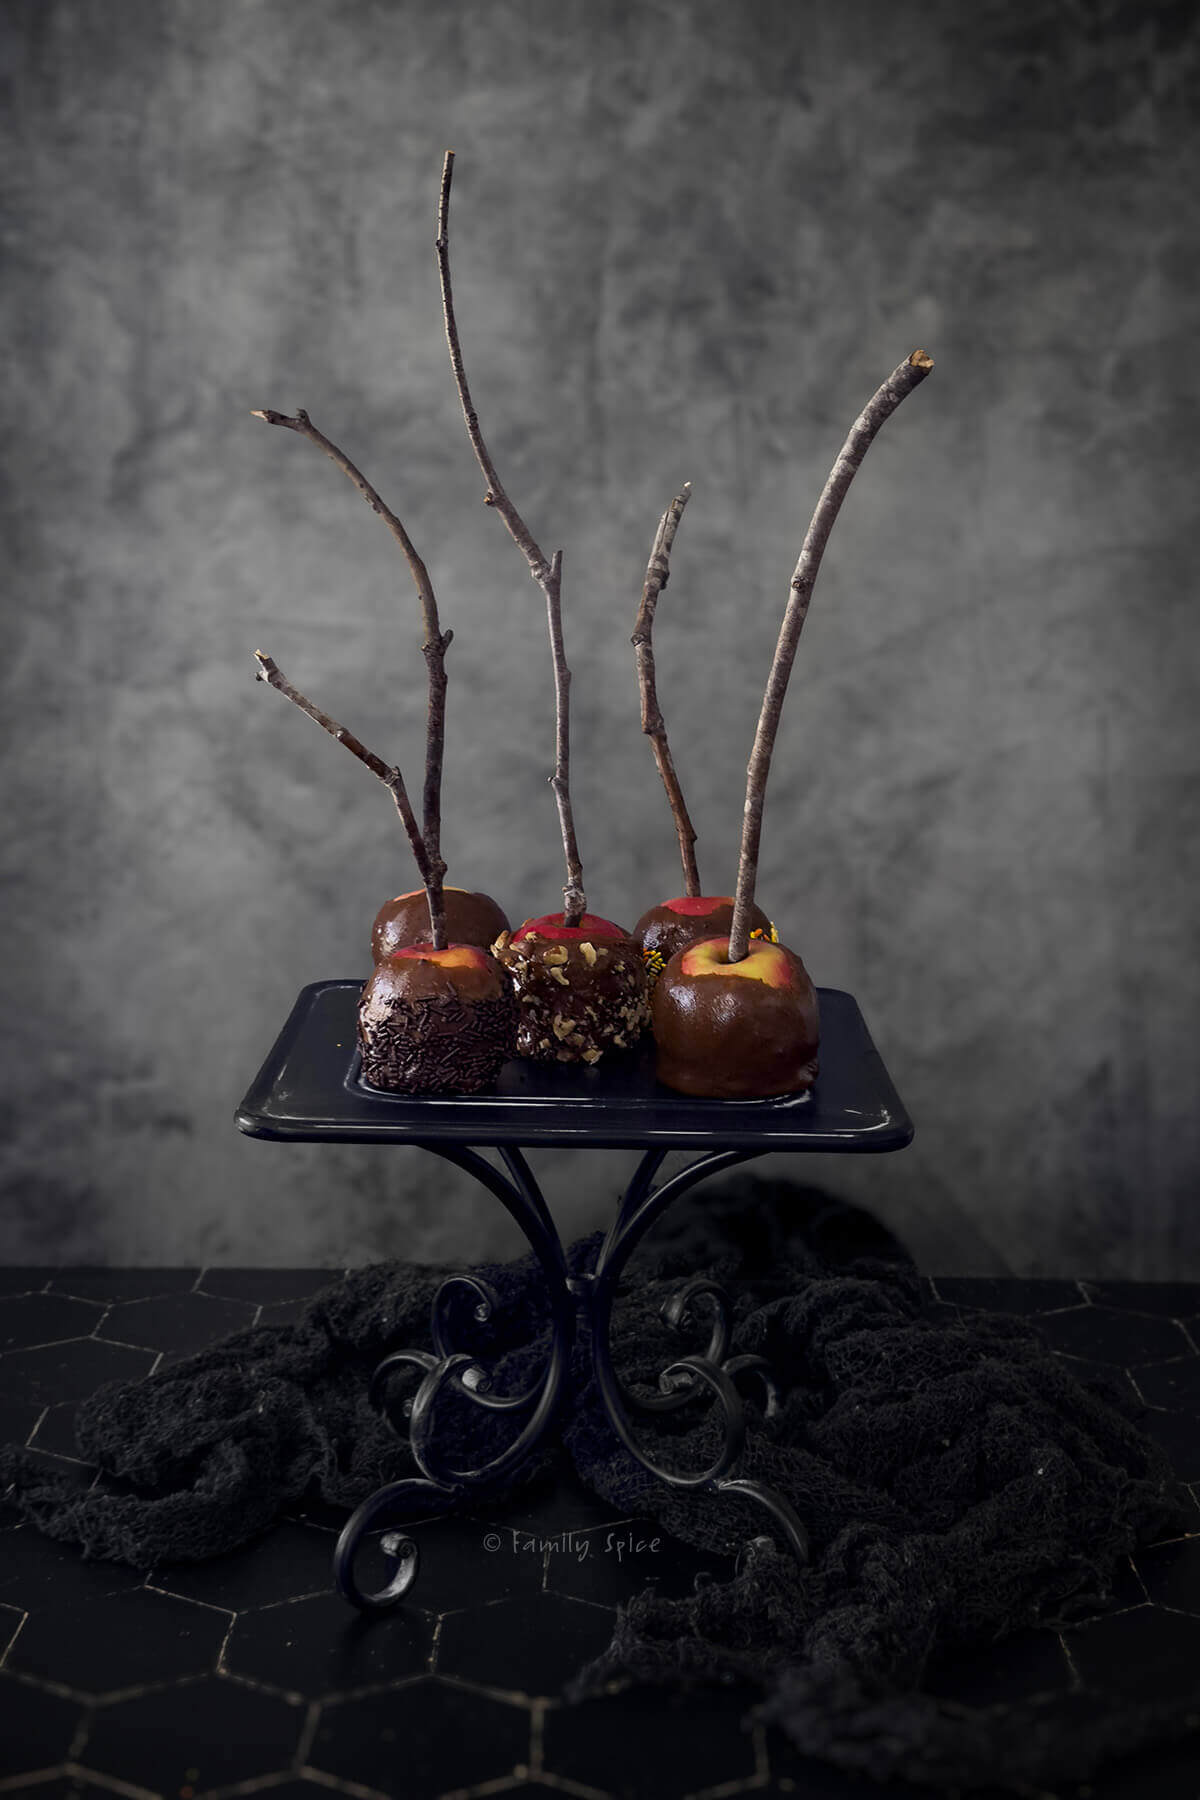
October treats are always fun to create… and EAT! Even though my kids are getting older, they still look forward to the hokey halloween goodies that I come up with each year.
Caramel Apples are one classic Halloween treat that you see this time of year. There is something about this sweet and sour combination that makes your mouth water for more.
The first time I made caramel apples was for my neighbor’s son’s birthday party. They were going to be given out to the kids as their parting treat. She requested 28 caramel apples. Hmmm.. Okay. Challenge accepted!
Jump to:
Supplies needed
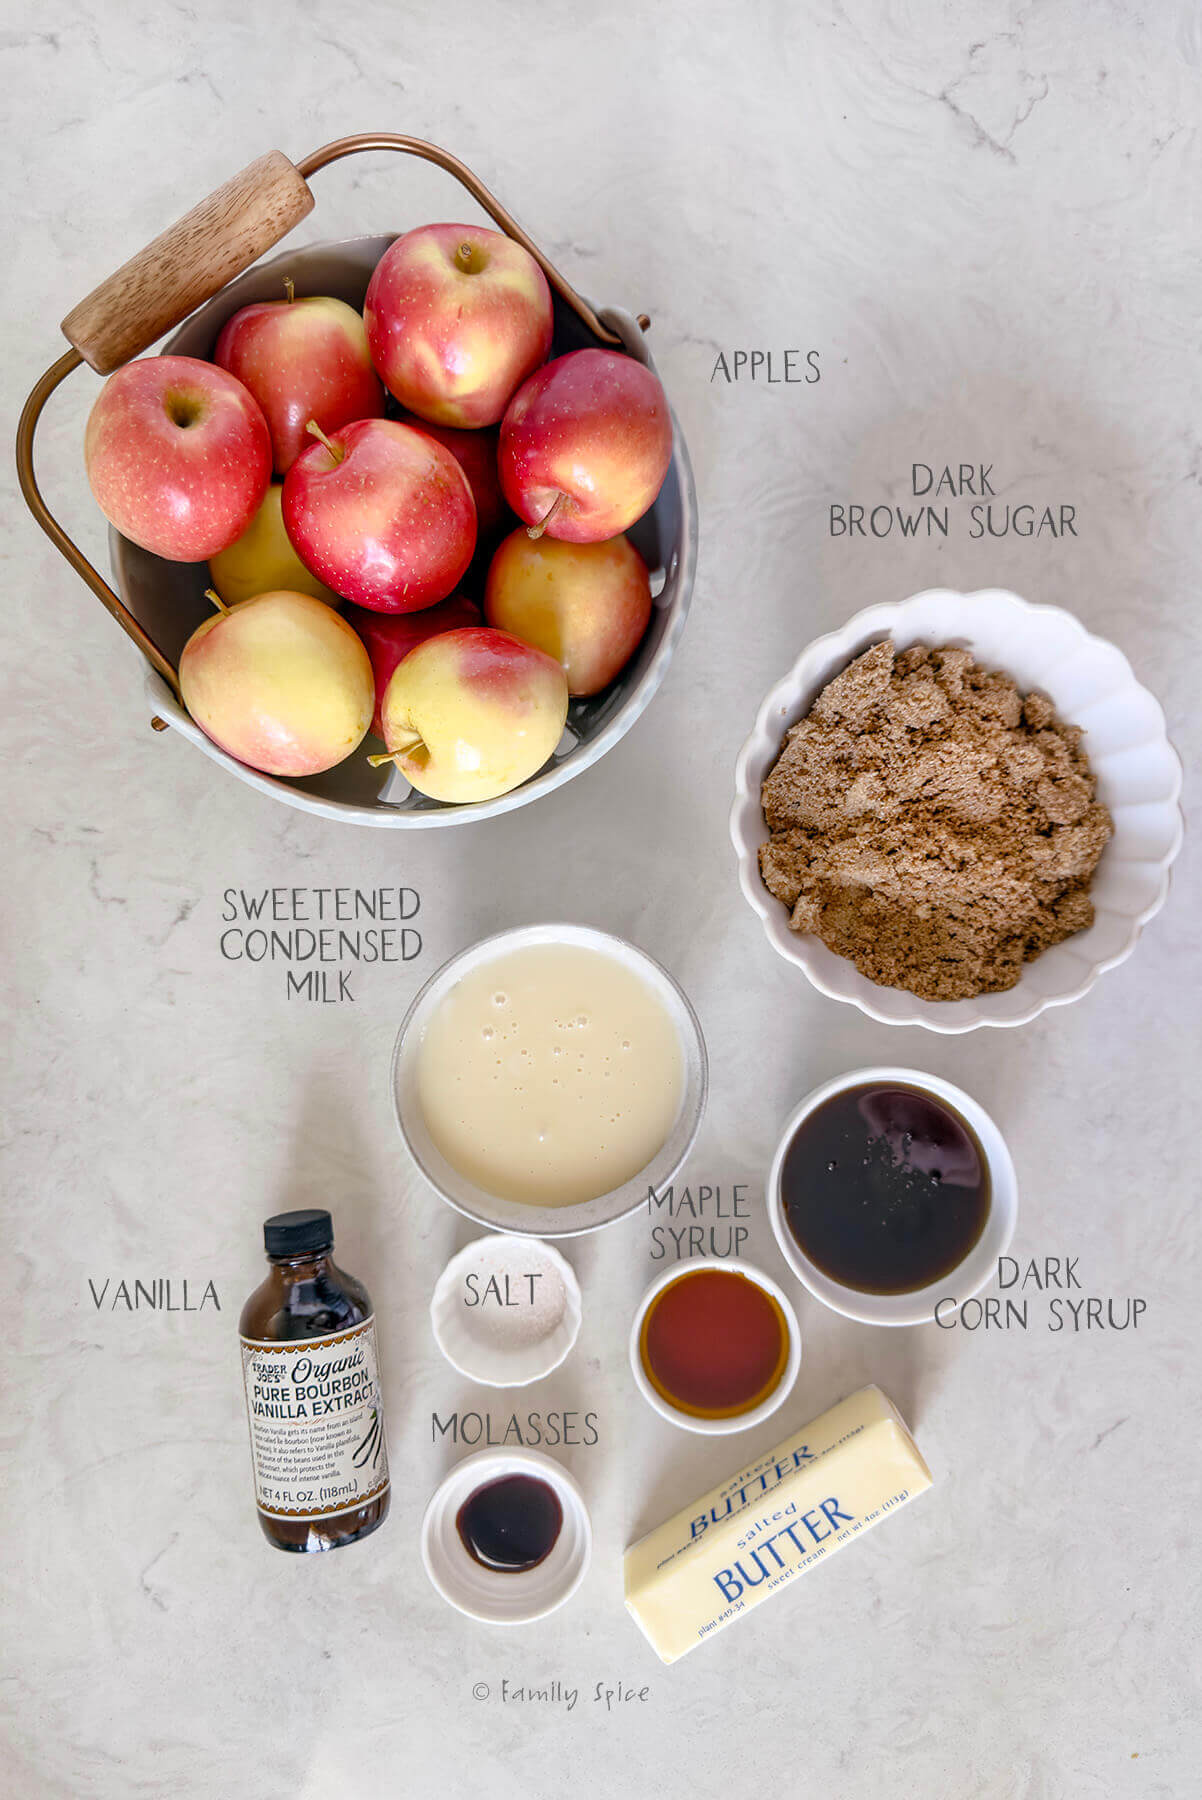
- Apples: The best apples to use for caramel apples are Granny Smith. Their tartness makes a terrific contrast to the sweet caramel. But you can use any variety of apples you want.
- Brown sugar: You can use dark or light brown sugar.
- Butter: Homemade caramel is made with butter because nothing beats the flavor it brings!
- Sweetened condensed milk: This tends to be more stable than heavy whipping cream and adds more flavor, too.
- Maple syrup: A little adds more depth of flavor, beyond just sugar.
- Molasses: A little helps balance the sweetness and adds a deeper color. Don’t have molasses? Substitute with 1 teaspoon honey, 1 teaspoon maple syrup or 1 ½ teaspoon brown sugar.
- Corn syrup: This gives the smooth consistency we are looking for and helps the caramel stick to the apples. It’s an essential in candy making. You can use dark or light corn syrup.
- Pantry staples: Vanilla extract and salt.
- Lollipop sticks: You can also use popsicle sticks or actual sticks – just be sure to clean them thoroughly first!
- Extras like chopped nuts, mini chocolate chips, chocolate jimmies, festive sprinkles.
- Candy Thermometer: You truly cannot make caramel without this because the temperature of your caramel is crucial in determining doneness. You can use a digital or traditional candy thermometer.
- Heavy bottomed saucepan: Don’t use a cheap pan. You are working with melted candy which reaches 236ºF. Thin pan create hot spots and can burn your caramel. A high quality, heavy bottomed soup or saucepan helps control the temperature of your candy.
- Wooden spoon: Wood has a high heat tolerance and it doesn’t conduct heat. This means it won’t cool the caramel while you stir it which can cause crystallization, creating a grainy caramel.
- Pastry brush: As you cook your caramel it can splash on the sides, which can burn and crystalize. A wet pastry brush helps you clean the sides of the pan.
Step-by-step directions
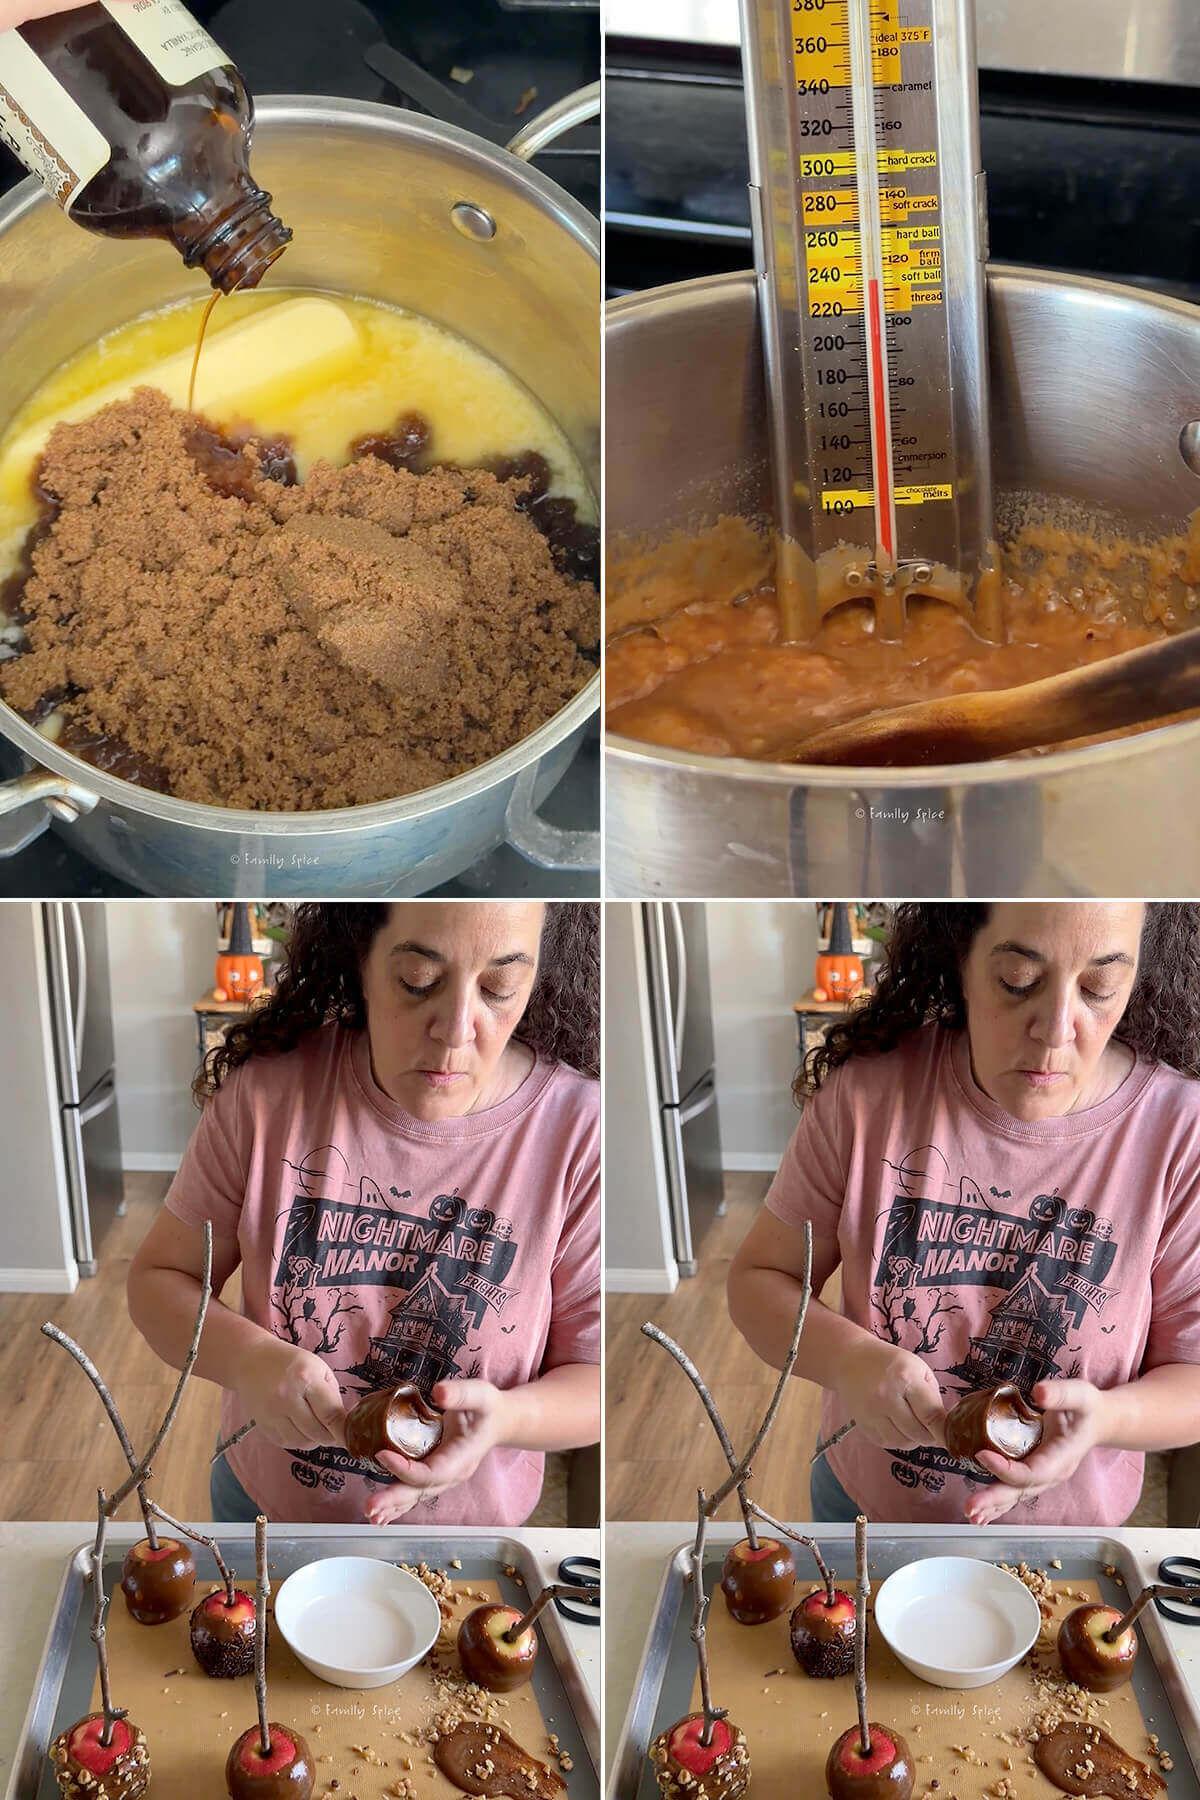
- Prep the apples. Wash and scrub off excess wax off apples and dry completely. Insert a popsicle stick into the core of the apple until secure. Place apples on a baking sheet lined with wax paper or silicone mat.
- Heat the mixture. Combine the ingredients in a thick bottomed 3-quart pot. Stir with a wooden spoon on medium-low heat until all the sugar dissolves and mixture is smooth.
- Soft ball stage. Continue cooking until the candy reaches 236°F (113°C), known as the Soft Ball Stage. The mixture will be thick and bubbling hot!
- Cool caramel slightly. Carefully transfer the caramel to a metal bowl and cool until 200ºF, dipping temperature. This takes about 10 minutes.
As the caramel cools, you have a short window to dip all the apples. You can keep it warm at 200ºF in a mini slow cooker on the low setting. Just be sure to stir it every 10 minutes so the butter doesn’t separate.
- Dip the apples. Dip the apples into the caramel and let the excess drip off. Rotate the apples and let the caramel smooth over and cool some more, then place on lined baking sheet.
- Fix the bottoms. Once cooled, if you don’t like the look of a little pooled caramel on the bottom of your apples, you can use your fingers to press the caramel back on to the apples.
- Add the extras. If you want to add chopped nuts or sprinkles to your apples, place them on a small plate and roll the apples over it. This is a fun way to get the kids to help you!

Expert tips and recipe FAQs
The apples turned out ridiculously cute and of course, delicious. The kids were excited to see their treats at the end of the party. I have made these again and again. My favorite is using mini apples and placing them on a halloween charcuterie board.
Want to save this recipe?
When dipping the apples, you can submerge most of it or half of it in the caramel. I personally like leaving half of the apple exposed. As much as I love the flavor of caramel, I hate how sticky it is to my teeth. And it also means less sugar getting eaten!
Clean up tips. Candy making is sticky work and you will have a sticky mess afterwards. The clean up is actually simple. Fill your pot with water and heat it up on the stove. Place your hard caramel coated utensils in the pot and the caramel will melt and dissolve in the water. Pour it all out and wash everything clean with soap.
To serve, place your apples on wax paper or any nonstick surface. Even when set, caramel apples can stick to a serving dish.
Storing Instructions
TO STORE: Loosely cover the apples and store in the refrigerator for up to 1 week.


If you are enjoying my recipes, please sign up for my newsletter and get my free 28-day meal plan! You can also follow me on Instagram or Facebook.

Homemade Caramel Apples
Ingredients
- 1 lb dark brown sugar
- 1 cup butter unsalted
- 14 oz sweetened condensed milk
- ⅓ cup maple syrup
- ½ teaspoon vanilla extract
- 1 teaspoon molasses
- ¼ teaspoon salt
- ⅔ cup dark corn syrup
- 12 medium apples unwaxed with stem removed
- 12 sturdy lollipop sticks

Instructions
- In a thick bottomed 3-quart stock pot combine brown sugar, butter, condensed milk, maple syrup, vanilla extract, molasses, salt and corn syrup. Stir with a wooden spoon on medium-low heat until all the sugar dissolves. There should be no grittiness (sugar crystals) when you test by rubbing a little of the caramel between your fingers.
- Brush down the sides of the pan with a wet pastry brush to dissolve any sugar crystals that might form on the pan sides.
- Attach a clip-on candy thermometer to the pan and cook caramel at a rolling boil until the thermometer reaches 236°F, stirring constantly and slowly with a wooden spatula. Continue to occasionally brush the sides down with a pastry brush.
- Carefully pour caramel into a metal bowl.
- Cool until the temperature lowers to 200°F, at which point you are ready to dip the apples.
- While the caramel is cooking and cooling, prepare a large baking sheet, covering it either with buttered aluminum foil, wax paper or silicone baking mat.
- Place apples on prepared baking sheet.
- Insert lollypop stick into each apple, about 2-inches, starting from the top and pushing down into the apple core.
- When the caramel has cooled enough for dipping (to 200ºF), dip the apples in, one by one, by holding on to the stick, and vertically lowering the apple into the caramel, submerging all but the very top of the apple. Pull the apple up from the caramel and let the excess caramel drip off from the bottom back into the metal bowl.
- Place the dipped apple back onto the prepared baking sheet. The caramel will pool a little at the bottom of each apple.
- Place into the refrigerator to chill for at least 15 minutes.
- Once the caramel has chilled a bit, remove from the refrigerator and use your fingers to press the caramel that has dripped to the bottom of the apples, back on to the apples.
- Take whatever coatings you want and press them into the apples for decoration.
- Return to the refrigerator to chill for at least one hour before serving.
Notes
Nutrition
Nutrition Disclaimer
Nutritional information is an estimate provided to you as a courtesy. You should calculate the actual nutritional information with the products and brands you are using with your preferred nutritional calculator.
PS If you try this recipe, why not leave a star rating in the recipe card right below and/or a review in the comment section further down the page? I always appreciate your feedback.
You can also follow me on Pinterest, Facebook or Instagram. Sign up for my eMail list, too!
Written by Laura Bashar
Hi, I’m Laura, a certified professional cook and cookbook author living in San Diego. I have been sharing my family’s favorite recipes inspired from all over the world since 2008. Let’s cook up something fun!


Yum! I love caramel apples! This recipe looks amazing Laura! I love your festive Halloween spirit! I’m definitely going to make this recipe this weekend, but first I’ll have to take your advice and invest in a candy thermometer! Thank you so much for the fall recipe!
Kendra
Most definitely get a candy thermometer. Candy making requires precise temperatures. Good luck and can’t wait to see how your apples turn out!