


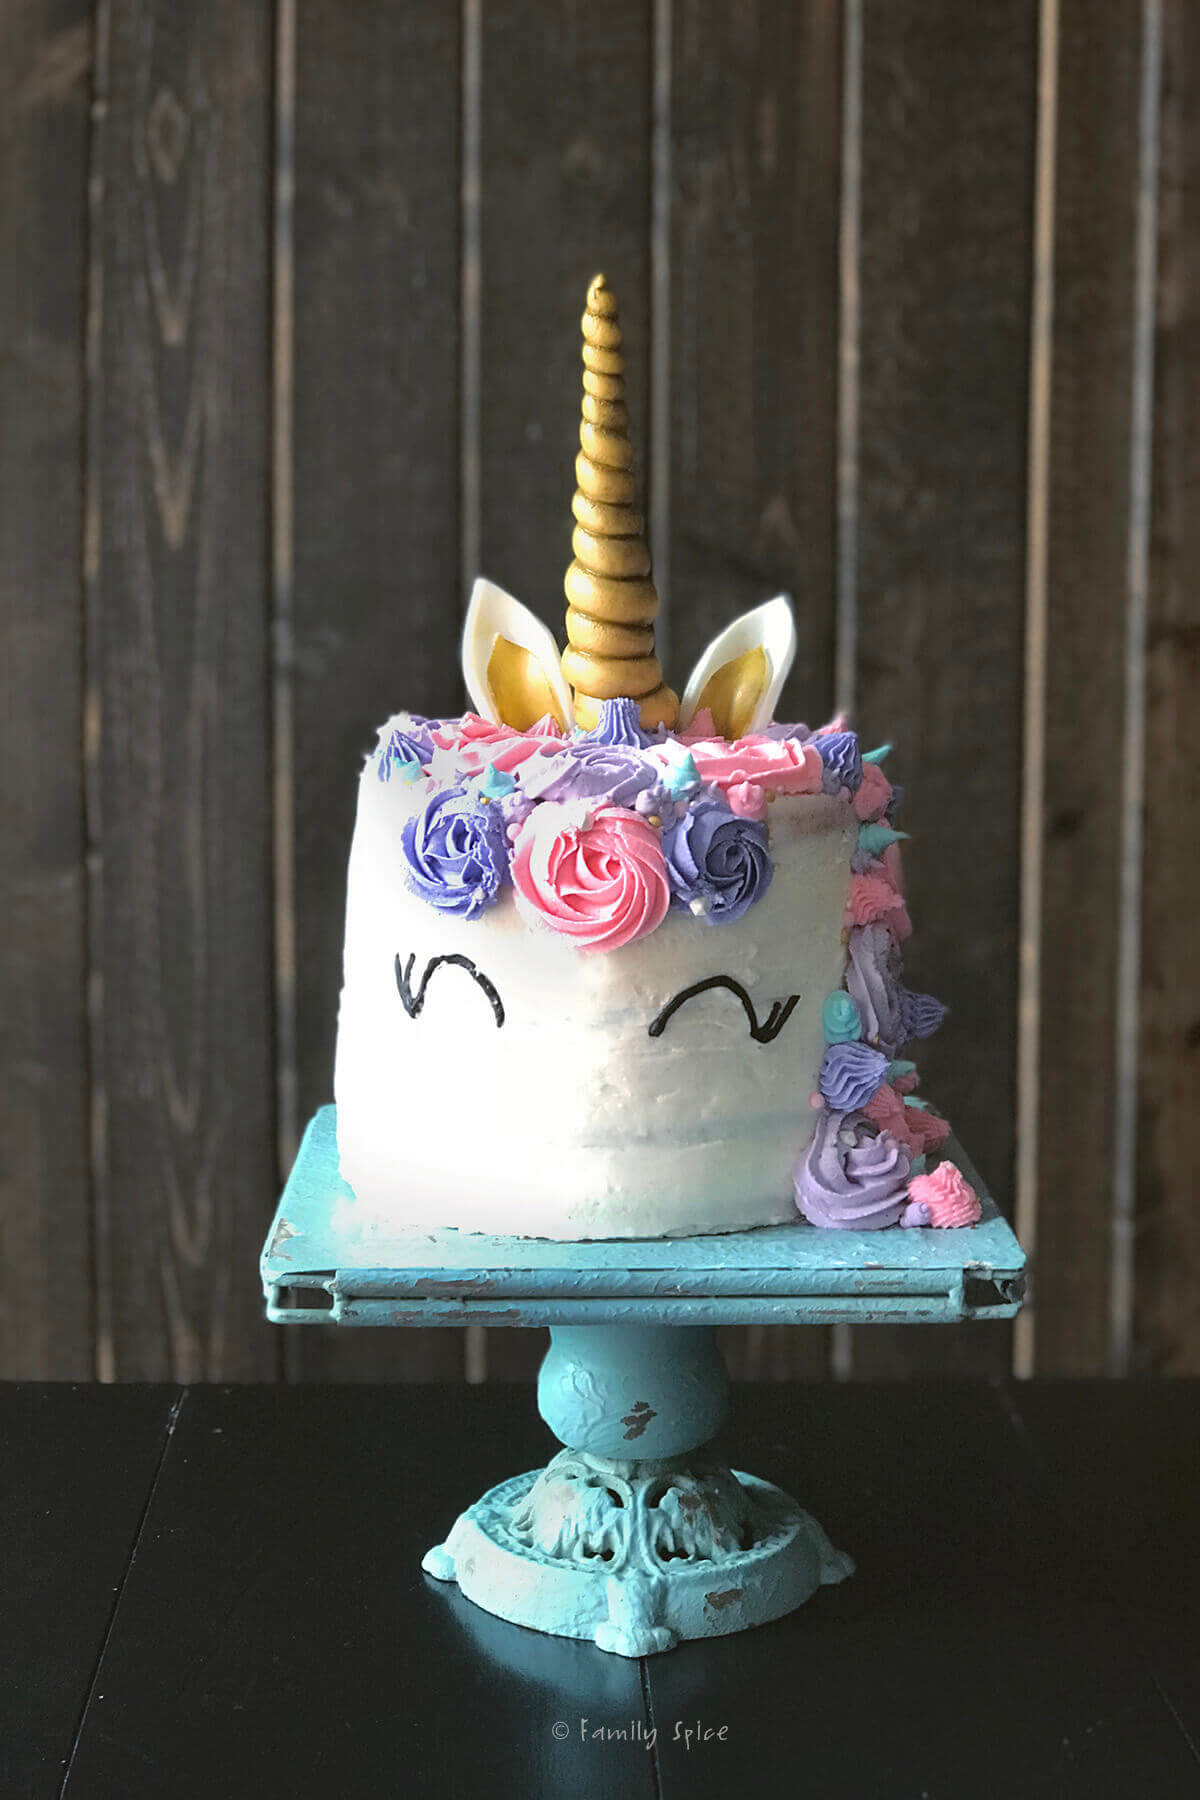
Making a unicorn cake doesn’t have to feel like magic. This step-by-step guide walks you through every detail, from supply list to piping techniques – plus a free ear template to help you nail the look.
Reader’s Reviews
“Thank you for the tutorial with so many helpful hints. The ear template was a lifesaver and I will be using your buttercream frosting recipe for now on. 3 batches of frosting did the trick. My 5 year old granddaughter was ecstatic to see ‘her unicorn cake‘.” — Verlajean
I bake all of my kids’ birthday cakes every year. It’s what I do to make their day a little bit special. Sometimes it’s a simple box mix cake that I’ve kicked up a notch or two, other times it’s all homemade from top to bottom. I take each child’s special request and do my best to make something amazing for their very special day.
From soccer balls to batman, kit kat ice cream cakes and tiramisu, I’ve made it all. My boys are pretty specific about the flavor of their cakes, but my daughter is all about themes. Despite her turning 13 this last October, she is still a glitter loving little girl and she requested a unicorn cake.
Jump to:
- Reader’s Reviews
- Recipe highlights
- Ingredients you need
- Step 1: Bake the cake
- Step 2: Make the unicorn horn
- Step 3: Make the unicorn ears
- Step 4: Paint your fondant gold
- Step 5: Frost your cake
- Step 6: Add the accessories
- Expert tips and recipe FAQs
- Storing/Freezing Instructions
- Unicorn Cake with Rainbow Layers
- Written by Laura Bashar
Recipe highlights
- Detailed Steps: When I began my plans to make a unicorn cake back in 2019, there were a few You Tube videos, but no one really broke down the steps in detail for me. If you are new to baking, it can appear to be a daunting task. So I kept track of every step with precise details and measurements as I made this cake. And since this cake, I have made several more unicorn cakes, fine tuning the steps so you won’t have to look all over the internet for help or answers.
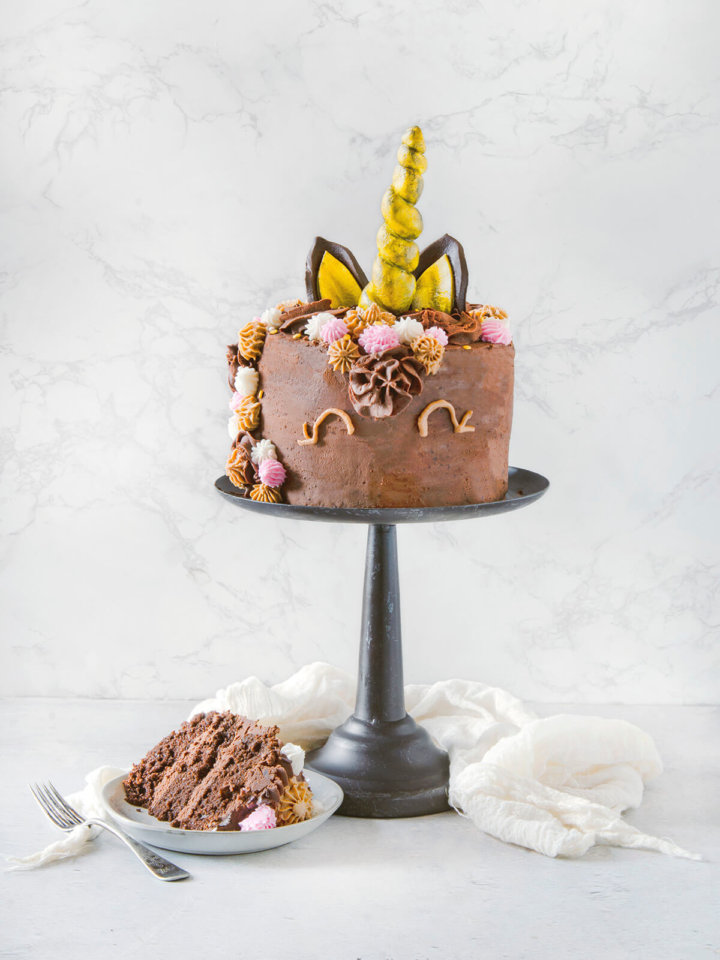
- Customize: Just because I made a rainbow cake covered in pinks and purple swirls, doesn’t mean you have to follow my color scheme. Feel free to customize your unicorn to whatever your unicorn love wants. The technique is the same. And if you are a fan of chocolate, you should check out my chocolate unicorn cake.
- Budget Friendly: I have not priced out what a bakery would charge for creating a unicorn cake, but I am pretty sure you can do it yourself at a fraction of the cost. And I used two box mix cakes and pre-made fondant to help keep the cost down. If you plan ahead, use coupons and shop for the lowest prices, this cake won’t break the bank.
- Perfectly Imperfect: My daughter and her friends loved the cake and didn’t notice my mistakes. Whatever piping skills you may or may not have, if you take each step of the cake decorating process as a small feat to conquer, you can recreate this unicorn cake without completely going insane!
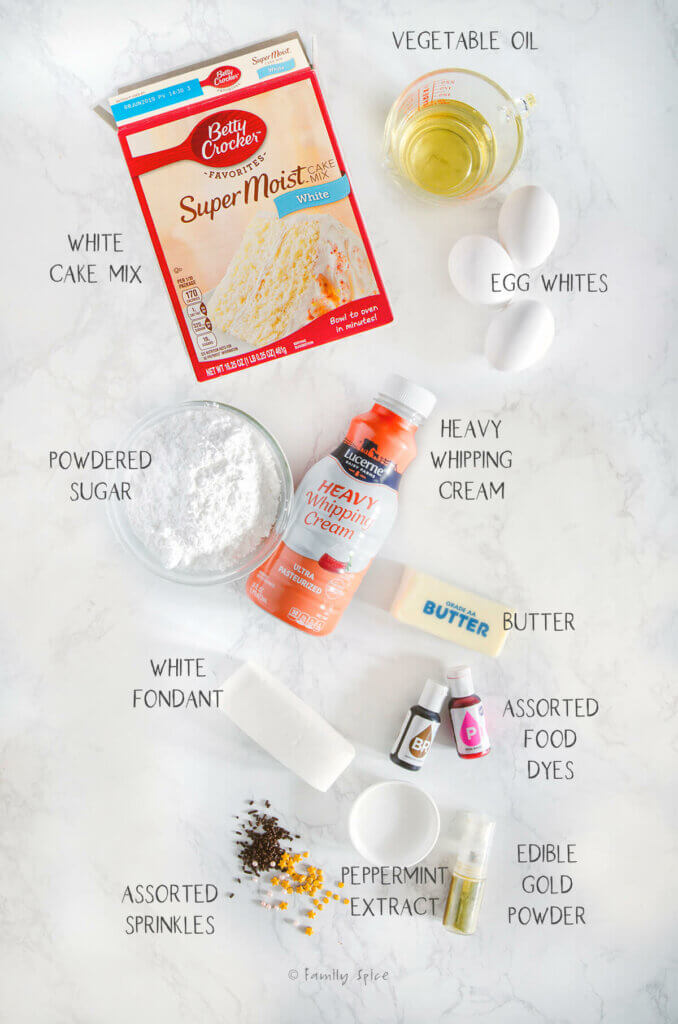
Ingredients you need
This post contains some affiliate links for your convenience (which means if you make a purchase after clicking a link I will earn a small commission but it won’t cost you a penny more)! Read my full disclosure policy
Now unicorn cakes tend to be on the tallish side, so a minimum three layer cake is needed. If you use one box mix, you can make a three layer cake using 6-inch cake pans. If you want an 8 or 9-inch 3-layer cake then you will need 2 boxes of cake mix.
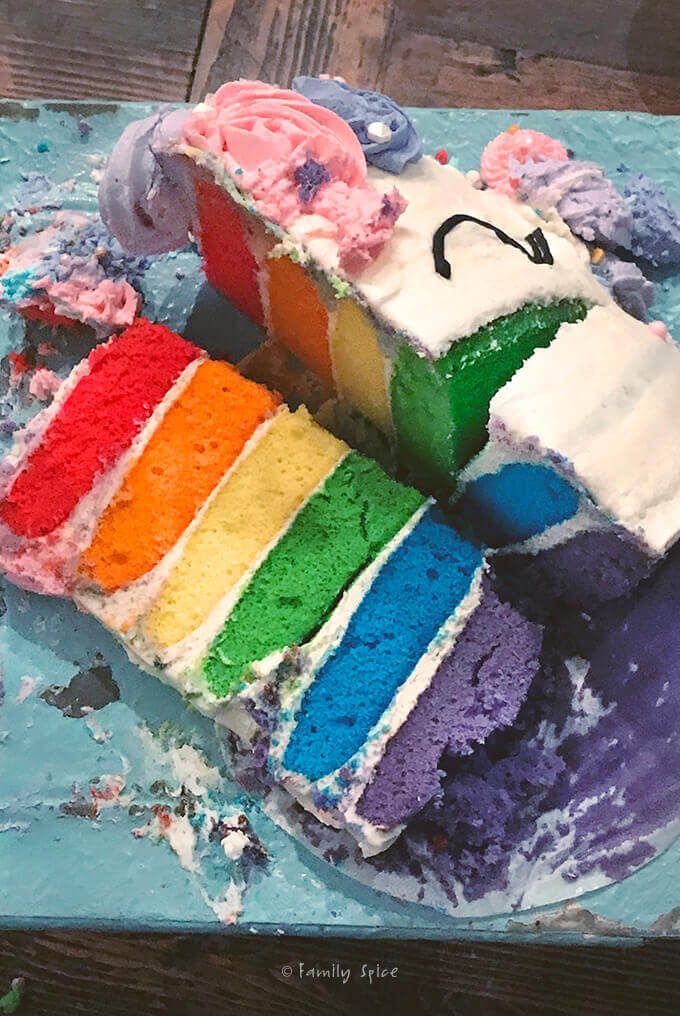
For my daughter’s cake I decided to make the interior of the cake with six layers of different colored cakes: red, orange, yellow, green, blue, purple. So, I used two 99¢ white cake mixes for the cake.
I include details on the ingredients and equipment you need in the step-by-step directions that follows.
- White cake mix: You will need one or two boxes, depending on how large a cake you want to make.
- Ingredients to make the cake: This will vary depending on the cake mix you use, but it is typically water, vegetable oil and egg whites.
- Assorted food dyes: You will need the colors to dye the rainbow cake as well as the buttercream frosting. I like to use these food dyes from Wilton as a little goes a long way.
- Buttercream frosting: This is made with butter and/or shortening mixed with powdered sugar and thinned out with heavy whipping cream. For colors I used white, pink, blue, light purple and periwinkle.
- White fondant: The unicorn horn and ears are shaped using white fondant. You can make your own or buy premade fondant. I have made marshmallow fondant from scratch. It is not a complicated thing to create, but it is time consuming.
- Edible gold powder: This is used to paint the unicorn horn and inner ears gold.
- Peppermint extract: You combine this clear extract with the gold powder to make the edible gold paint you need.
- Black frosting or black candy melts: The eyes can be piped using frosting you dyed black. You can also melt black candy melts or dark chocolate for the eyes.
- Assorted sprinkles: To add more bling (and sugar) you can add sprinkles of gold, white or pink.
Step 1: Bake the cake

To make sure all of the layers were even, you need to divide each box mix batter into thirds. This is most easily done with a kitchen scale.
- Weigh your empty bowl. Place your empty large mixing bowl on the scale first then zero out your scale.
- Mix the batter. Follow the directions on your box and mix up one box of white cake batter into the empty bowl you just weighed.
- Mark the new weight. Once the batter is done, read the weight of the scale and divide this number by 3. I swear this is the most complicated math problem you will have to solve for this unicorn cake project!
- Divide the batter. For me, the batter weighed 31.3 ounces. So, I needed two other bowls and I weighed out 10.4 ounces of batter into each of the three bowls. Remember, when weighing the batter, you need to place each bowl on the scale empty and zero out the scale before you pour in the batter.
- Dye the batter. Once the batter is divided into the three bowls, I added the dyes. I used these food dyes from Wilton and I used their website to estimate the color recipes to get the bright colors we liked.
- Bake the cakes. I baked the 3 colorful cake layers in 3 greased 8-inch cake pans lined with parchment paper.
- Repeat with second box of cake mix. While the first three cakes are baking, clean the mixing bowl and mixed up the second box of white cake mix, divide the batter again 3 ways and add food dye to the last 3 cake layers.
I prefer to bake the cakes the day before I decorate them. This gives the cakes time to cool completely. Wrap the cakes in plastic wrap and keep chilled in the refrigerator. Cold cakes are easier to frost than warm ones.
Step 2: Make the unicorn horn

I also recommend making the unicorn horn and ears the day before since they are made with fondant and need to dry and harden.
- Roll out the fondant. For the unicorn horn, you will need about a golf ball sized amount of fondant. Roll the fondant out on a silicone mat or flat work surface dusted with powdered sugar.
- Form a log. Roll the fondant into a tapered rope of fondant about 19-inches long. Start by rubbing your ball of fondant between your two hands until you have a nice log forming. Then you roll it on your work surface using both hands, stretching it outwards as you roll to make it longer.
- Taper the end. Add more pressure on one end of the rope as you roll it back and forth to form a tapered end. Again, this takes some practice to get it right. If you don’t like how smooth your tapered rope is turning out, roll it back into a ball and start again.
- Wrap the horn. Carefully wrap the fondant around a bamboo skewer. Starting with the thinner end of your fondant rope, wrap it around the tip of the bamboo skewer. Then continue to wrap it around as you work your way down the bamboo stick.
- Trim the ends. The length of your fondant unicorn horn is up to you. Mine was about 9-10 inches long. Snip off the extra fondant when you get the horn to the length you like and tuck it into the fondant.
- Let it dry overnight. Stick your unicorn horn somewhere safe to dry out. It can be in a glass, a vase or in a big piece of styrofoam.
This is a fun project for your kid-helper. Remember, they have years of play-doh and slime experience behind them so don’t be surprised if they roll out a beautiful rope of fondant better than you!
Step 3: Make the unicorn ears

- Print out template. You can use tear drop cookie cutters for the unicorn ears or print out the unicorn ear template I have provided. If using the template, be sure to cut out the ears so you have it ready.
- Roll fondant flat. Starting with a tennis ball size amount of fondant press it down flat on your work surface. Use a small fondant rolling pin to roll the fondant smoothly until it is about ⅛-inch thick. Again, use powdered sugar to keep things from sticking.
- Cut ears out. Place the large ear template over the flat fondant and use the tip of a sharp knife to cut two out. Repeat with the smaller inner ears, too. You will have four pieces in total.
- Assemble the ears. Lightly moisten the back of one of the smaller ears with water and position it on top of one of the larger ears. The bottom of the ears should line up together on the straight end edge. Do not press the fondant too much as every indentation shows up. Repeat with the other two ear pieces until both ears are ready and assembled.
- Dry the ears. The unicorn ears aren’t simply flat pieces of fondant sticking straight out of the cake. Instead, they are rounded. This is simple to recreate. Place each assembled ear over a small rolling pin or whisk handle, with the little ear facing down. Gently smooth the ear over the curve so the ears are curved together facing down. Let it dry overnight.
Step 4: Paint your fondant gold
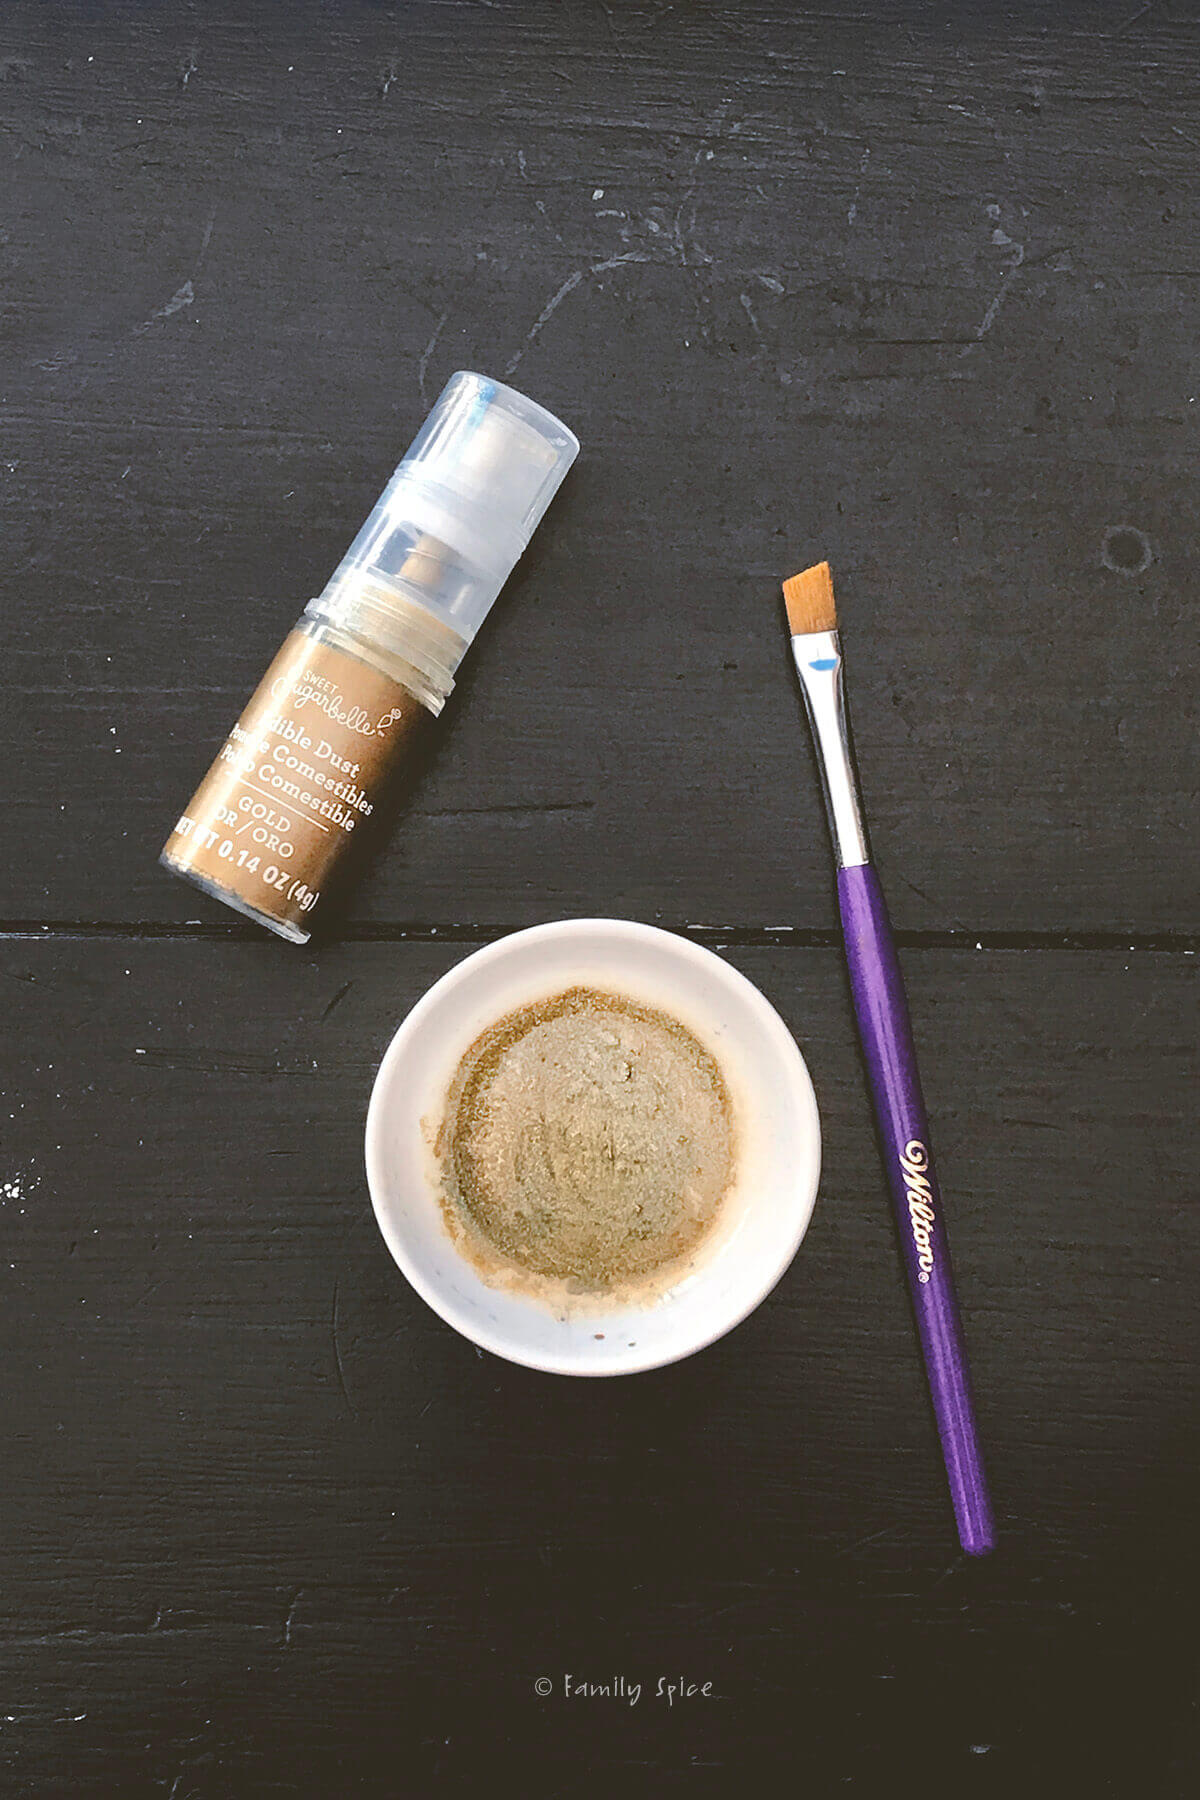
When your fondant ears and horn have hardened, you can paint them. I chose to paint the inner ear and horn both gold
- Make the gold paint. Add a teaspoon of edible gold powder into a small bowl with a few drops of vodka, peppermint or almond extract. The alcohol evaporates as the gold paint dries, keeping the gold adhered to the fondant.
- Paint your fondant. Use a brand new paint brush or one that is exclusively used for food. Simply paint your fondant unicorn horn and ears with the edible gold paint and let it sit for a couple hours (or up to overnight) to dry completely. I painted the entire unicorn horn and only the inner small ears gold for this step.
You could roll out strips of fondant to make the eyes and eyelashes and paint them gold, too. But I found this to be super tedious and chose not to do the eyes in gold.
Step 5: Frost your cake

I frosted the six rainbow layers of my unicorn cake with white frosting. You can use store bought canned frosting or make your own. I used this recipe for all of the frosting (both the white frosting and the dyed) used in my unicorn cake.
Want to save this recipe?
You will need approximately 6 to 6 ½ cups of white frosting to frost just the basic white all over the six layers of cake.
- Flatten the layers. Using a serrated knife, cut the domed tops from each of your cake layers to flatten them.
- Assemble the bottom layers. Add a dab of frosting on you cake stand and lay your bottom layer down. I typically flip the cake over so the bottom of the cake (the flattest surface) is facing up. Cover with white frosting.
- Assemble the layers. Add the next layer of cake and top with frosting, continuing until all the layers are on top of each other.
- Frost the sides. Either with a piping bag or offset spatula, add frosting to the sides of the cake. Smooth out the sides and top of the cake. I find that using a rotating cake stand and acrylic scraper helps create a smooth professional looking frosted cake.
- Chill the cake. Let the cake chill in the refrigerator for a few hours to help the frosting set.
While the cake chills, add your desired food coloring to an additional 6 cups of white frosting. This is for the unicorn mane. I made more frosting than I needed, but again, I wanted to be sure I did not run out.
I used four colors: pink, purple, periwinkle and light blue. I also used similar frosting tips, too. Be sure to have plenty of piping bags, small piping couplers and large piping couplers.
- 2 cups light pink buttercream frosting in decorating bags fitted with #824 and #4B tips
- 1 cup blue buttercream frosting in a decorating bag fitted with a #2A tip
- 2 cups light purple buttercream frosting in a decorating bag fitted with a #824 tip
- 1 cup periwinkle buttercream frosting in decorating bags fitted with #2A and #4B tips
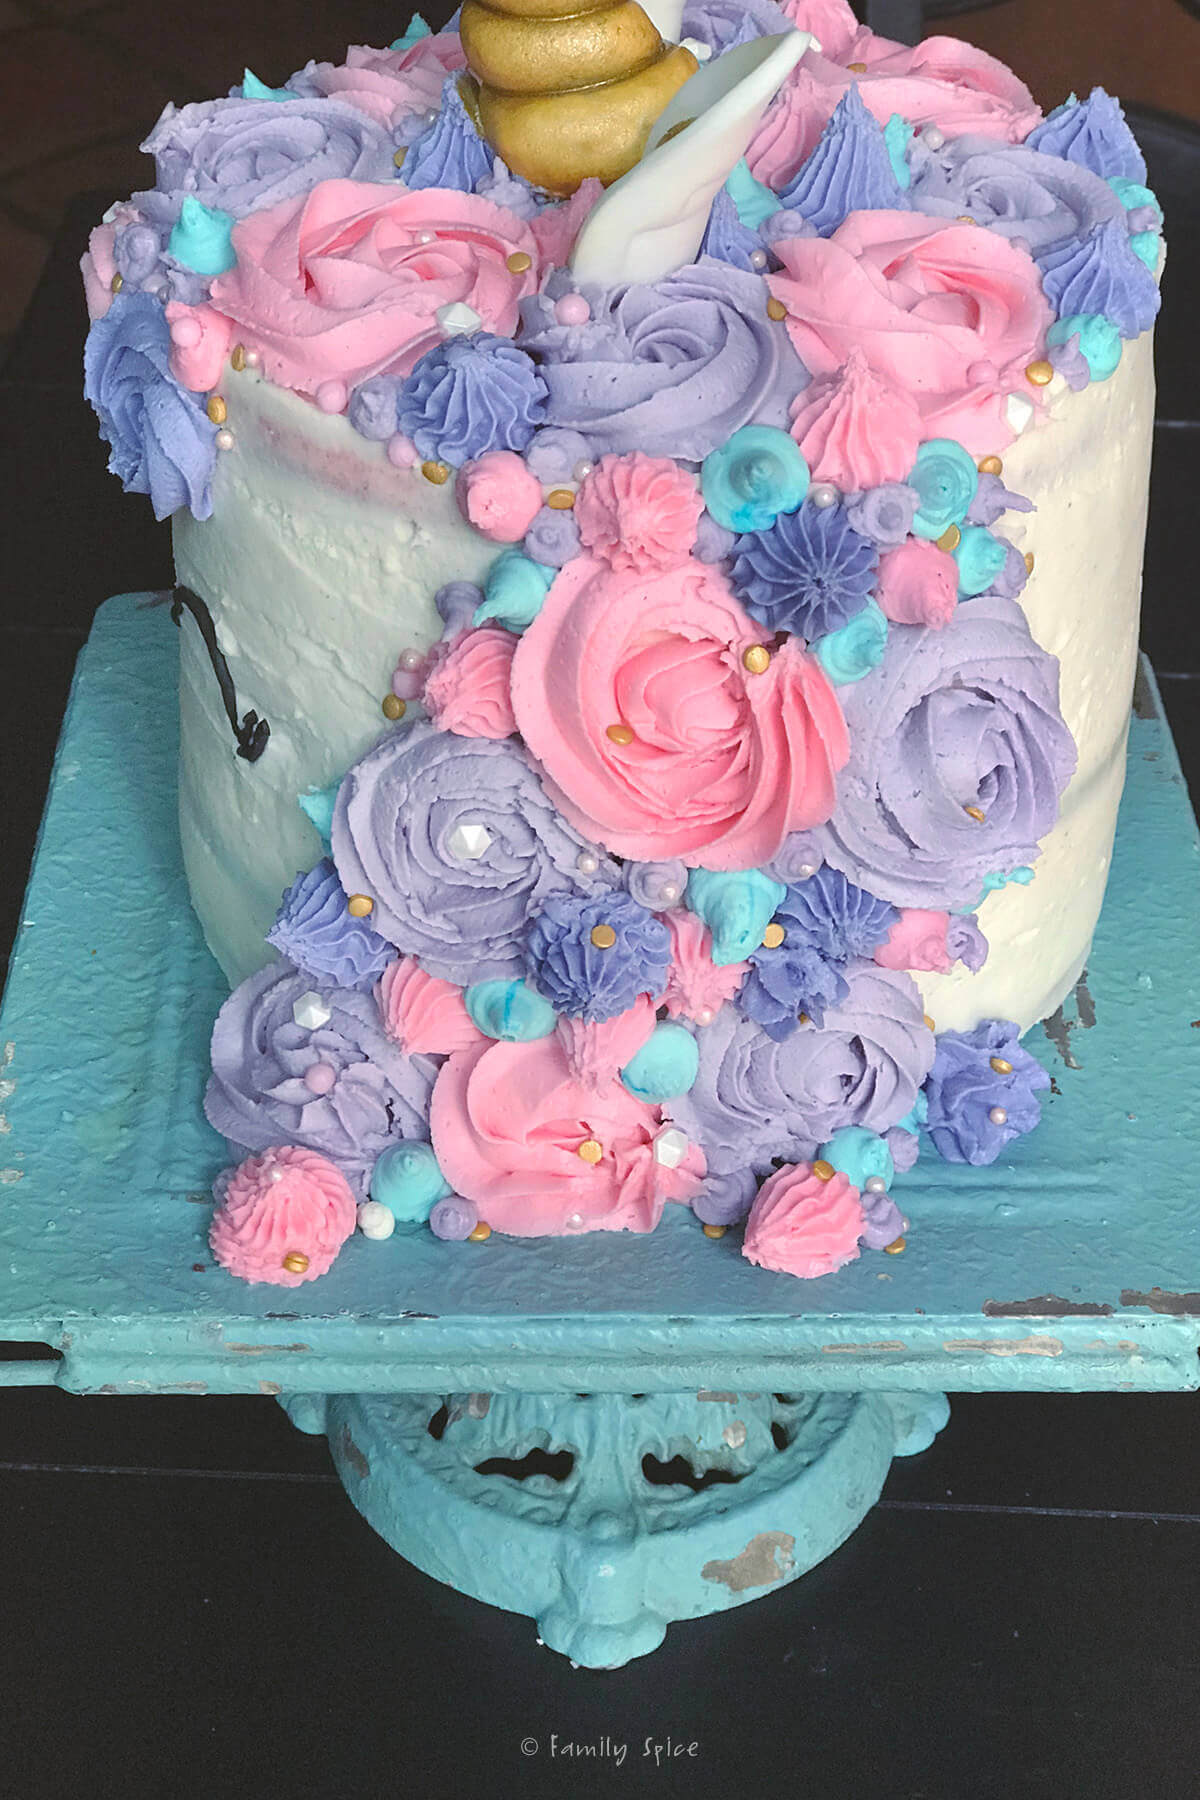
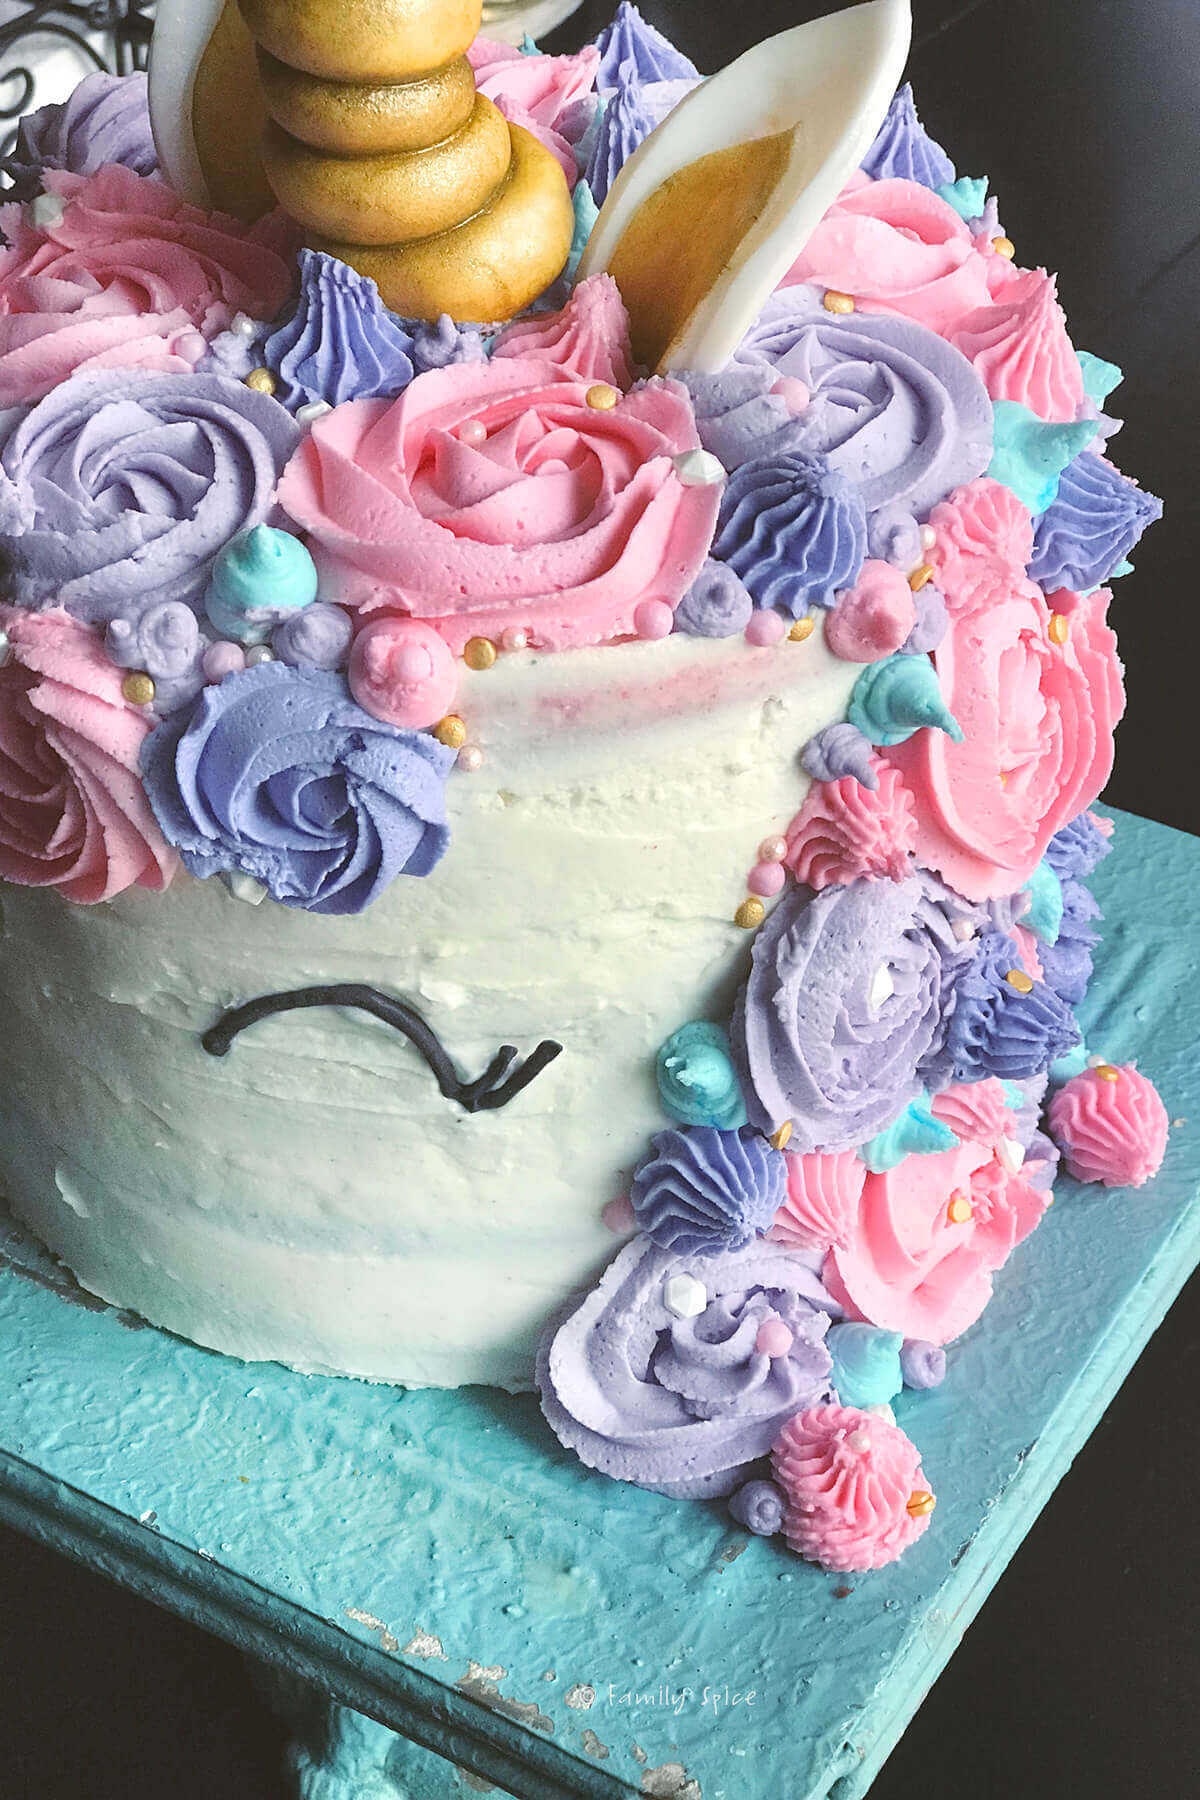
I must have examined dozens and dozens of decorated unicorn cakes to analyze the mane that cascaded down the side of the cake. I ended up just winging it! I included multiple pictures of different angles of my unicorn cake so you could get a better idea of how I piped it.
- Start at the top. To keep things symmetrical on top, start by piping four large rosettes (I used the periwinkle color) along the top of the cake edge, equidistant from each other. In between these four rosettes, pipe 4 more rosettes to fill the space in between using a second color (I used pink). This was with the #2A tip.
- Add medium sized swirls. Fill in the top with various medium sized rosettes and stars.
- Finish with smaller designs. Fill in the gaps with the smaller dollaps of frosting until the top is full.
- Pipe the mane. I used the same method for piping the front hair and side mane of the cake: pipe the larger swirls first, add the medium designs and fill in the gaps with the smaller designs.
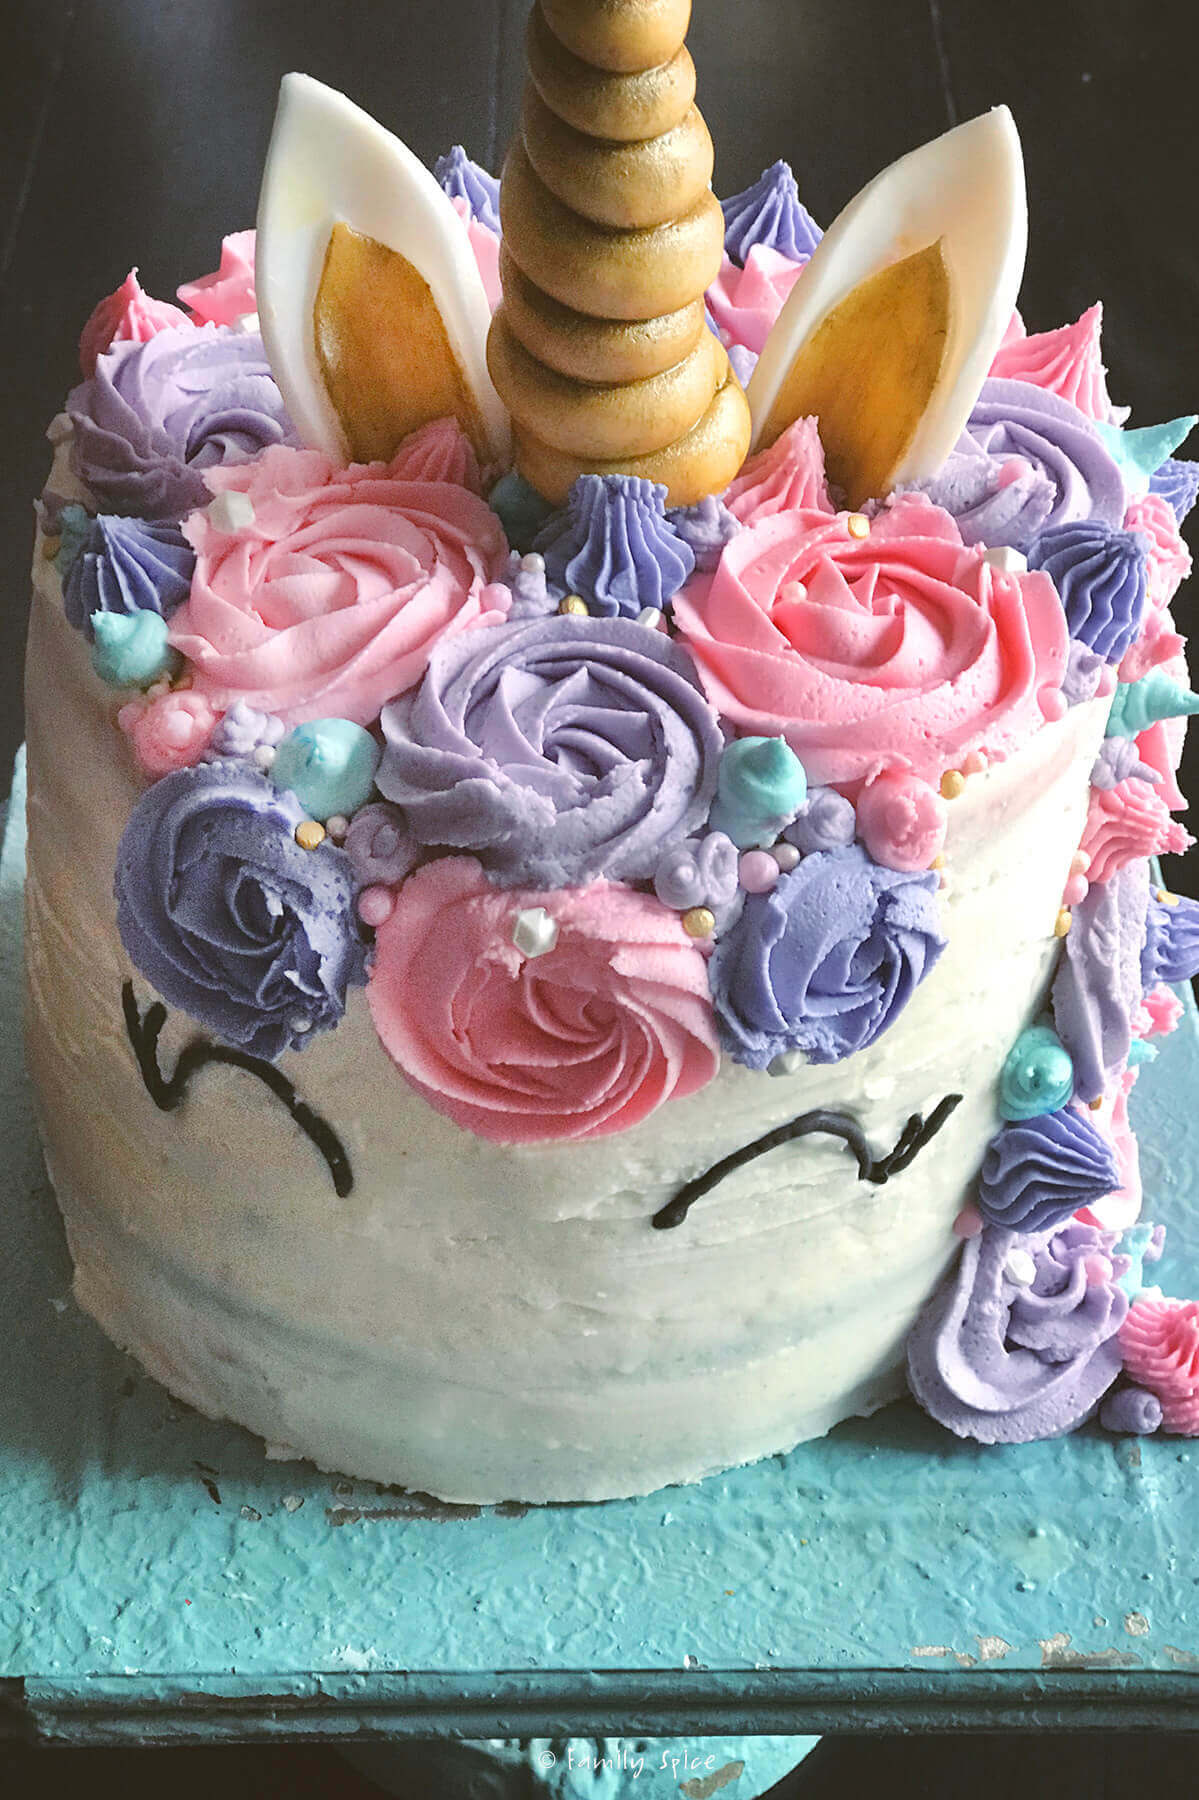
Step 6: Add the accessories
For the eyes, you have several options. You can pipe the eye slits on the side of the cake directly. My thin pipes were not sticking and kept falling off. So I settled on using melted black candy melts. You can also use melted chocolate.
- Melt the chocolate. In a microwave safe bowl, melt the candy melts or chocolate in 30-second increments, stirring in between until melty and smooth.
- Transfer to a bag. Transfer the melted chocolate into a small resealable bag and cut a corner off to make a little piping bag.
- Draw eye design on paper. My daughter helped me and drew eye slits on paper.
- Pipe the eye slits. Place a sheet of parchment paper over the paper and pipe the eye design on the parchment paper.
- Let it harden. It doesn’t take long for melted chocolate to harden. Once it is dry and hard, carefully place the eyes on the side of the cake.
- Add the horn. Push the stick end of the horn into the top of the cake. I had the horn leaning a slight bit towards the front of the cake, not pointing straight up.
- Add the ears. Gently place the ears on either side of the horn. I placed each ear at a slight angle pointing in opposite directions of each other.
- Final touches. You can pipe some frosting near the ears and horn if you need to hide any blemishes. My daughter wanted sprinkles so we added some gold, white and pink sprinkles to the cake to bling it up.
NOTE: If you don’t have much room in your refrigerator, you will probably need to add the unicorn horn right before you serve the cake.
Expert tips and recipe FAQs
So this unicorn cake with the six rainbow colored layers was definitely not for the faint of heart. It took two full days to bake, assemble and decorate. It took gobs and gobs of frosting to decorate.
I spent several nights lying awake thinking about each aspect of decorating this cake. I really am all thumbs with the piping bag and I was afraid I had over-promised my daughter when I said I could make this unicorn cake.
I just found these unicorn silicone molds on Amazon. You can easily make your horn, ears and eyes using fondant. I have not tried it, but I certainly understand the appeal for using something like this to make easy unicorn parts with less stress. Totally up to you.
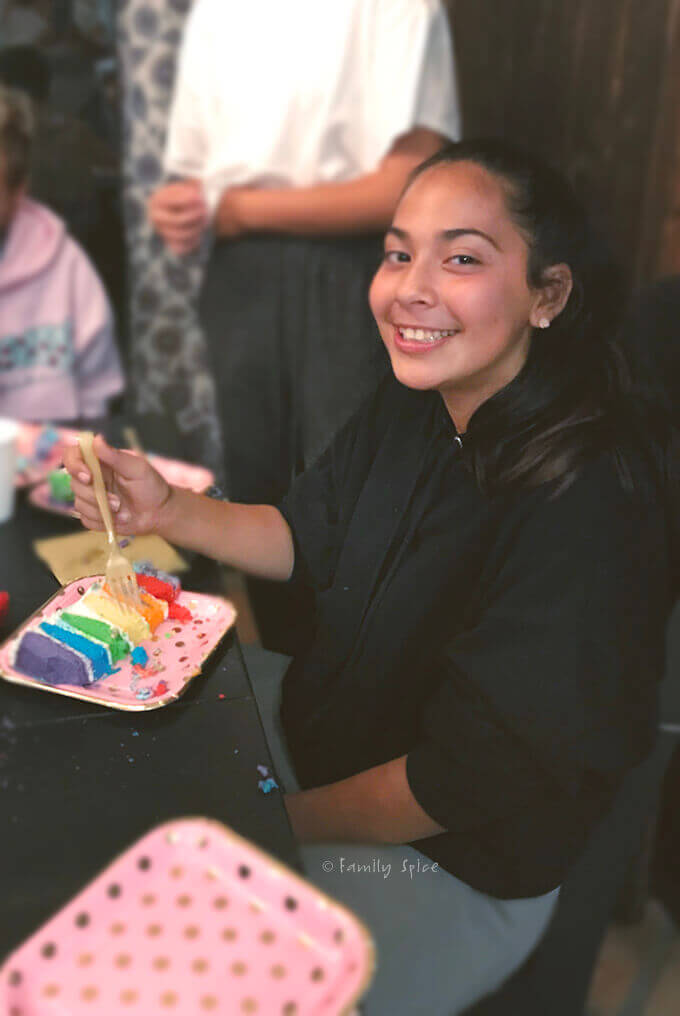
But, her face said it all. She loved the cake. Her friends loved the cake. My daughter and I can now laugh about making this cake together. She ate the golden fondant unicorn horn the following week – ack, gross, right?!
If this unicorn cake seems to daunting for you, why not try your hand at unicorn cupcakes? This version uses ice cream cone tips for the horn (I thought they looked like those bugle snack chips!). I love the simplicity of this version which uses fondant.
And for those of you with gluten allergies or sensitivities, try this Gluten Free Unicorn Cake (gluten free strawberry cake) from Fearless Dining.
I was too busy slicing up the cake for my daughter’s friends that I didn’t have an opportunity to take a pretty picture of my rainbow layered unicorn cake sliced open. So, enjoy this shot of what was left AFTER I passed out the cake slices!
If you are looking for something less labor intensive for your next birthday party, I have a list of fun and easy birthday cakes that are budget friendly and require less skills than this unicorn cake to assemble! How about a barbie cake?!
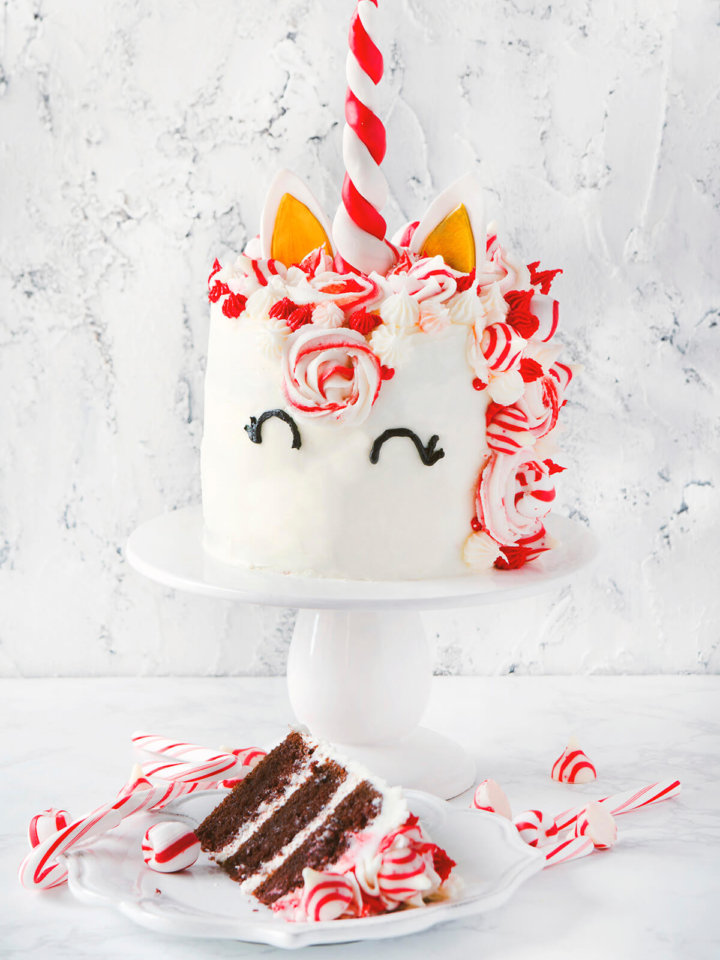
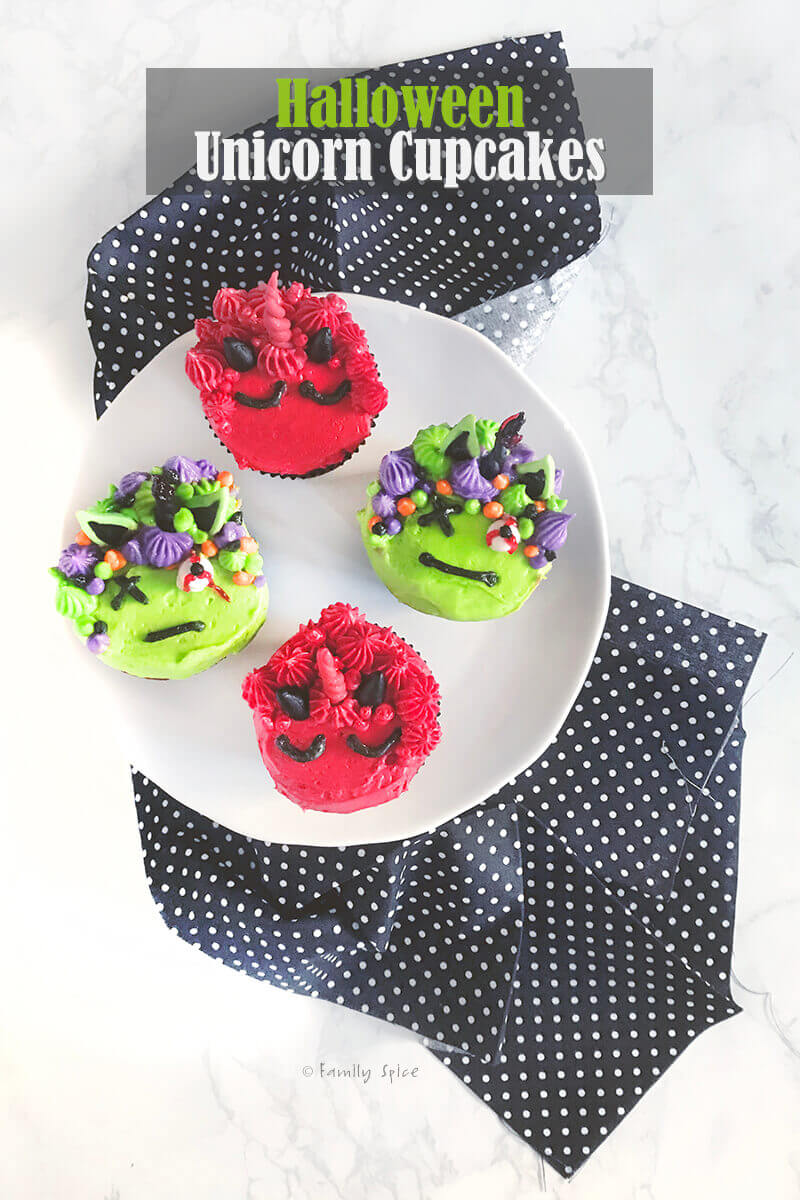
And if you want to make some unicorn cupcakes for halloween, check out my tutorial to make these halloween unicorn cupcakes: red devil unicorn cupcakes and zombie unicorn cupcakes! I also have a Christmas unicorn cake made with chocolate and peppermint!
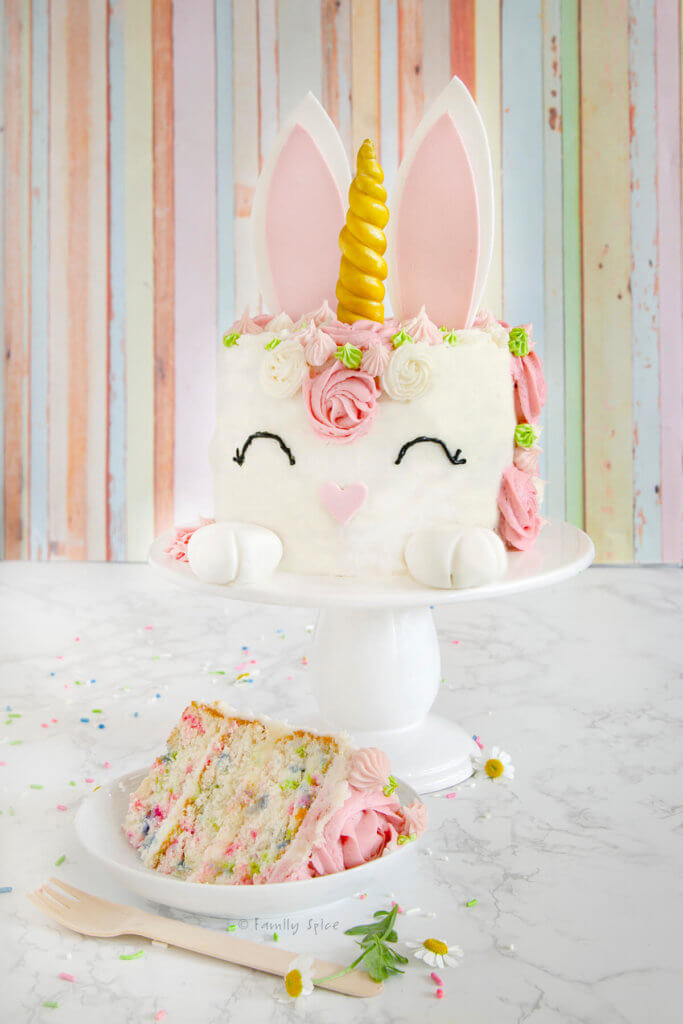
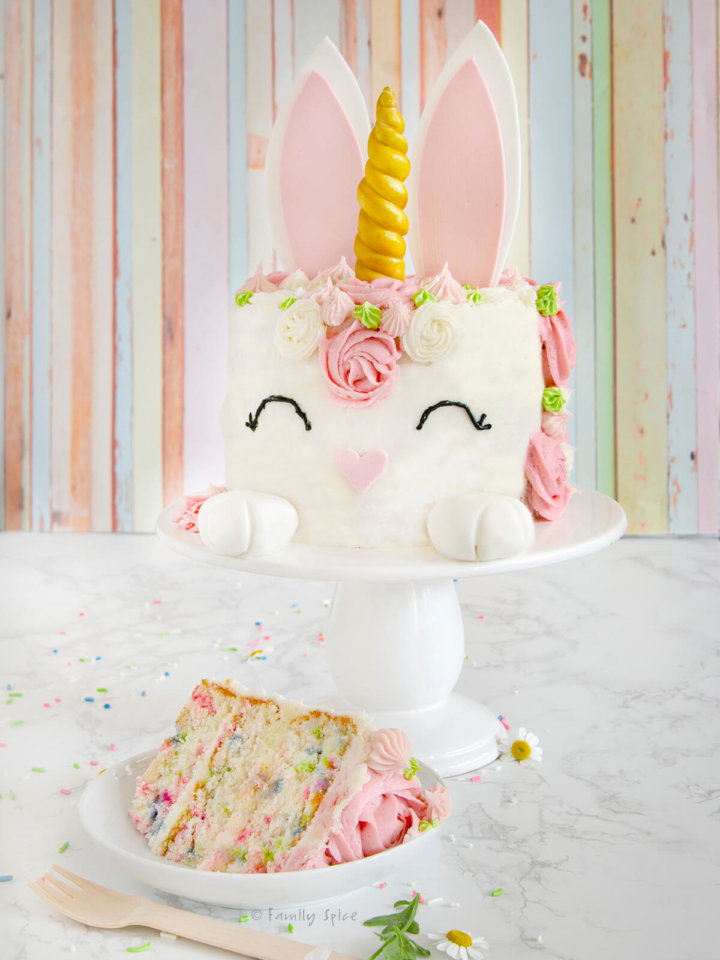
For Spring, I made this super cute Easter Bunny Unicorn Cake. And if you have any questions about the process on how to make a unicorn cake, please leave a comment below.
Storing/Freezing Instructions
TO STORE: Because of the frosting, I suggest storing any leftovers in an airtight container and refrigerate for up to 5 days.
TO FREEZE: You can also freeze leftovers. Wrap in foil, parchment paper or plastic wrap and freeze for up to 4 months.

If you are enjoying my recipes, please sign up for my newsletter and get my free 28-day meal plan! You can also follow me on Instagram or Facebook.

Unicorn Cake with Rainbow Layers
Ingredients
- 2 boxes white cake mix
- 2 ½ cups water*
- ⅔ cup vegetable oil*
- 6 egg whites*
- Assorted food dyes
- 6 ½ cups white buttercream frosting
- ½ lb white fondant
- ½ teaspoon edible gold powder
- ⅛ teaspoon peppermint extract
- 2 cups light pink buttercream frosting
- 1 cup blue buttercream frosting
- 2 cups light purple buttercream frosting
- 1 cup periwinkle buttercream frosting
- ¼ cup black frosting or black candy melts
- Assorted sprinkles in gold white or pink
Instructions
Baking Instructions
- Preheat oven to 350ºF.
- Place mixing bowl on kitchen scale then zero out scale.
- Mix up one box of white cake batter per package directions into mixing bowl.
- Weigh bowl with white cake batter mixed and ready. Divide this number by 3 and divide batter equally into three bowls.
- Dye each bowl of cake batter into desired colors. I used red, orange and yellow.
- Transfer batter into 3 8-inch cake pans, coated with oil and lined with parchment paper.
- Bake cakes until toothpick inserted into center of cake comes out clean, about 20 minutes. Let cakes cool completely on wire racks.
- While cakes are baking, clean bowls and prepare second box of white cake batter per package directions into mixing bowl.
- Divide batter evenly into three bowls and dye each batter into desired colors. I used green, blue and purple.
- Transfer batter into 3 8-inch cake pans, coated with oil and lined with parchment paper.
- Bake cakes until toothpick inserted into center of cake comes out clean, about 20 minutes. Let cakes cool completely on wire racks.
Fondant Directions
- NOTE: The fondant pieces should be made at least 24 hours before serving sot they can harden.
- Roll out white fondant into a long log to make a unicorn horn (detailed instructions in blog post above). Wrap it around a bamboo stick and let it harden.
- Roll out remaining fondant until flat and ¼-inch thick. Use teardrop cutters or template I provide (link in blog post) to cut out 2 ears with 2 inner ear pieces.
- Dampen back of inner ear piece with water and place on top of larger ear piece. Place ears facing down over a small rolling pin and let it harden. (detailed instructions in blog post)
- Mix a few drops of peppermint extract into edible gold dust and then brush it onto the horn and paint the inner ear gold. Set aside to dry completely.
Decorating Instructions
- Do not begin frosting the cake until the cakes are completely cooled.
- Stack cakes on a cake stand, layering in white frosting between each layer.
- Frost and smooth out entire cake in white frosting. You will use approximately 6 cups of frosting.
- Place in refrigerator to chill at least one hour.
- Pipe rosettes on the top and along one side of the cake using the pink and light purple frostings using the #824 tip.
- Add dollops of pink and dark purple frostings using the #4B tip and the blue and dark purple frosting each fitted with a #2A tip.
- Pipe eyes onto the front center of the cake using black frosting and the #4 tip.
- Place horn on the top center of the cake and the ears on either side of the horn.
- Sprinkle around the cake with assorted gold, white and pink sprinkles.
- Refrigerate until ready to serve.
Notes
Nutrition
Nutrition Disclaimer
Nutritional information is an estimate provided to you as a courtesy. You should calculate the actual nutritional information with the products and brands you are using with your preferred nutritional calculator.
PS If you try this recipe, why not leave a star rating in the recipe card right below and/or a review in the comment section further down the page? I always appreciate your feedback.
You can also follow me on Pinterest, Facebook or Instagram. Sign up for my eMail list, too!
Written by Laura Bashar
Hi, I’m Laura, a certified professional cook and cookbook author living in San Diego. I have been sharing my family’s favorite recipes inspired from all over the world since 2008. Let’s cook up something fun!