


Chicken katsu is a wonderful Japanese panko fried chicken cutlet. These extra crispy chicken pieces are a family favorite, plus they freeze and reheat well. Serve them like chicken tenders, with rice or make a delicious chicken katsu sandwich.

I love introducing new foods to my kids. Sometimes it’s a bit of the exotic and sometimes it’s a little familiar. Now that they are young adults, I’m thrilled to see them so adventurous and open to new flavors and cultures on their dinner plate.
With everything I have cooked for them, they do have their favorite meals. Meat cutlets are always welcome at our dinner table. There’s the Italian version, like my pork Milanese, and the Persian version (kotlet) which uses ground beef.
This Japanese chicken katsu is seriously one of the top requested recipes I make for my family.
Jump to:
Recipe highlights
- Family Friendly: I have been making this recipe for almost 10 years now. When I first prepared it, my kids were little and called this dish “Japanese chicken tenders” and so of course, love this dish!
- Simple: The spices used are basic and found in most grocery stores.
- Texture: By slicing the chicken breasts on an angle (a technique known as sogigiri), you are creating a larger surface area and exposing more of the chicken fibers. You end up with thin and tender cutlets, all without needed to pound your chicken flat!
- Flavor: The chicken stays crispy and juicy even as leftovers! Because of the way the chicken is cut, the breading does not fall off. My family enjoys this American style and dip their bites into ketchup or ranch dressing. I prefer using a spicy mayo. You can also go traditional and serve it with store-bought or homemade Tonkatsu sauce.

Ingredients needed

This post contains some affiliate links for your convenience (which means if you make a purchase after clicking a link I will earn a small commission but it won’t cost you a penny more)! Read my full disclosure policy
- Boneless chicken breast: This dish uses any size boneless chicken breast. If you use tenders, you can skip the slicing. You can also use boneless skinless chicken thighs, but they tend to have more fat.
- All purpose flour: Flour is used to make the glue in the breading for your chicken. Regular flour works just fine.
- Egg: This is the glue to help the panko crumbs stick.
- Panko bread crumbs: Panko crumbs are Japanese bread crumbs and are more coarse and larger than regular bread crumbs. You can find them as plain or seasoned and can use either versions.
- Oil: Oil is used to pan fry the chicken cutlets. You can use canola or any other vegetable oil. You can also use extra virgin olive oil. Yes you can fry with olive oil.
- Salt and pepper: The only seasoning used on the chicken is simple salt and pepper.
Step-by-step directions

- Prep the chicken. Using a sharp chefs knife, trim off excess fat from chicken. Starting at one end of the breast, begin cutting slices at a 45-degree angle. Depending on the size of the breast, you will be able to cut 4-7 small cutlets. Once all the chicken breasts are sliced, season both sides with salt and pepper.
- Set up breading. You will need 3 shallow bowls. One will hold the flour, one will hold the eggs (whisked) and the third will hold the panko crumbs.
- Bread the chicken. With each chicken cutlet, start by coating completely with flour. Then dip the chicken in the egg. Finish by pressing the chicken piece into the panko crumbs.
Want to save this recipe?
- Be sure to press the panko firmly into both sides of the chicken cutlet. You will see that as you press, the chicken will spread and even out in thickness. Use a fork to transfer the pieces from bowl to bowl. This keeps you from developing fat flour finger tips as you work.
- Heat the oil. Add oil to a large frying pan and warm over medium heat, about 350F. You know the oil is hot enough when you add a few panko crumbs to the oil and it bubbles and browns.
- Fry the cutlets. Add 3-4 chicken cutlets to the hot oil, making sure you do not crowd the pan. The oil should go up the sides of the chicken and may not completely cover it. This is fine. You could deep fry your cutlets, but it is not necessary.
- After a few minutes, you will notice the sides started to turn golden. At this time flip the chicken over and brown the other side. Because the cutlets are thin, they do not require long frying times. The chicken is cooked through when the crust is golden on both sides.
- Drain the oil. Continue frying the chicken cutlets until they are done. Add more oil as needed. Once done, place the fried chicken cutlets on a cooling rack set over a baking sheet for the oil to drain.
Expert tips and FAQs
When I make this chicken katsu for my family, I am usually making extra large quantities. Like 3 to 5 pounds of chicken! My kids fight over the leftovers and they get eaten quickly. While I fry up the cutlets, I keep the finished chicken on another large baking sheet and store them in a warm oven until I am ready to serve.
There are a number of different ways to serve your crispy chicken. As I explained before, my kids enjoy it like American chicken tenders and dip it in ketchup or ranch dressing. I like dipping it in spicy mayo.
You can also go traditional and serve it with some Tonkatsu sauce, sticky rice, coleslaw and Furikake seasoning. Or make a chicken katsu sandwich using your favorite bread.
Storing/Freezing Instructions
TO STORE: Store any leftover chicken in an airtight container and refrigerate for up to 4 days.
TO FREEZE: You can also freeze leftovers. Transfer to a resealable bag or freezer safe container and freeze for up to 4 months.
TO REHEAT: Once thawed, place on a baking sheet and reheat at 350F (180C) for 10–15 minutes. If frozen, reheat for 20-30 minutes.
You can use either boneless chicken options to make katsu. I prefer using chicken breast. It remains tender and juicy because I cut them at an angle (sogigiri style) before breading and frying.
I prefer to pan fry my katsu chicken because it uses less oil than deep frying. With the chicken pieces being thin, you only need enough oil for it to up the sides of the cutlets at least halfway.
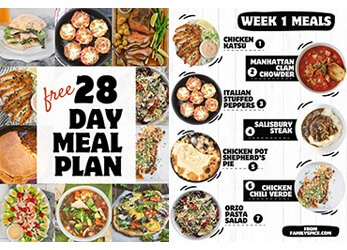
If you are enjoying my recipes, please sign up for my newsletter and get my free 28-day meal plan! You can also follow me on Instagram or Facebook.


Chicken Katsu
Ingredients
- 2 lbs boneless skinless chicken breast
- 1 cup all purpose flour
- 2-3 large eggs
- 7 oz 3 cups panko bread crumbs about 3 cups
- 1 teaspoon kosher salt
- ¼ teaspoon ground black pepper
- Oil for frying about 1-2 cups
Instructions
- Using a sharp chefs knife, trim off excess fat from chicken. Starting at one end of the breast, begin cutting slices at a 45-degree angle. Depending on the size of the breast, you will be able to cut 4-7 small cutlets.
- Once all the chicken breasts are sliced, season both sides with salt and pepper.
- You will need 3 shallow bowls. One will hold the flour, one will hold the eggs (whisked) and the third will hold the panko crumbs.
- With each chicken cutlet, start by coating completely with flour. Then dip the chicken in the egg. Finish by pressing the chicken piece into the panko crumbs. Be sure to press the panko firmly into both sides of the chicken cutlet. You will see that as you press, the chicken will spread and even out in thickness.
- Place the breaded chicken on a large baking sheet. Continue breading the remainder pieces of chicken until they are all done.
- Add ½ to 1-inch of oil to a large frying pan and warm over medium heat, about 350F. You know the oil is hot enough when you add a few panko crumbs to the oil and it bubbles and browns.
- Add 3-4 chicken cutlets to the hot oil, making sure you do not crowd the pan. The oil should go up the sides of the chicken and may not completely cover it. This is fine. You could deep fry your cutlets, but it is not necessary.
- After a few minutes, you will notice the sides started to turn golden. At this time flip the chicken over and brown the other side. Because the cutlets are thin, they do not require long frying times. The chicken is cooked through when the crust is golden on both sides.
- Continue frying the chicken cutlets until they are done. Add more oil as needed. Once done, place the fried chicken cutlets on a cooling rack set over a baking sheet for the oil to drain.
- If you are preparing a large batch of chicken katsu, you will need to clean the oil so the breadcrumbs don’t burn and turn your oil dark. I usually stop cooking and then pour the hot oil thru a fine sieve to remove the browned bits of bread crumbs.
- You can now transfer the oil back to the pan, adding more if needed, and finish frying the chicken
Notes
Nutrition
Nutrition Disclaimer
Nutritional information is an estimate provided to you as a courtesy. You should calculate the actual nutritional information with the products and brands you are using with your preferred nutritional calculator.
PS If you try this recipe, why not leave a star rating in the recipe card right below and/or a review in the comment section further down the page? I always appreciate your feedback.
You can also follow me on Pinterest, Facebook or Instagram. Sign up for my eMail list, too!